Create a View with Mixed Dimensions
Use Views with multiple dimensions to split your resources and costs into segments that align with your business needs.
Before You Begin
- Estimated time to complete: 10 minutes
- When creating, duplicating or editing a view, it may take up to (or in some cases more than) four hours for the View's cost and compliance data to display correctly
- Ensure you are a member of either the Admin or Cost & Compliance Admin role in your Stax tenancy
- You should have a good understanding of your organization's tag and account structure
Create a Mixed Dimensions View
- Log in to the Stax Console
- Navigate to the Views page
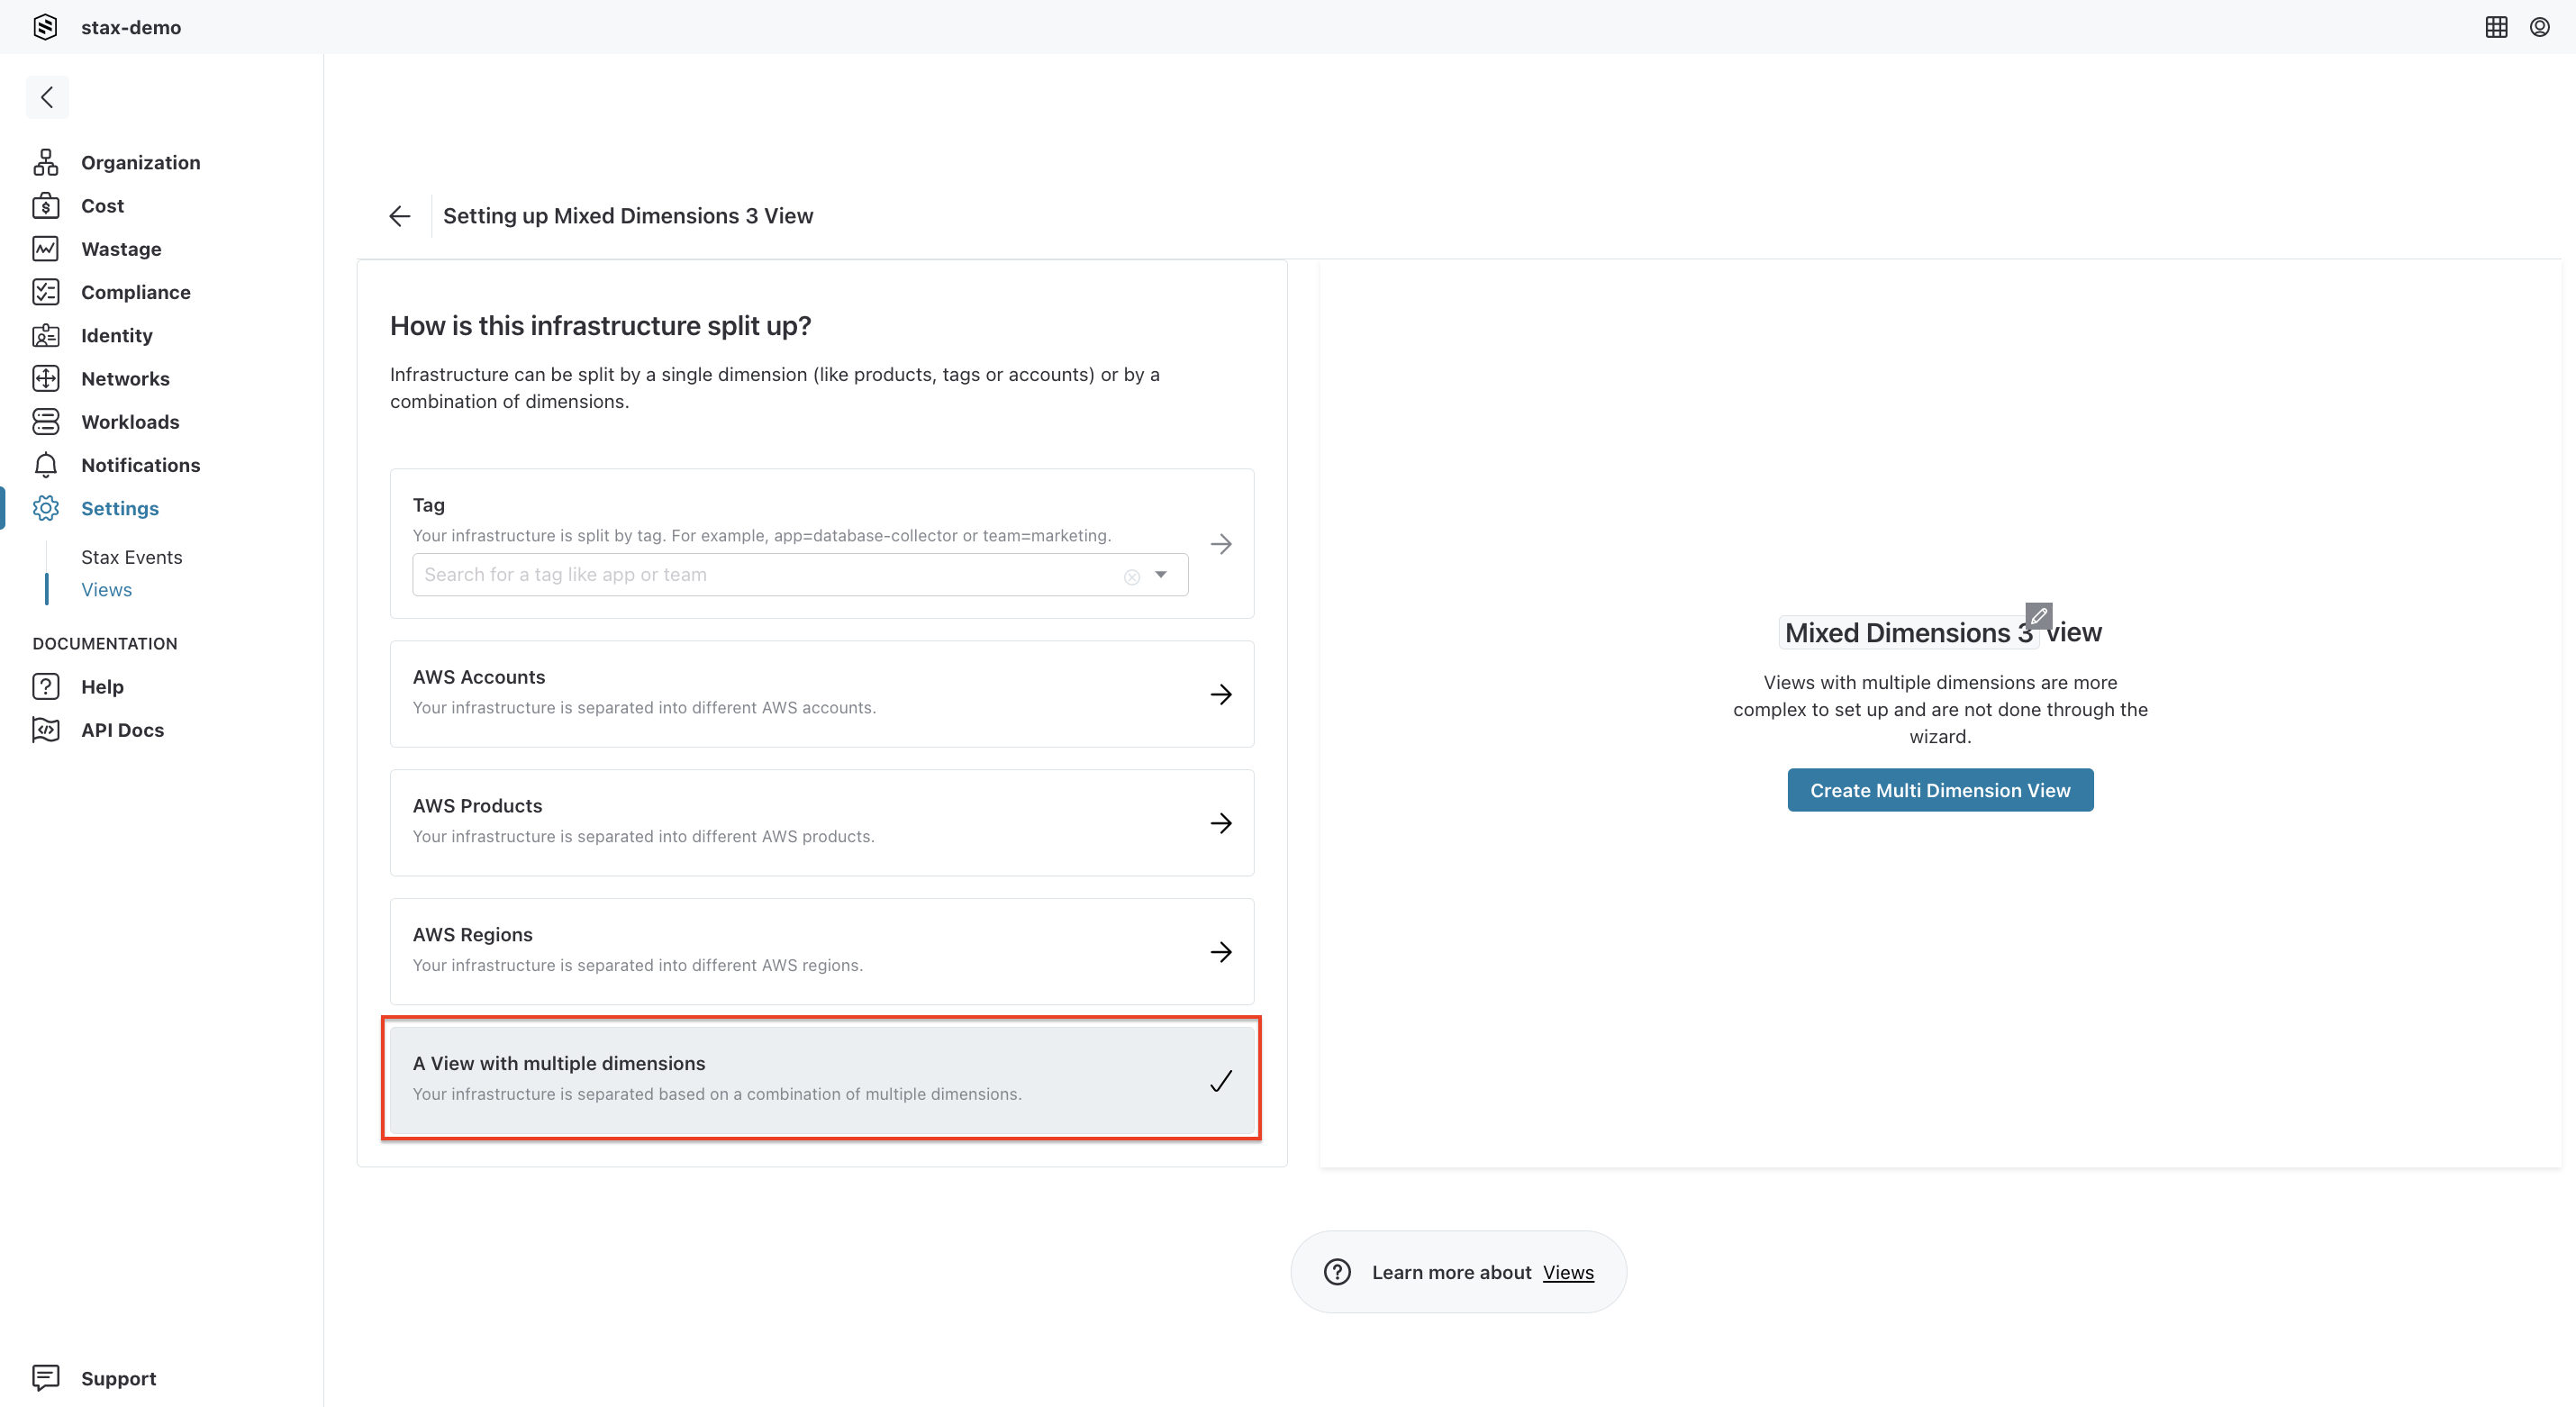
- Choose Create View from the top right-hand side of the Views page
- Choose the option to create A View with multiple dimensions. Choose the edit (pencil) icon in the right-hand pane and provide a suitable name for the View
- Choose Create Multi Dimension View to create the View and start customizing
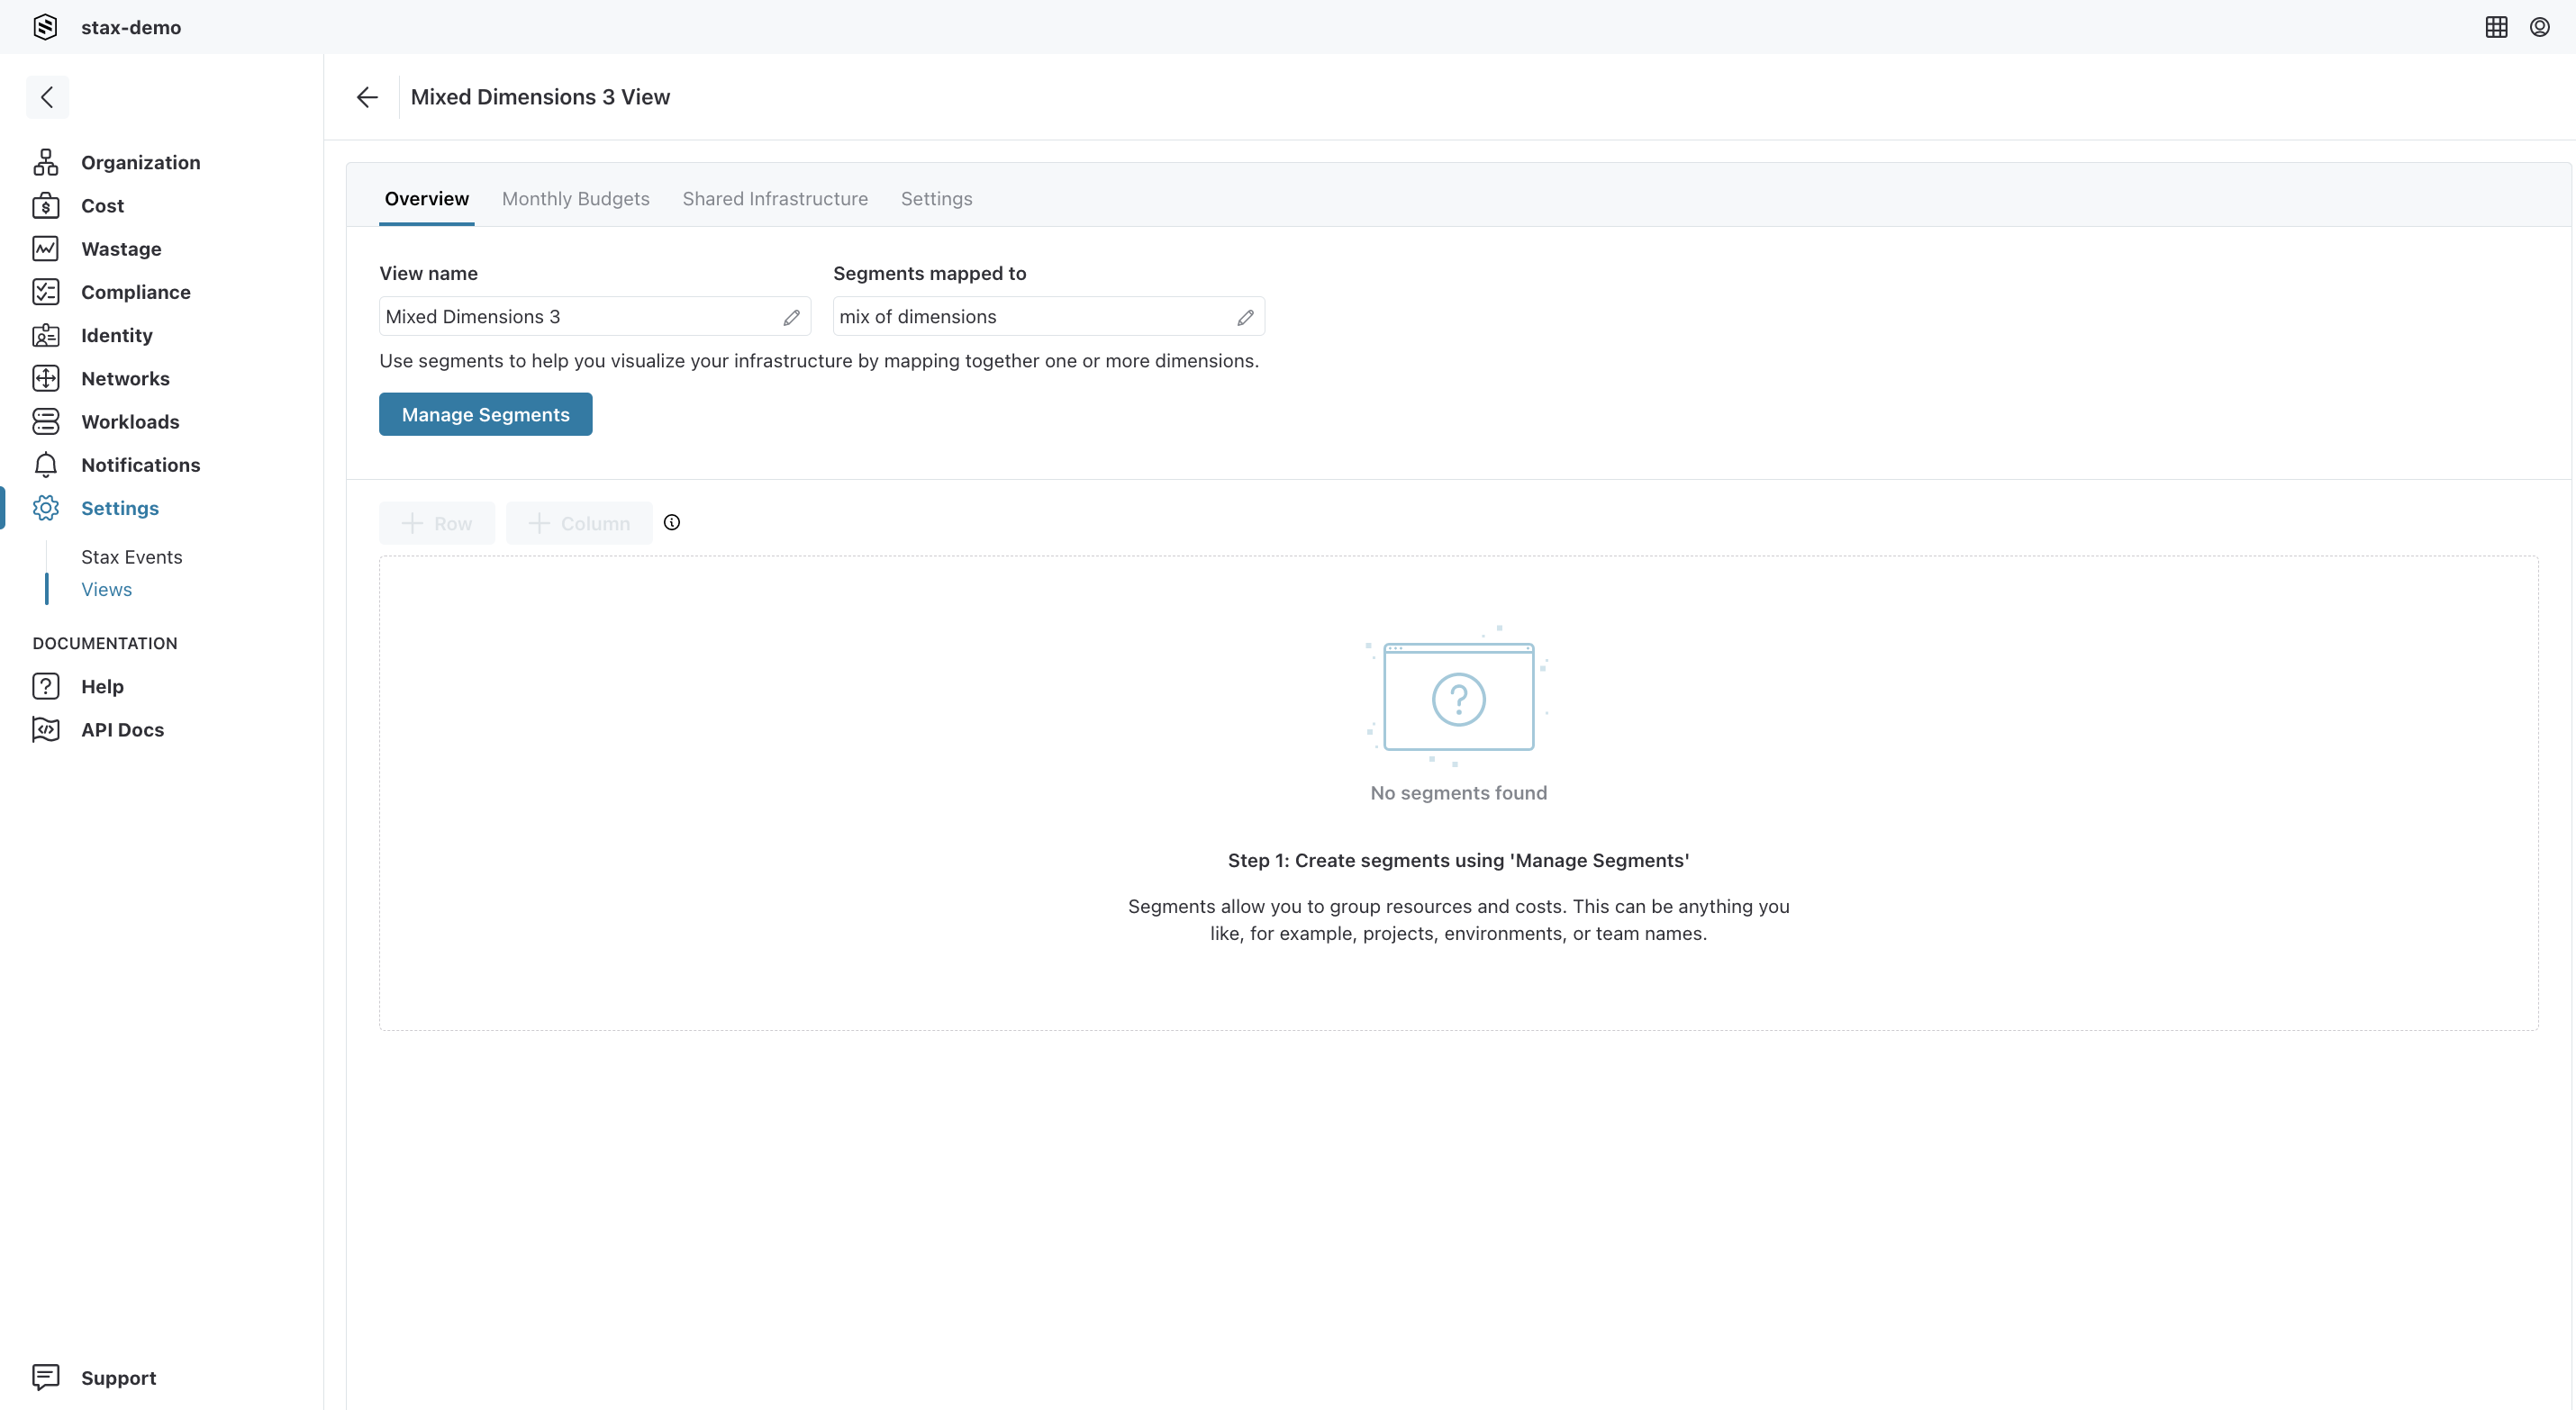
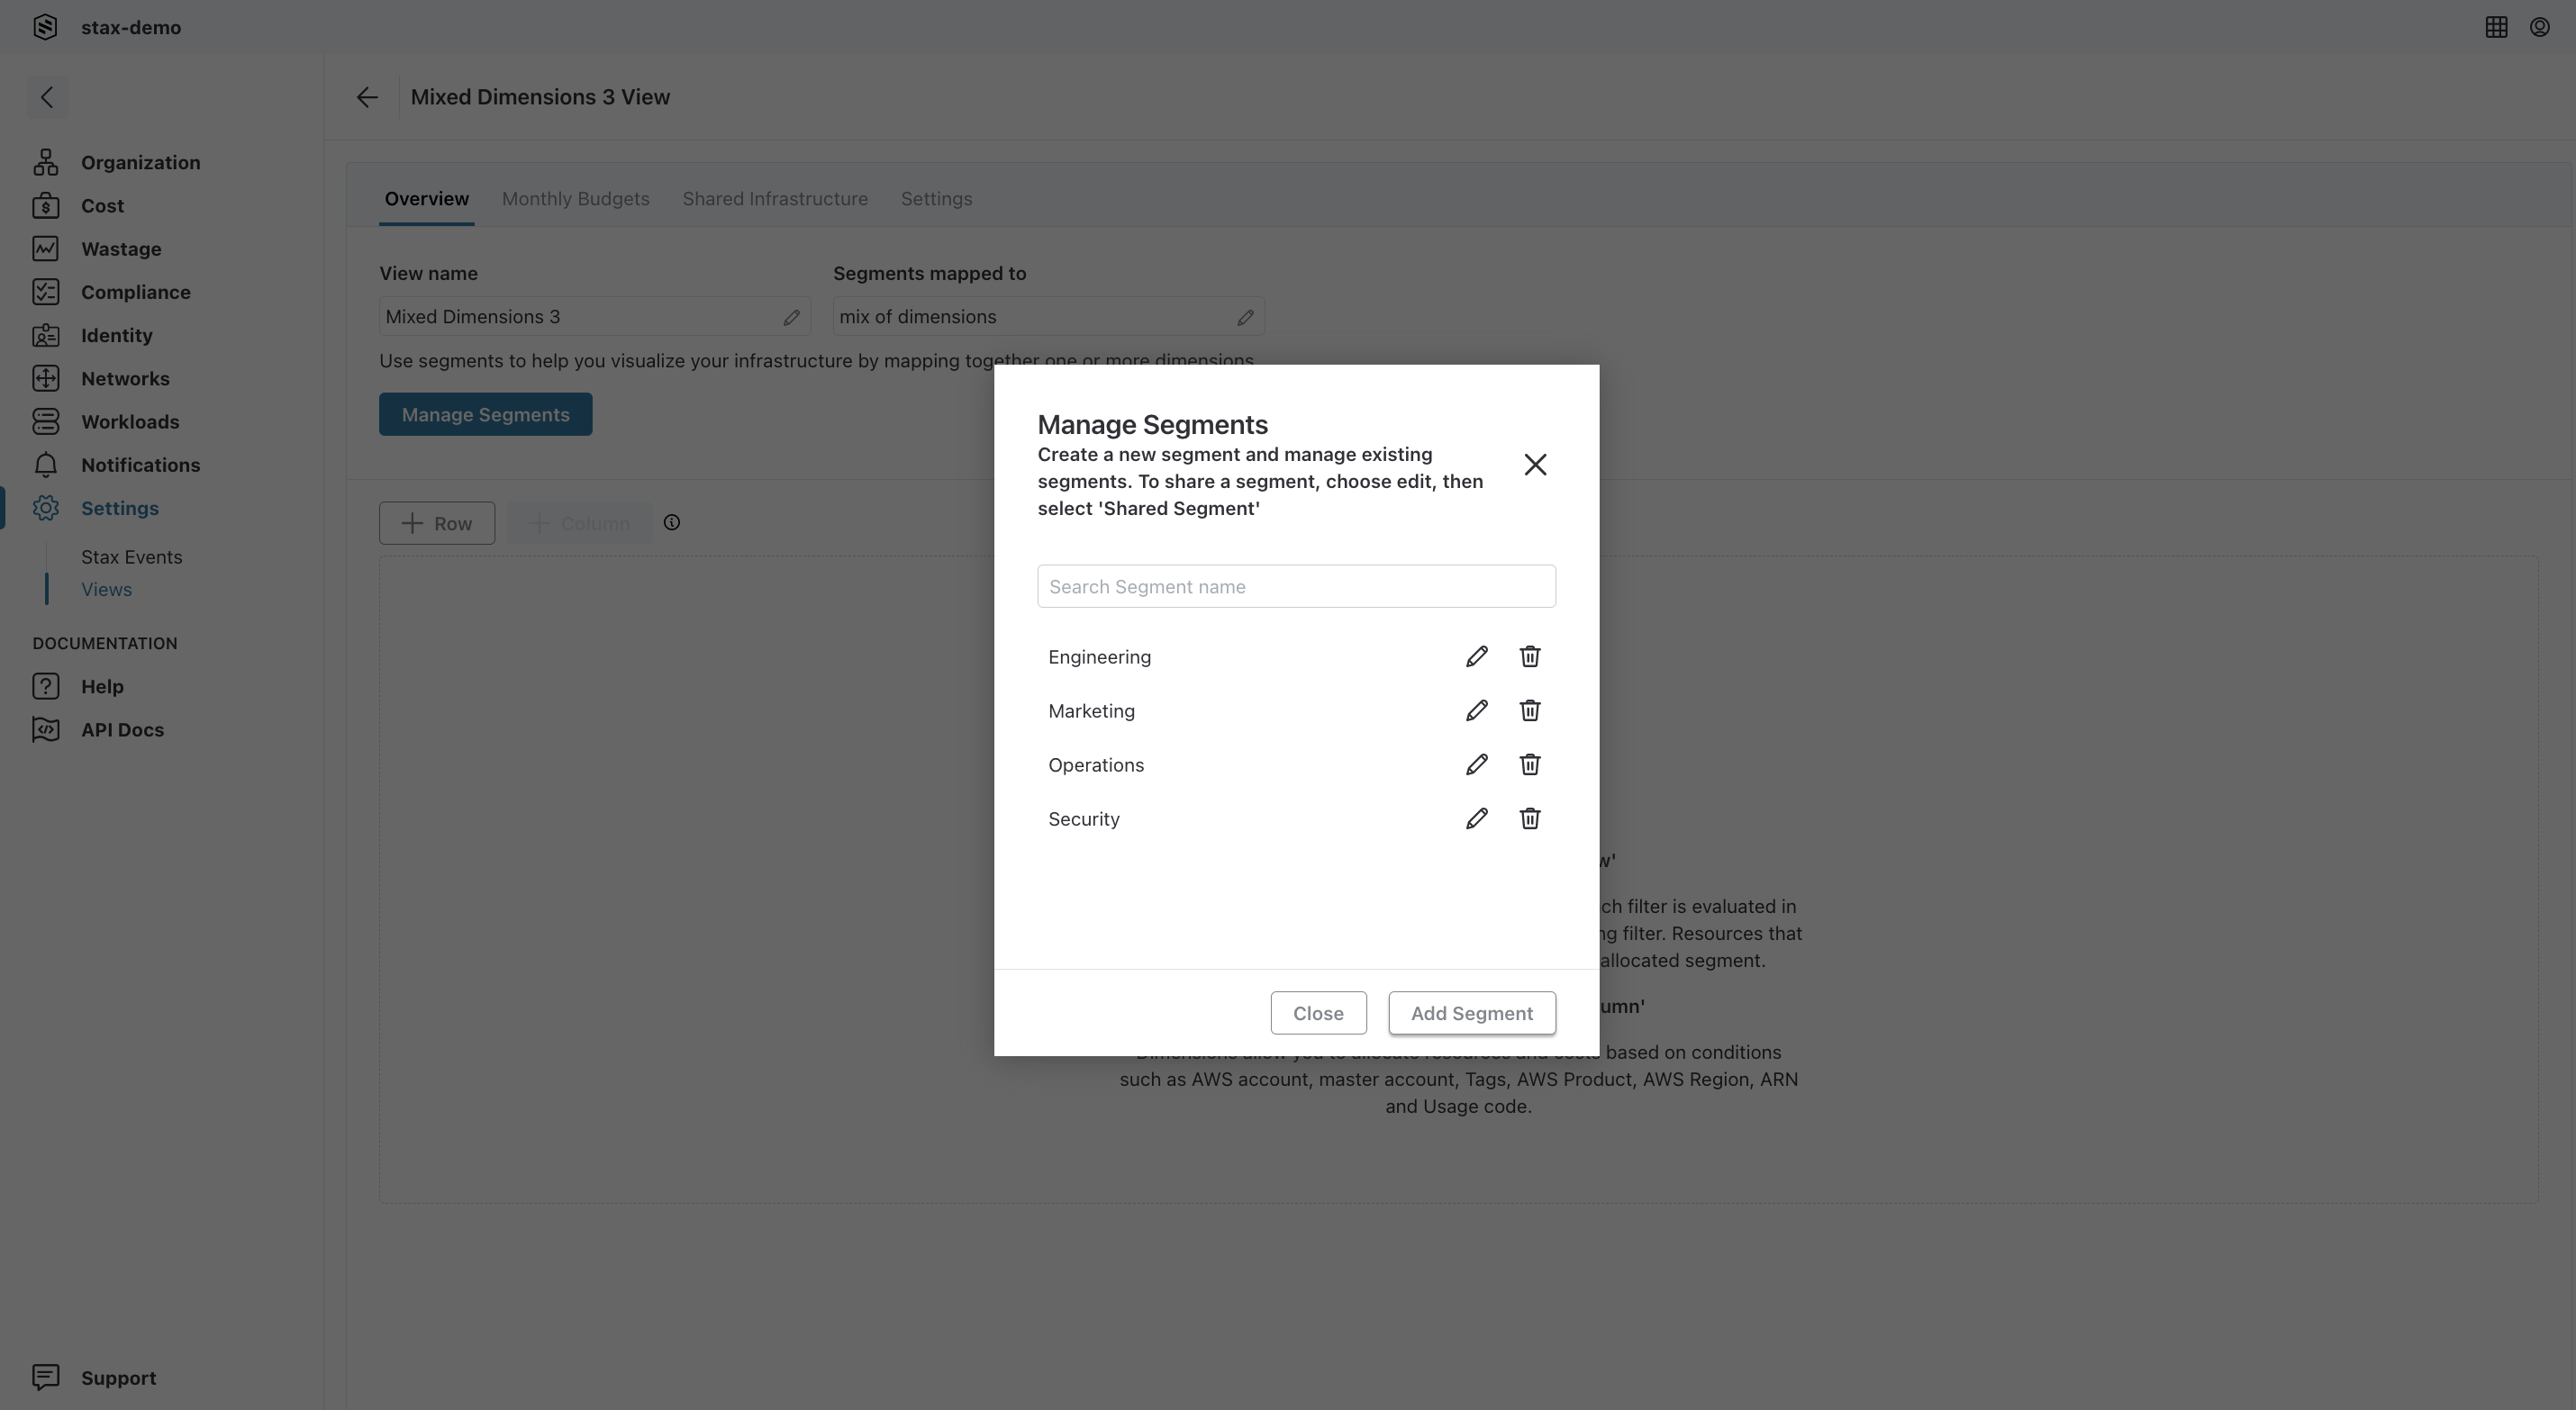
- Choose Manage Segments and create at least one segment.
Segments represent groupings of AWS resources and costs. Consider using projects, environments, or team names here
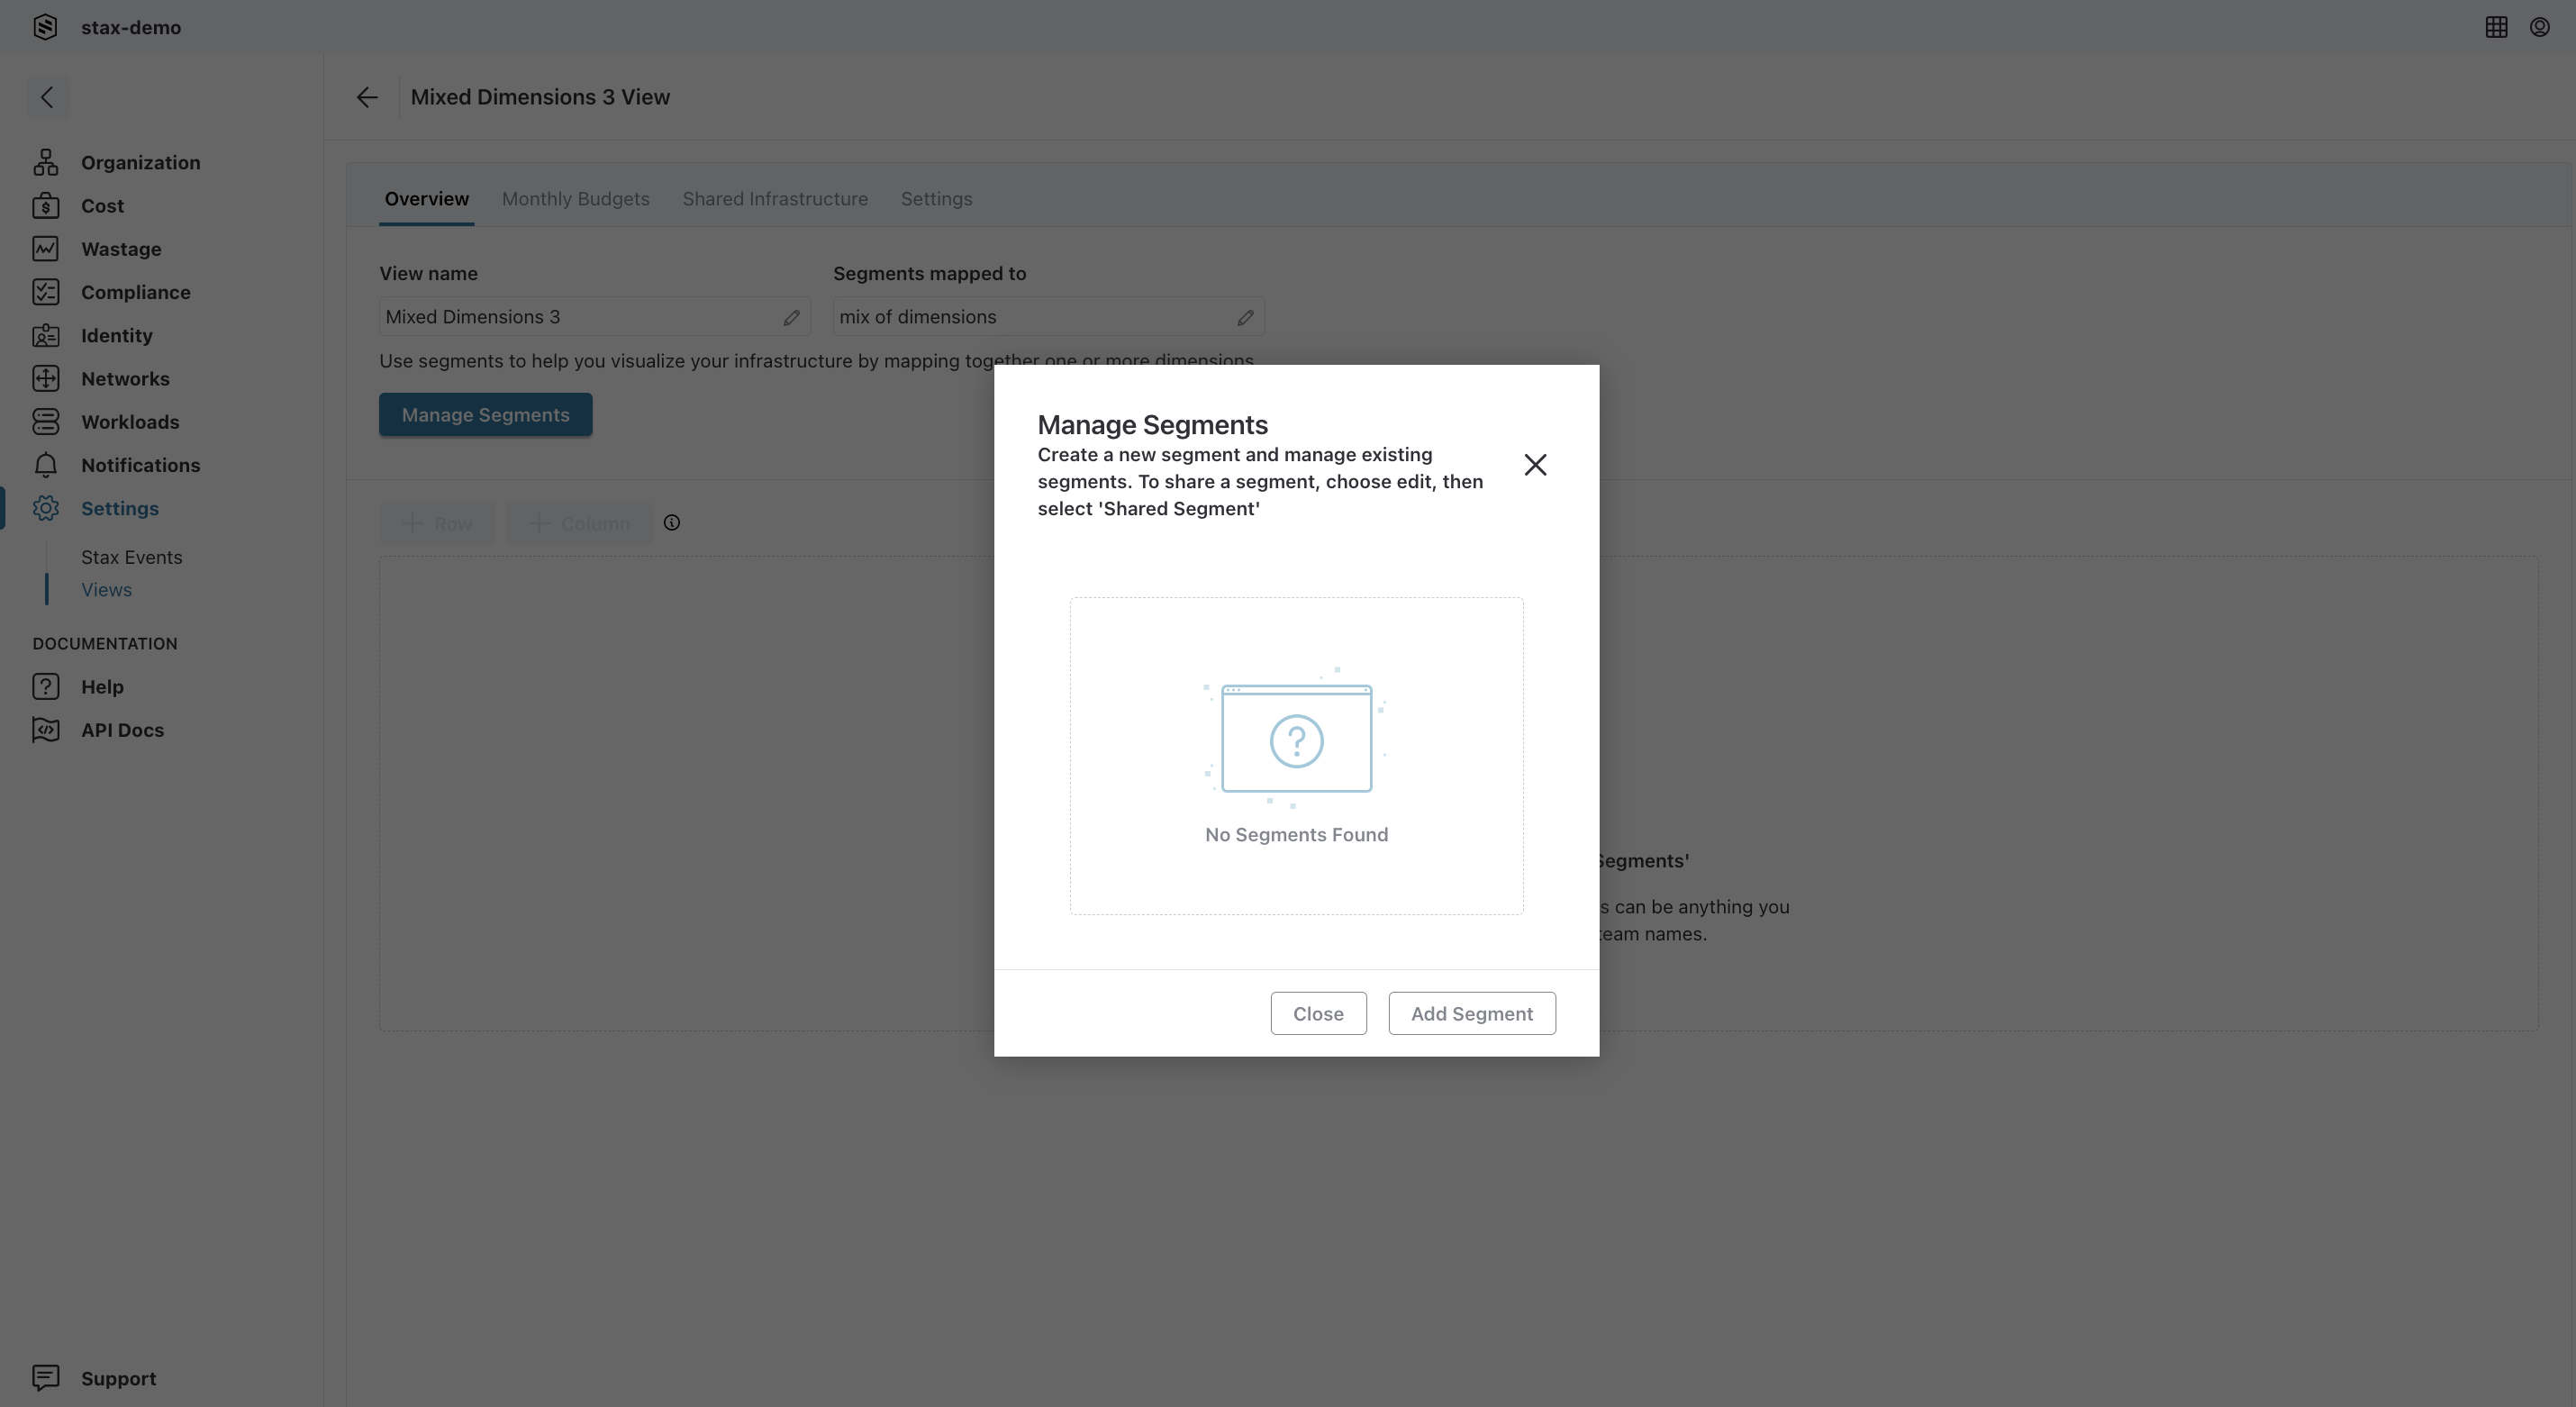
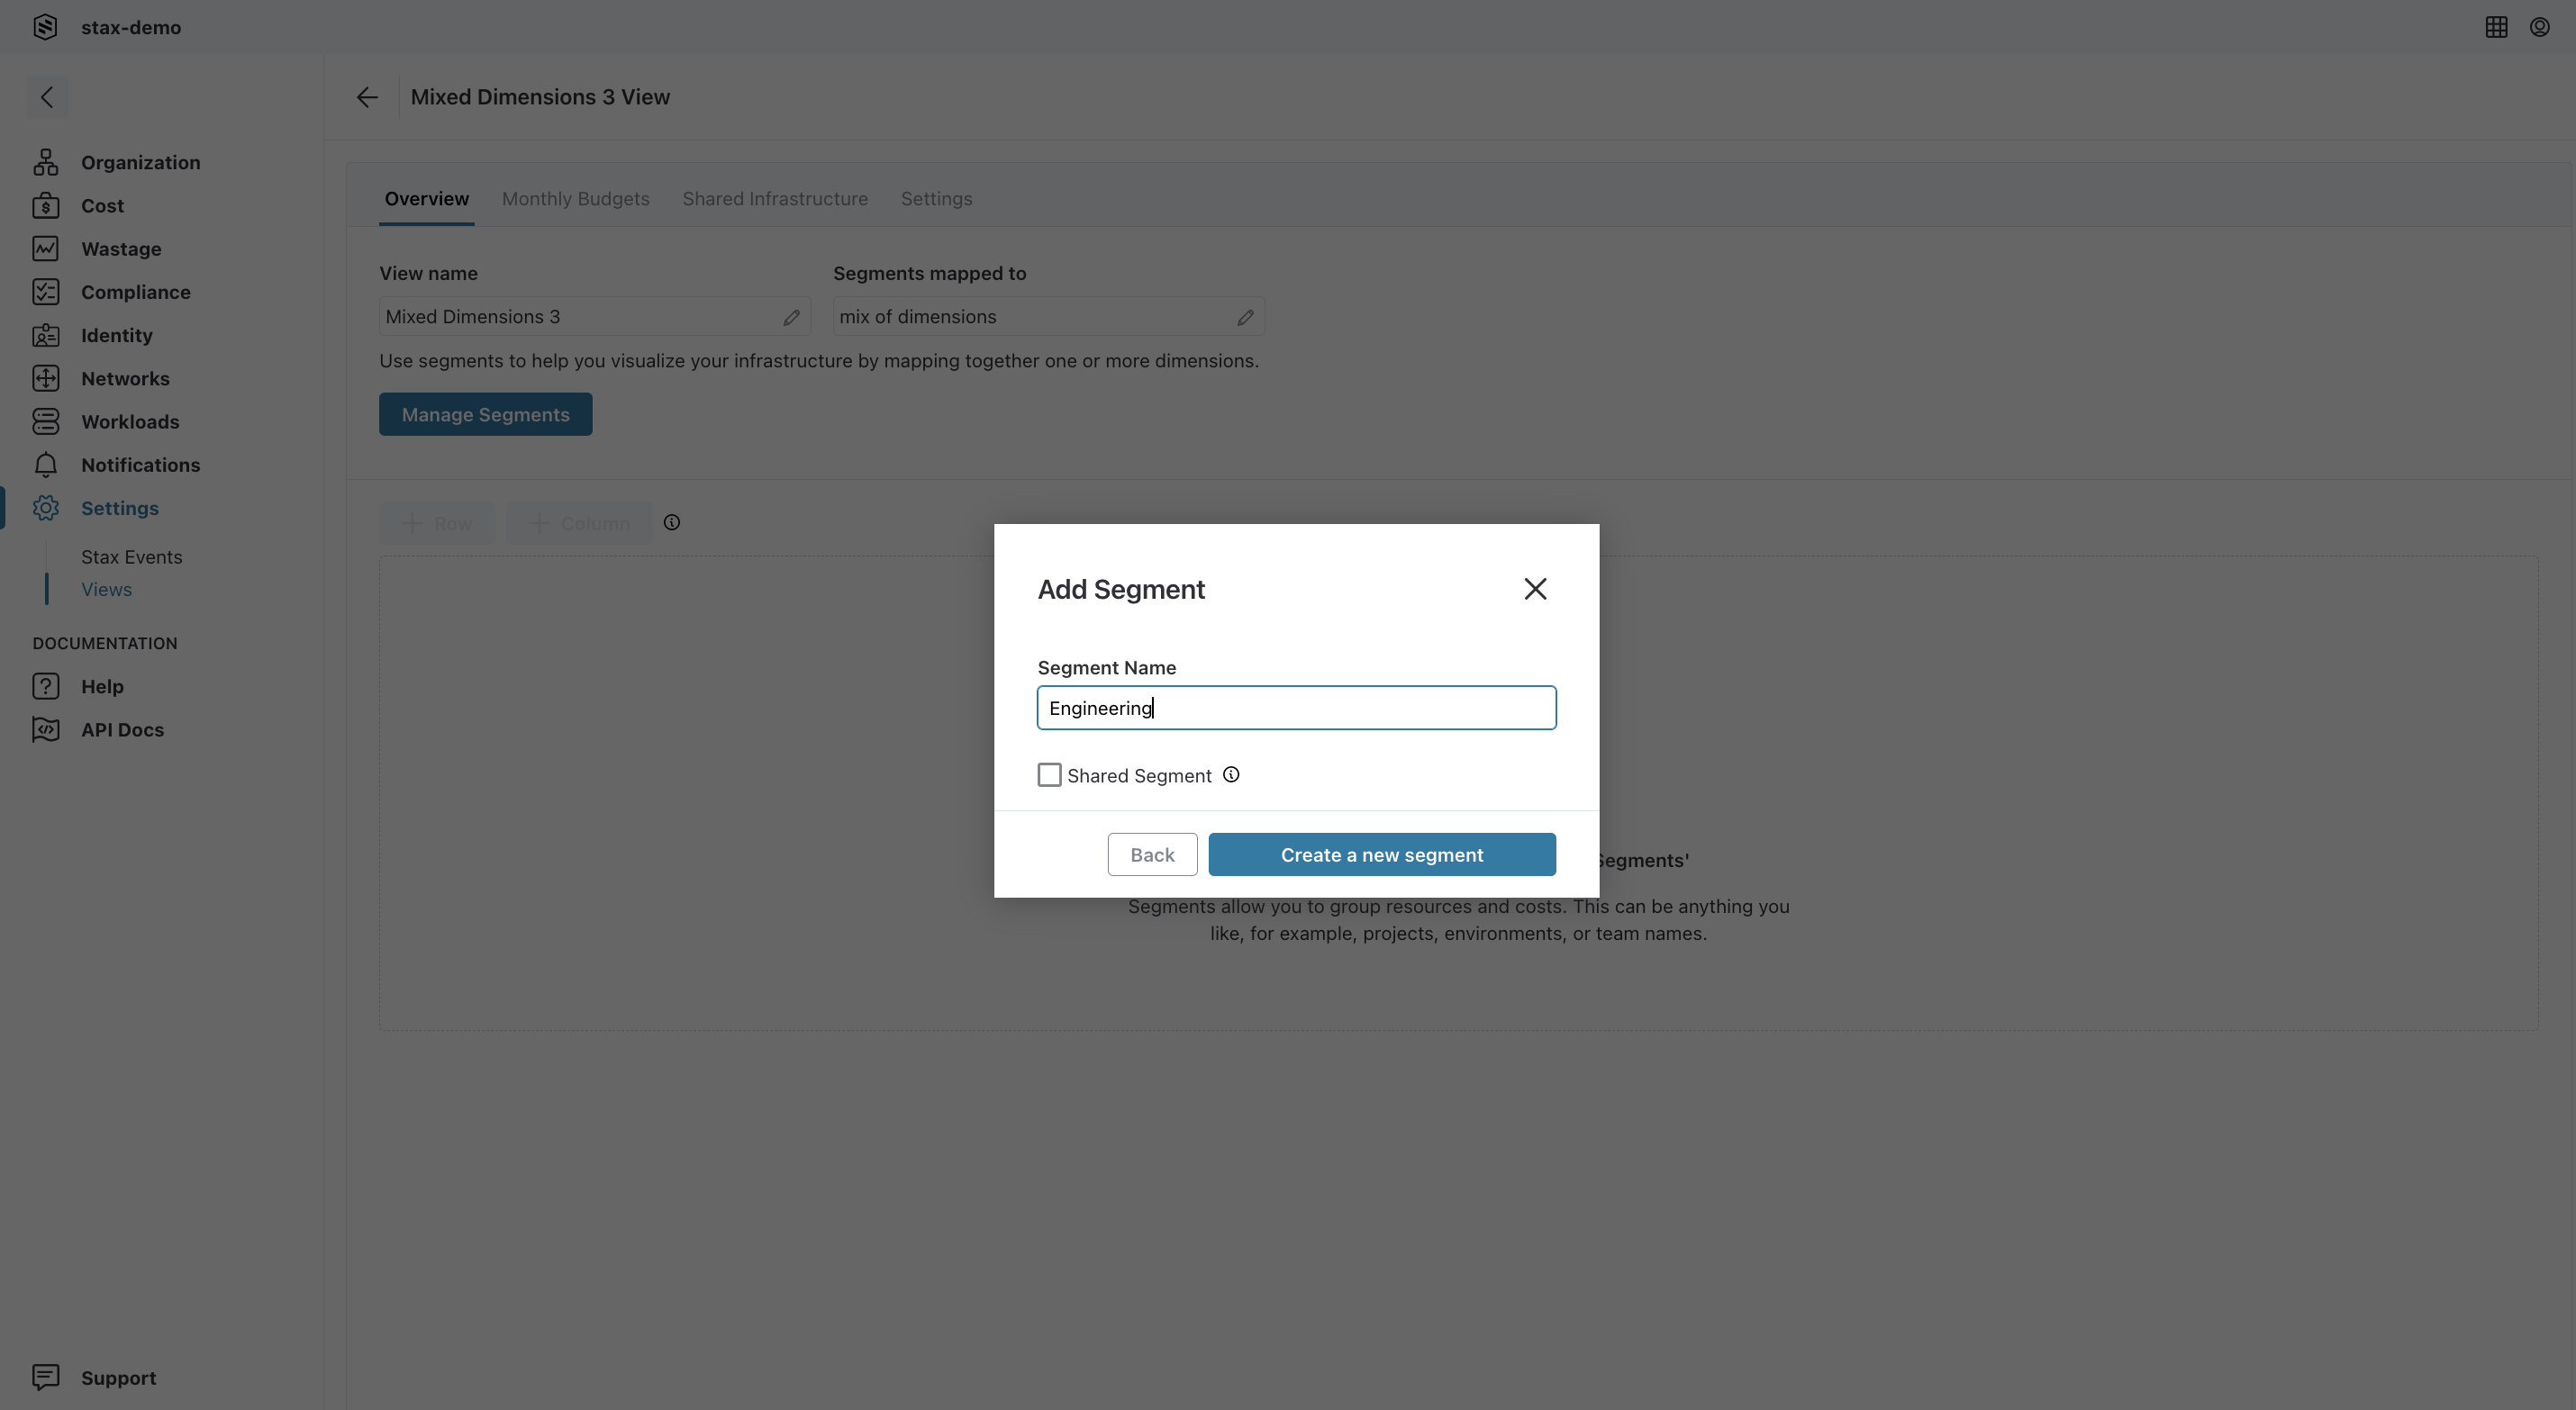
- Choose Add Segments to add a new segment. Give the segment a name and check the Shared Segment checkbox if the segment's costs should be allocated to multiple segments within a view using Shared Infrastructure in Views
- Choose Create a new segment to create the segment. Repeat this process to create additional segments
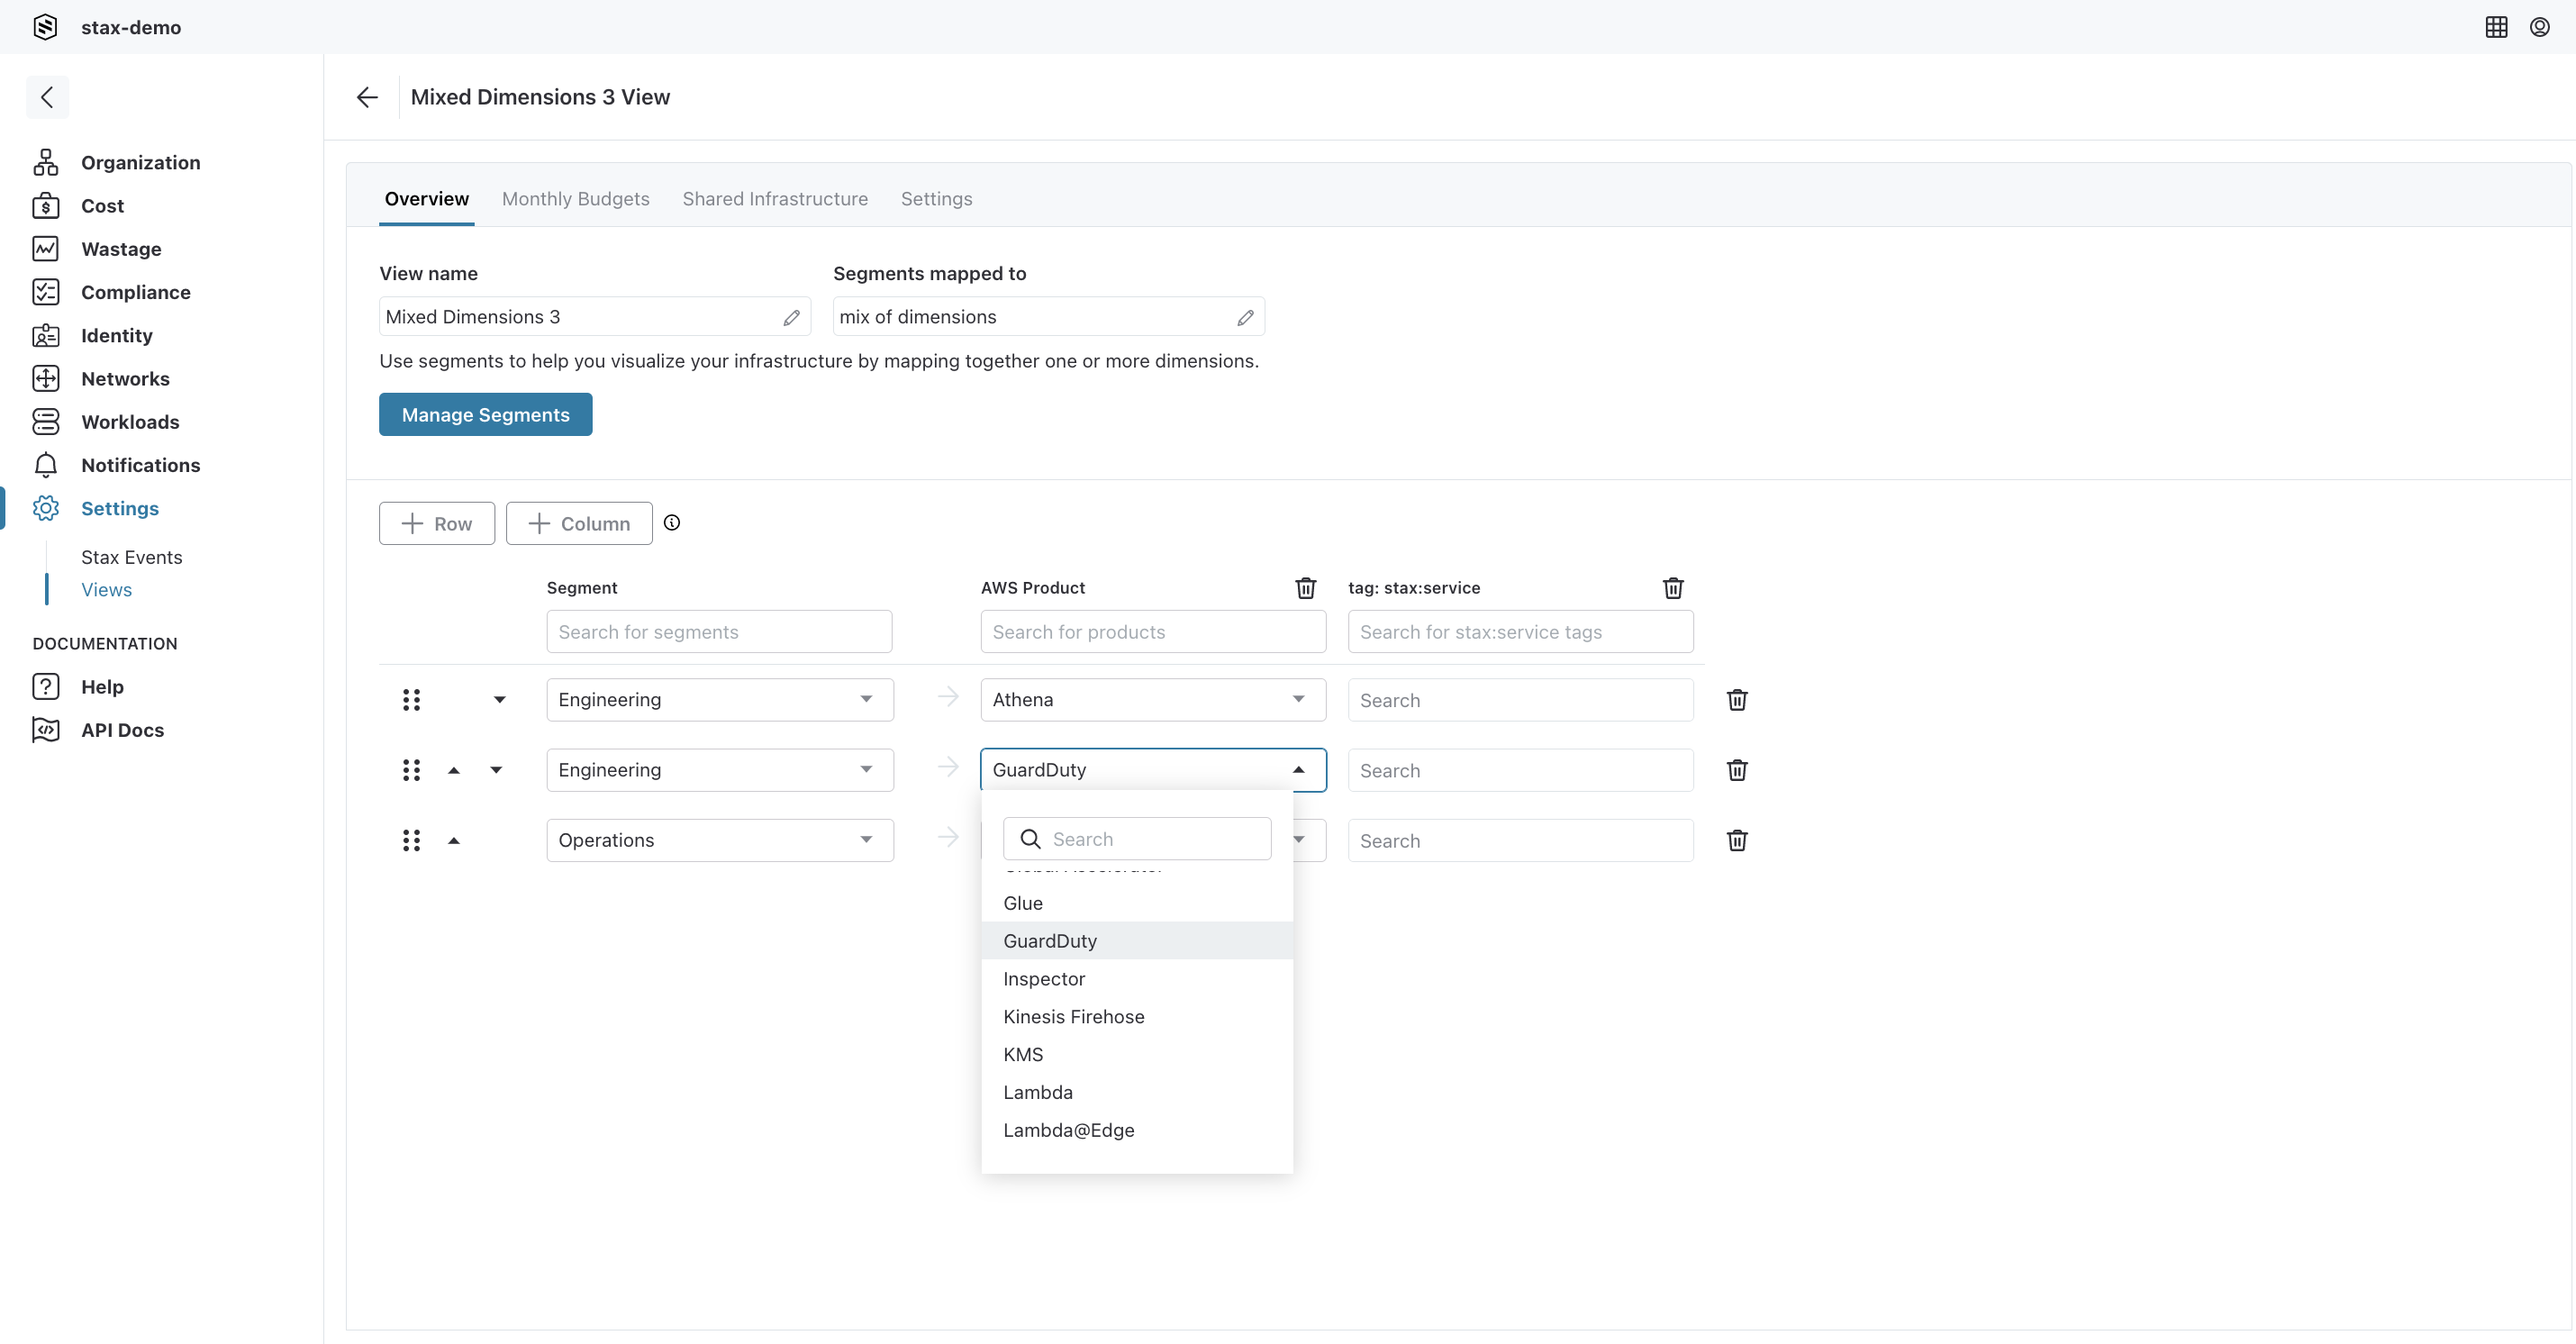
- Add a filter to allocate resources and usage to a segment. Choose + Row to create a row, then select from the list the name of the desired segment
Filters are evaluated in order, with resources being assigned to the first filter they match. Resources that do not match a defined filter are assigned to the Unallocated segment
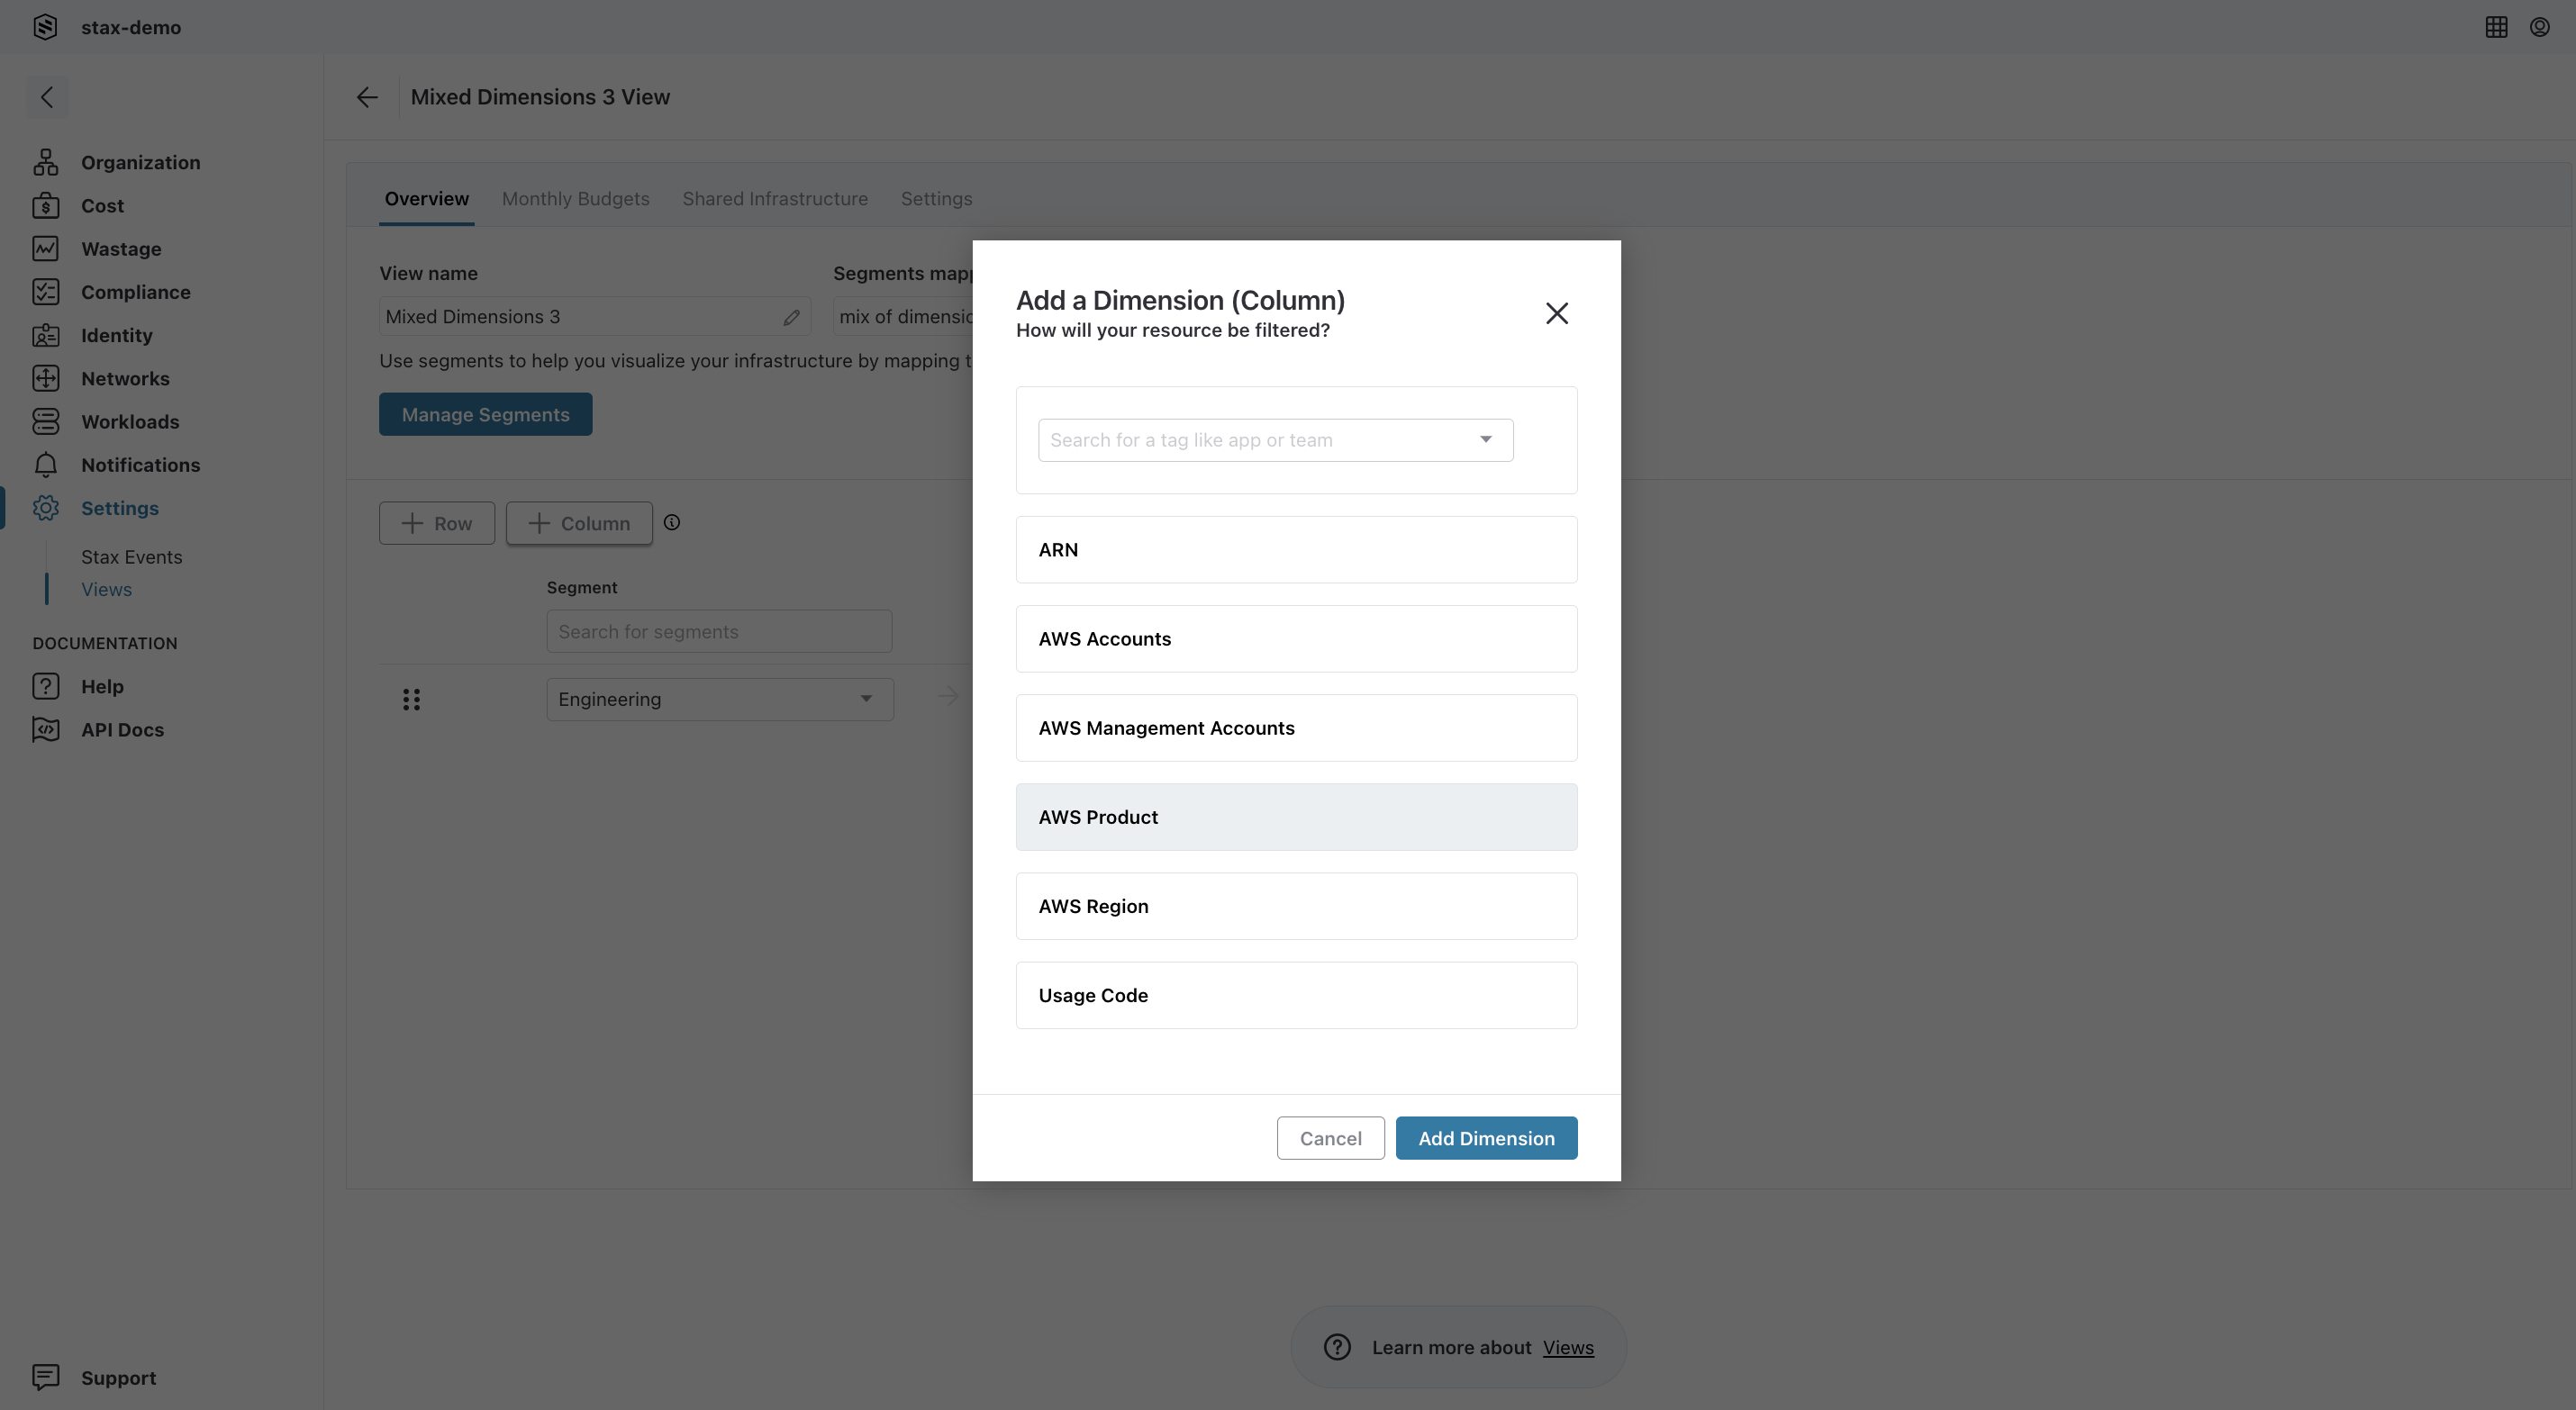
- Choose + Column to add dimensions to your filters. Dimensions allow you to allocate resources and costs based on conditions such as AWS account, management account, tags, AWS product, AWS region, ARN, and usage code. Repeat this step to add additional dimensions to each filter in the View
- For each filter, either type a value, or use the drop-down list to choose the dimension's value to match your desired condition. If the value in the drop-down list is left empty, the column will be ignored for that filter. This allows for mixing of dimensions where appropriate

Once your rows (filters) and columns (dimensions) are created, the View will begin calculating in the background and become visible in the Global Filters menu in Stax.
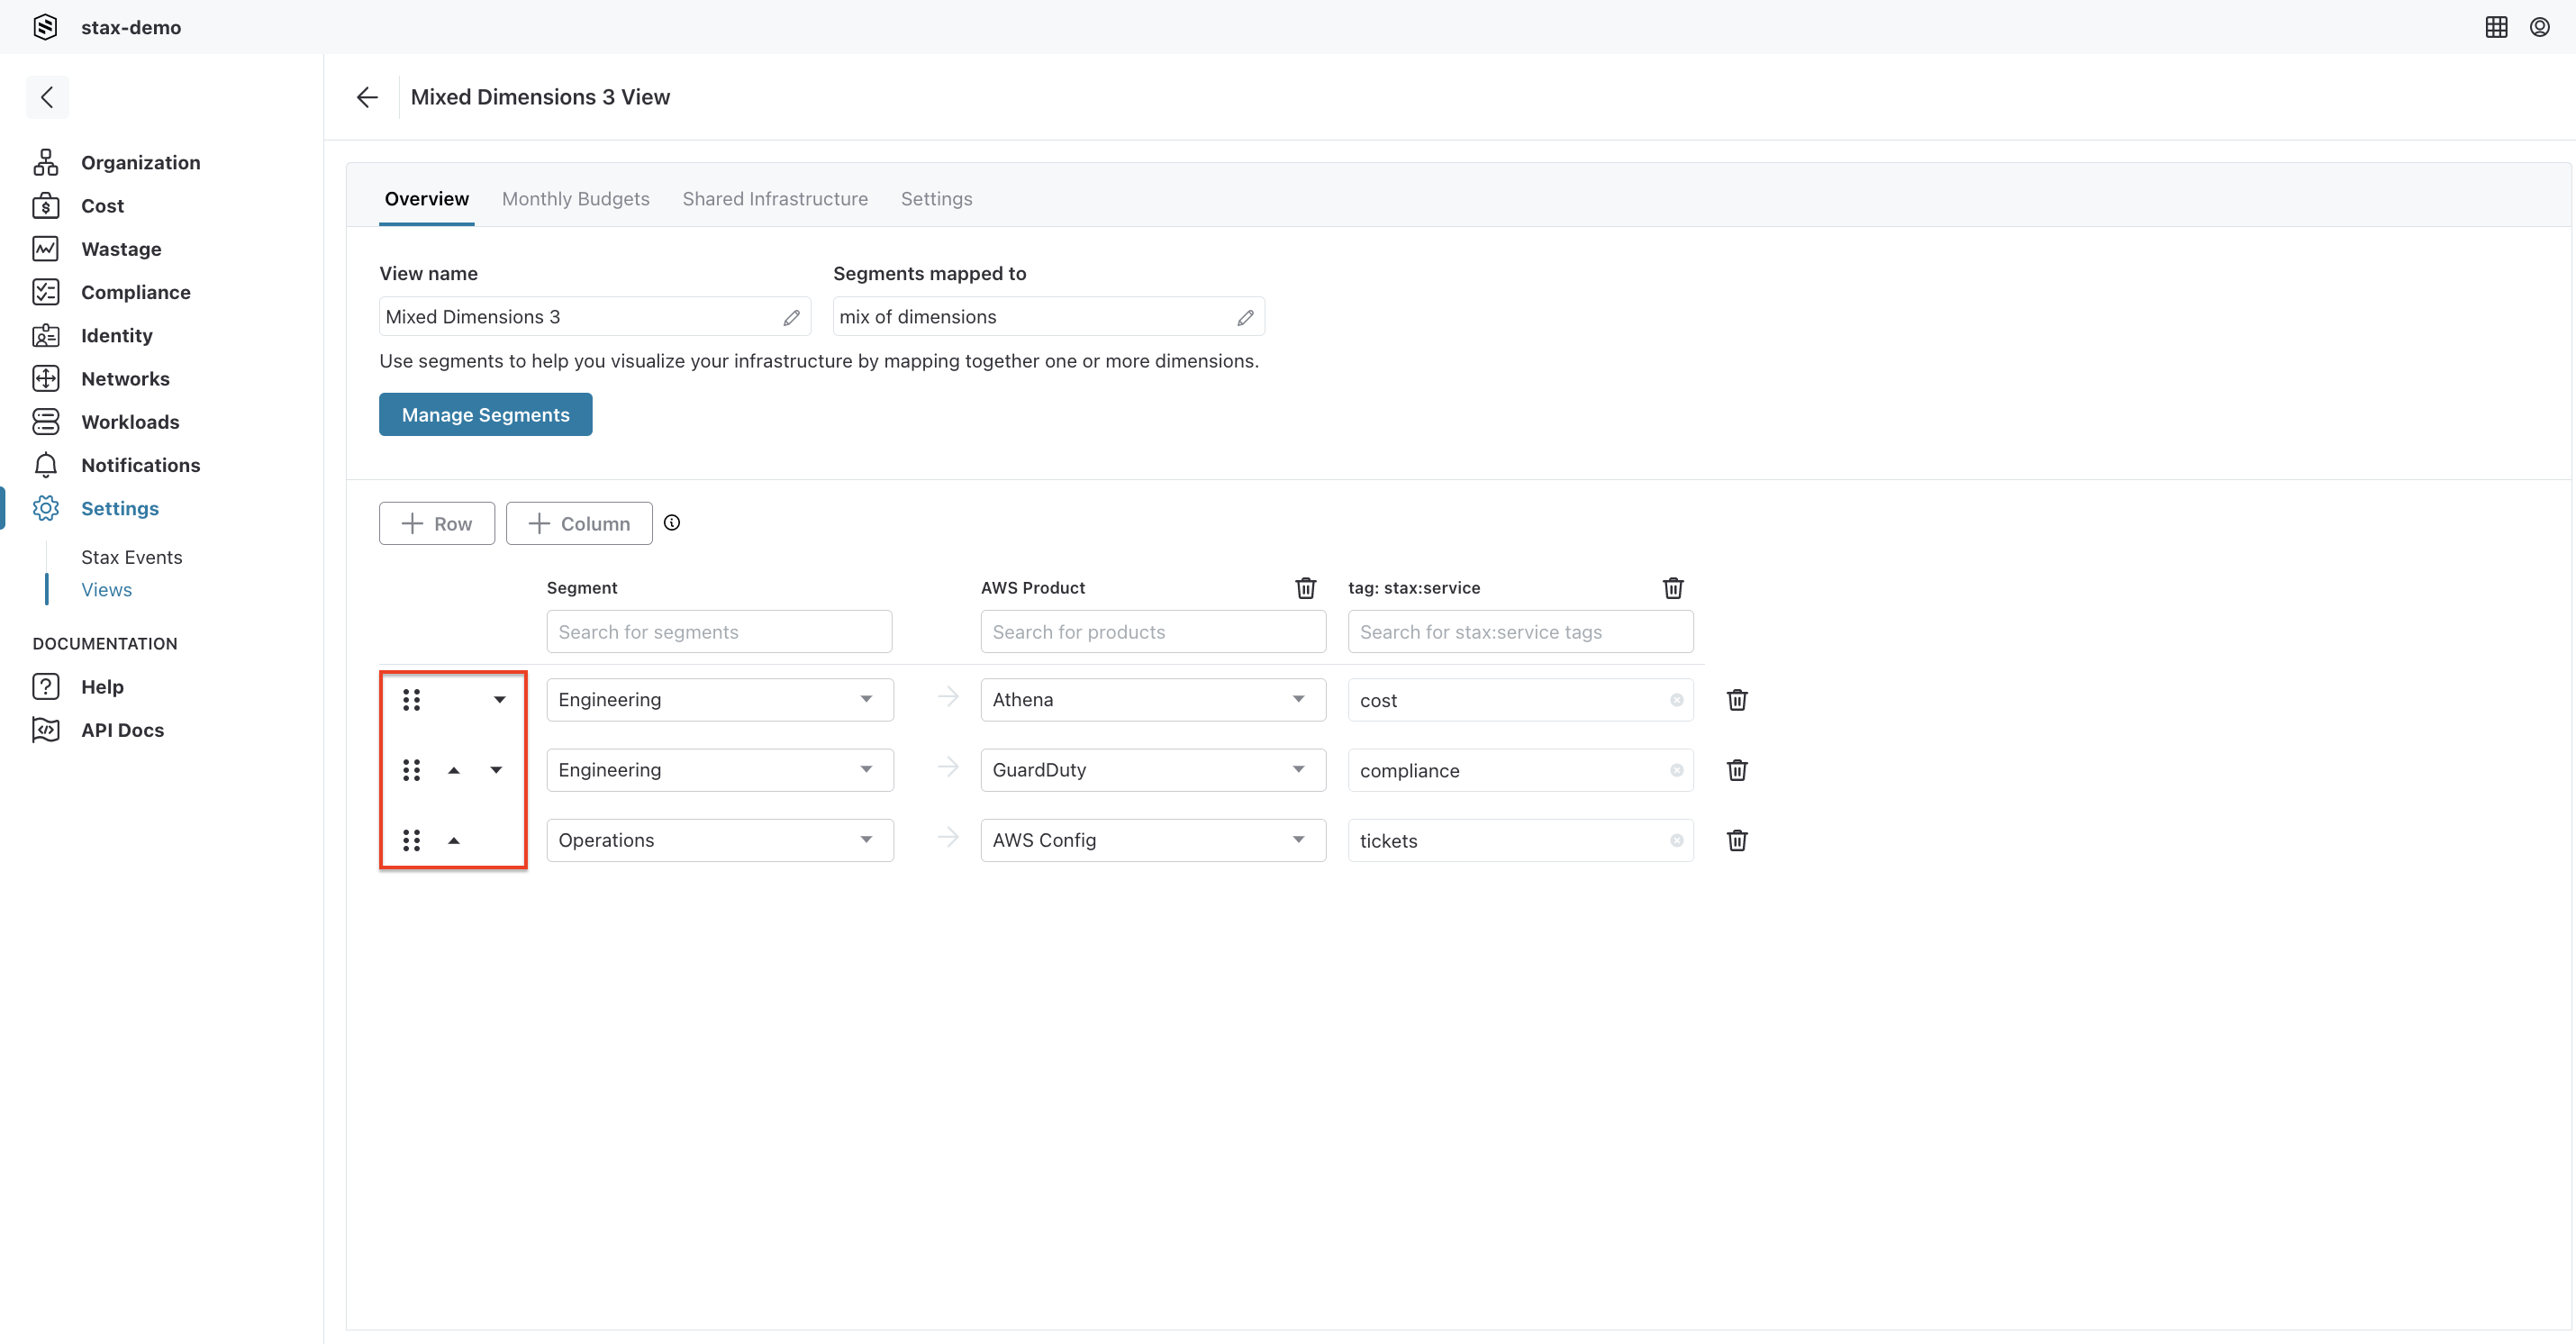
Change the Order of Filters
Each filter is evaluated in order. Resources that do not meet any filter are assigned to the Unallocated segment. To the left of each row (filter), there is a grab handle and up/down arrows available for re-ordering. Either grab a row and move it to the desired position, or move it up and down one row at a time using the arrows. The changes to the View will update immediately.
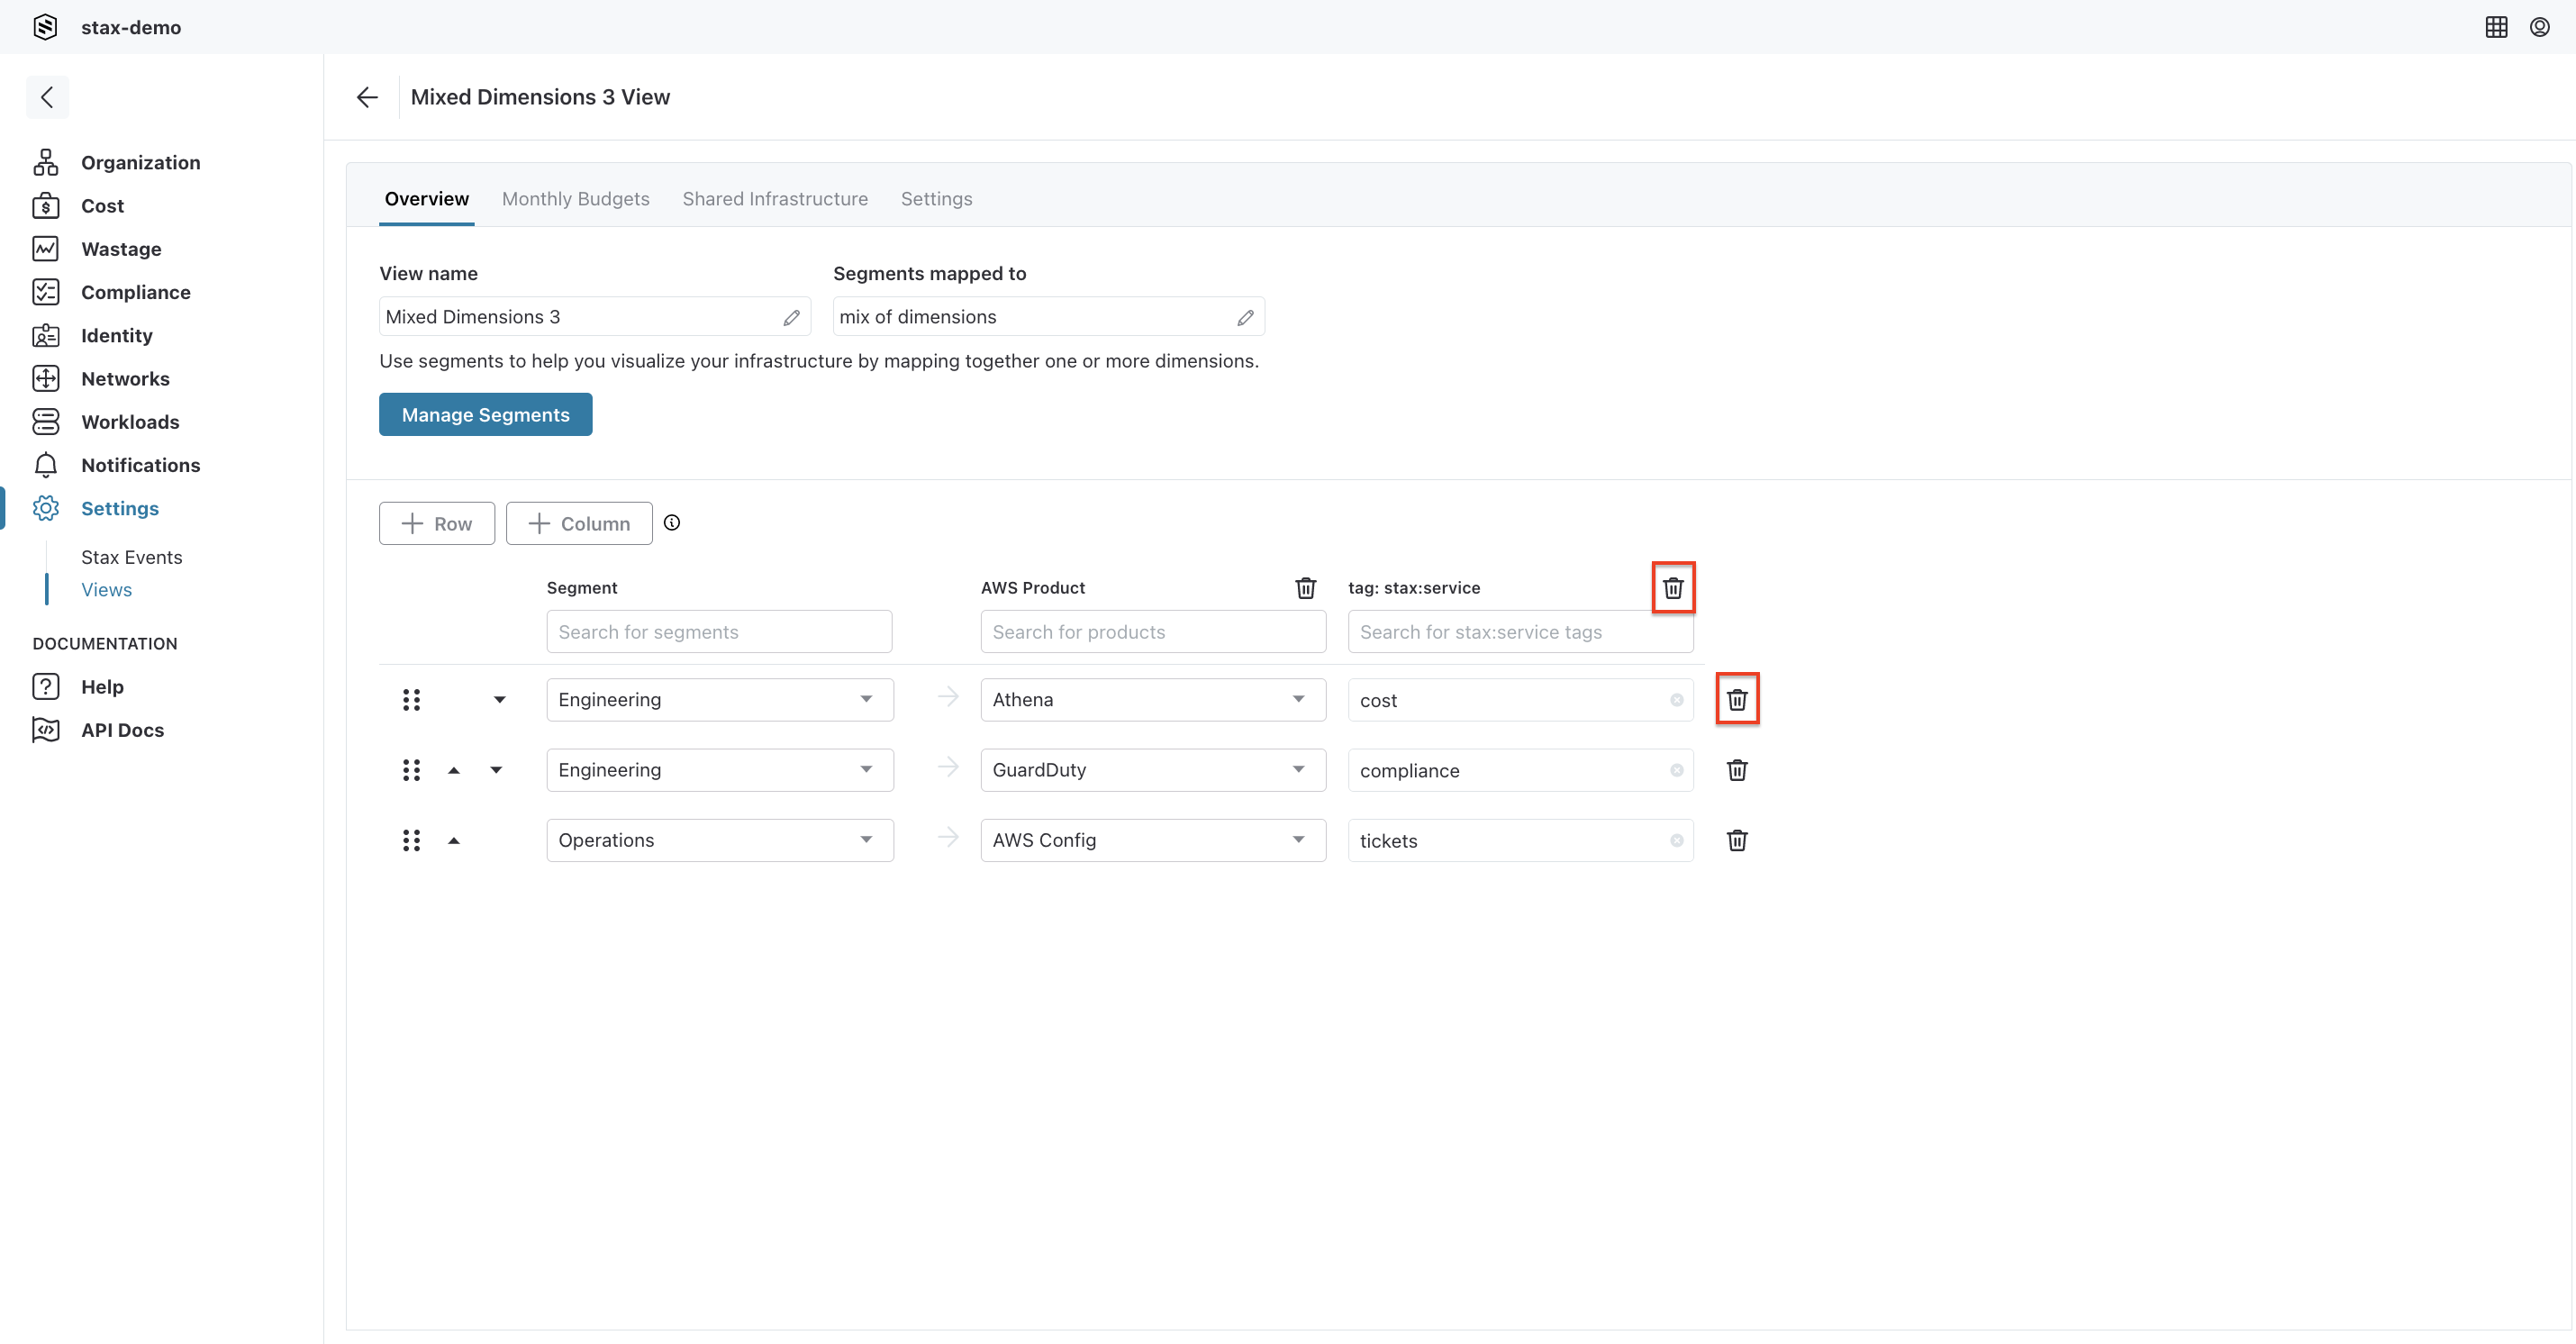
Delete a Filter or Dimension
Delete a filter by choosing the delete icon to the right-hand side of the row. Delete a dimension by choosing the delete icon at the top of the column name.
Manage Segments
Manage the View's segments using Manage Segments. Choose Add Segments to add new segments. Use the edit button to rename or change the sharing option on a segment, and use the delete button to remove unwanted segments. Any filters utilizing that segment will be deleted from the View.
