Configure Okta for Single Sign On
Stax integrates with your corporate identity using SAML. This allows you to bring your own identities and identity management controls to the Stax platform. Stax supports Okta's identity solution. It supports integration with applications as a SAML identity provider (IdP) and is available for use by organizations with an Okta environment.
Before You Begin
- Estimated time to complete: 1 hour
- Ensure you are a member of the Admin role in Stax
- You need to be a administrator of your Okta environment
Prepare the SAML Service URIs
Determine your SAML Service URIs (Entity ID and SAML 2.0 Service URL) using the guidance in Configure Single Sign-On.
Creating an Okta App for your Stax Tenancy
-
In the Okta Admin console, choose Applications from the left-hand nav and select Create New App
-
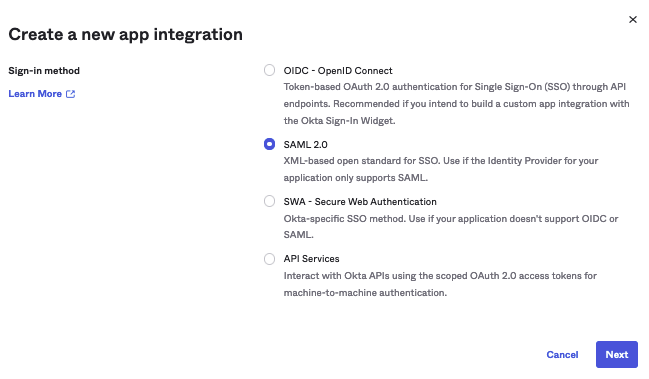
Choose* SAML 2.0* in the Create a new app integration and click Next
-
Provide your application a Name
-
Check ✅ Do not display an icon to our users
-
Check ✅ Do not display application icon in the Okta Mobile App (Note: Stax does not support IdP-initiated sign-ins, so while you can display the app, it will not log-in on your behalf)
-
Click Next
-
On the Configure SAML in Okta page configure the following General Settings:
Parameter Value Example Single Sign on URL The entity ID you determined earlier https://id.security.mega-corp.au1.staxapp.cloud/auth/realms/master/broker/saml/endpointUse this for Recipient URL and Destination URL Checked ✅ n/a Audience URI(Entity ID) https://id.security.<organization-alias>.<region>.<domain>/auth/realms/masterName ID Format Persistent n/a -
Complete the following Attribute Statements:
Name Name Format Value email Email address of the user user.emailfirstName First name of the user user.firstNamelastName Last name of the user user.lastNameRole Basic appuser.JumaRole -
Click Preview the SAML Assertion and add the Assertion information to a support ticket and Click Next
-
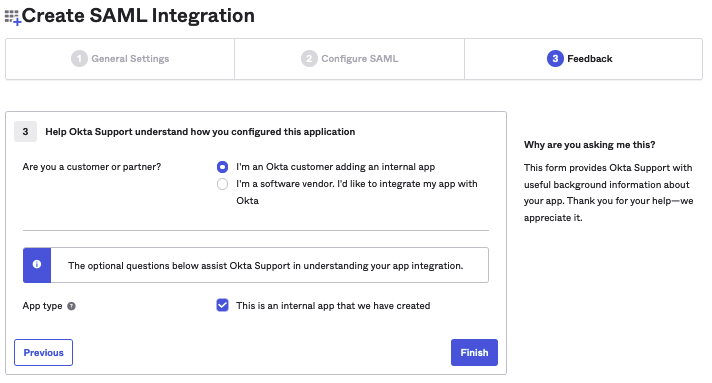
Under Create SAML Integration:
- Choose I'm an Okta customer adding an Internal App
- Check ✅ This is an internal app we have created
- Click Finish
-
The app will now be created and you can navigate to the Sign-on tab of the App to view SAML Setup Instructions
Defining Role-Based access for your Organization
-
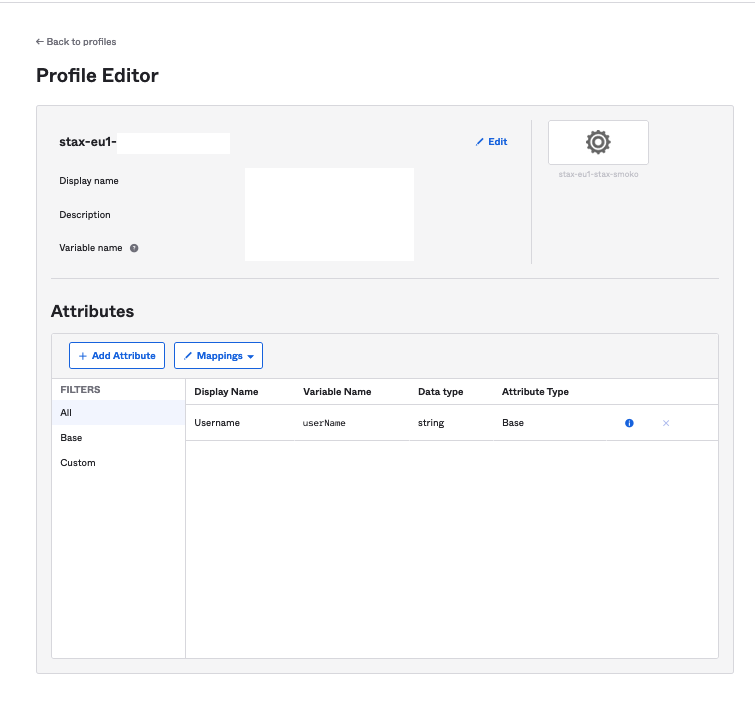
In Okta, navigate to Directory >Profile Editor then locate the application name and click it. The Profile Editor screen will appear
-
Select Add Attribute
-
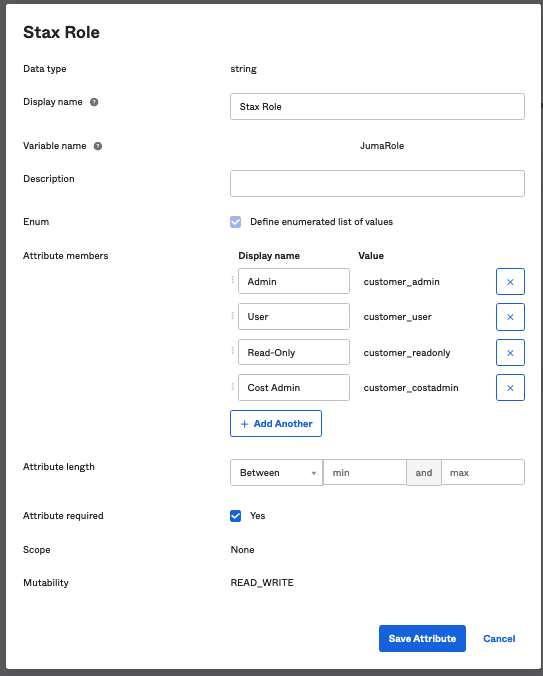
Input the following information the the Attribute Screen:
Name Value Data Type String Display Name Stax Role Variable Name JumaRole Define Enumerated list of values ✅ -
Input the following Attribute Members:
Display Name Value Admin customer_adminOperations customer_operationsUser customer_userRead-Only customer_readonly -
Attribute Required ✅
-
Click Save- it should look like this:

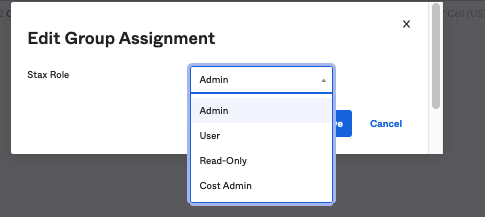
To validate this worked:
-
Navigate to the Assignments tab of your new application
-
Assign a User or Group to the application
-
Edit the User/Group assignment. It should present the following options:
Configure Stax to allow SAML Sign In
When you're ready to have Stax configured, you will need to raise a support case with your SAML metadata file and the ACS URL of your SAML IdP. Once SAML is configured for your Stax tenancy, the support team will be in touch to let you know that it's ready to be tested.
How do you know this worked?
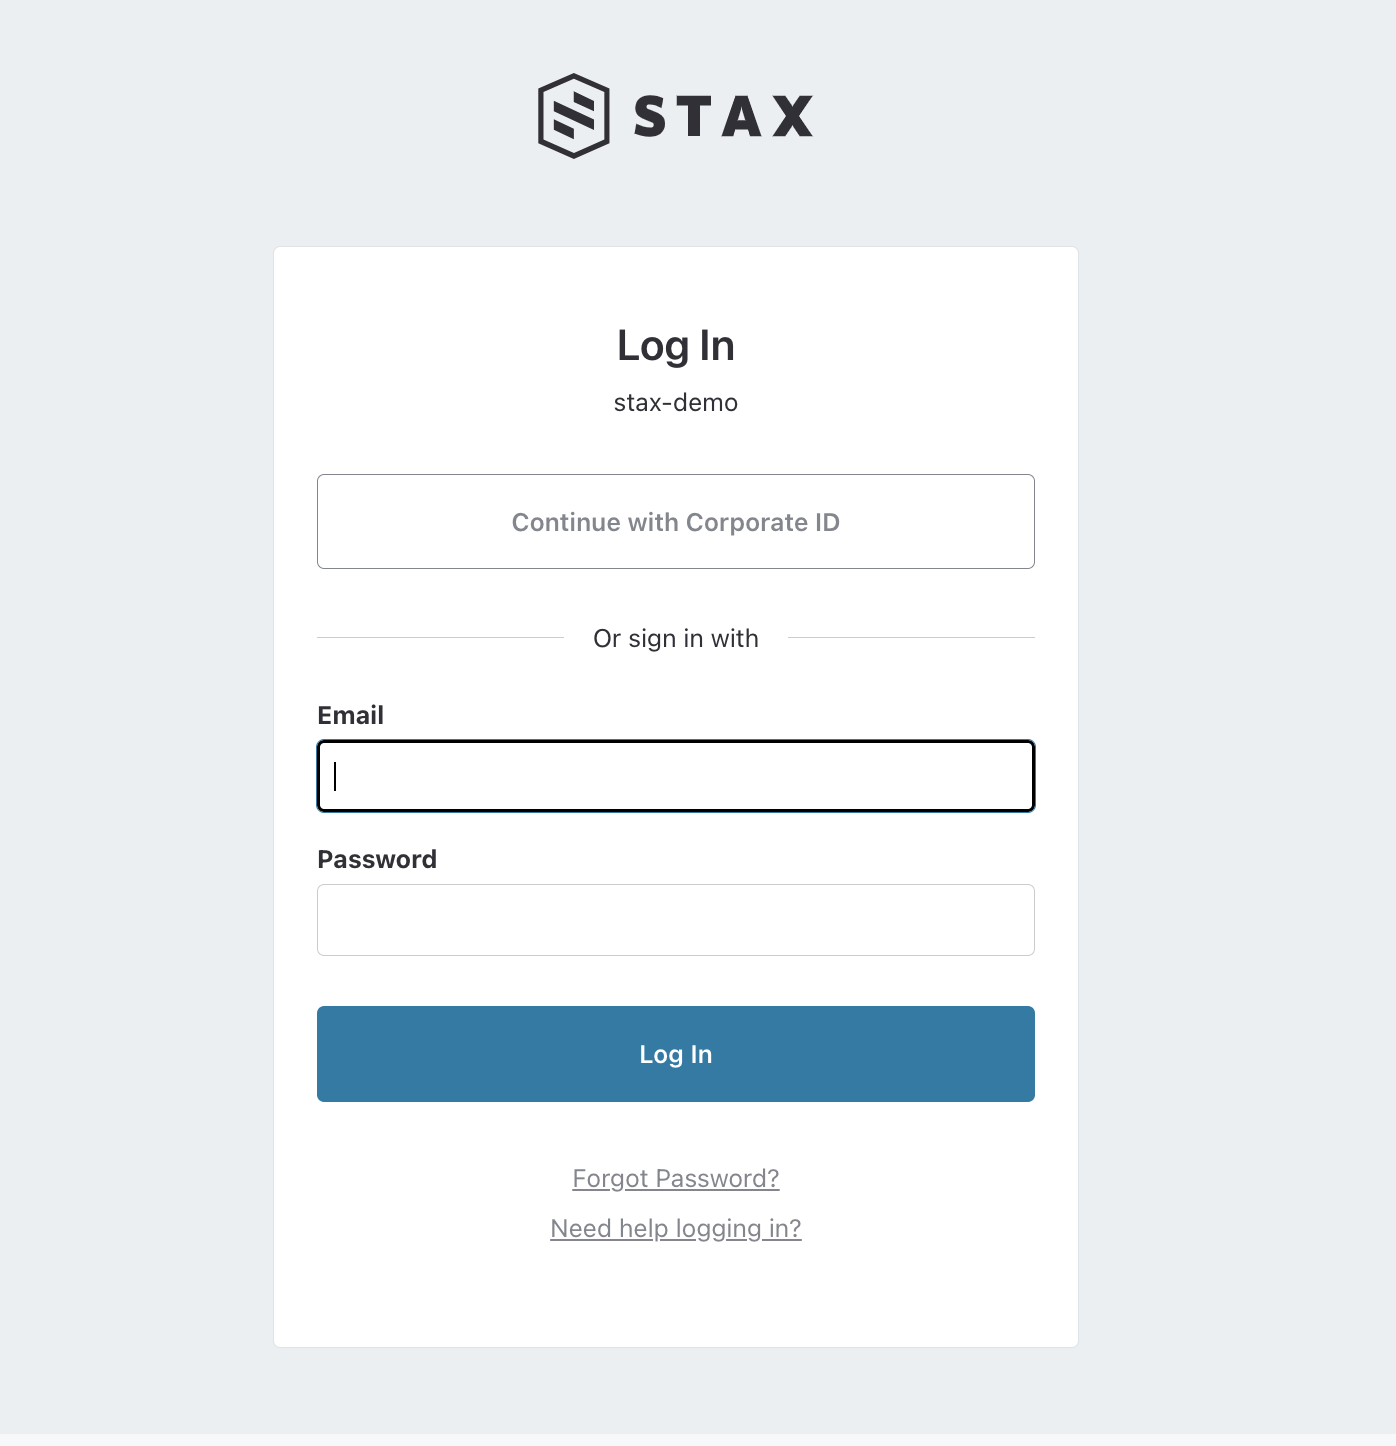
At this time, Stax does not support IdP-initiated sign-ins. You must use SP-initiated sign-in to access Stax.
Next time you navigate to your Stax Console login page, on the top, you'll see a new Continue with Corporate ID button. Clicking this button will take you to your SAML sign-in page. Log in to the IdP and you'll be signed into your Stax tenancy.