Manage Advanced Routing
Networks is an opt-in feature. To enable this feature for your Stax tenancy, please raise a support case.
Advanced Routing enables configuration of a Networking Hub's Transit Gateway route tables, as well as individual VPC subnet route tables.
Before You Begin
- Estimated time to complete: 5 minutes
- Ensure you are a member of the Admin role in your Stax tenancy
- You must already have created a Networking Hub. If not, you'll need to create one first
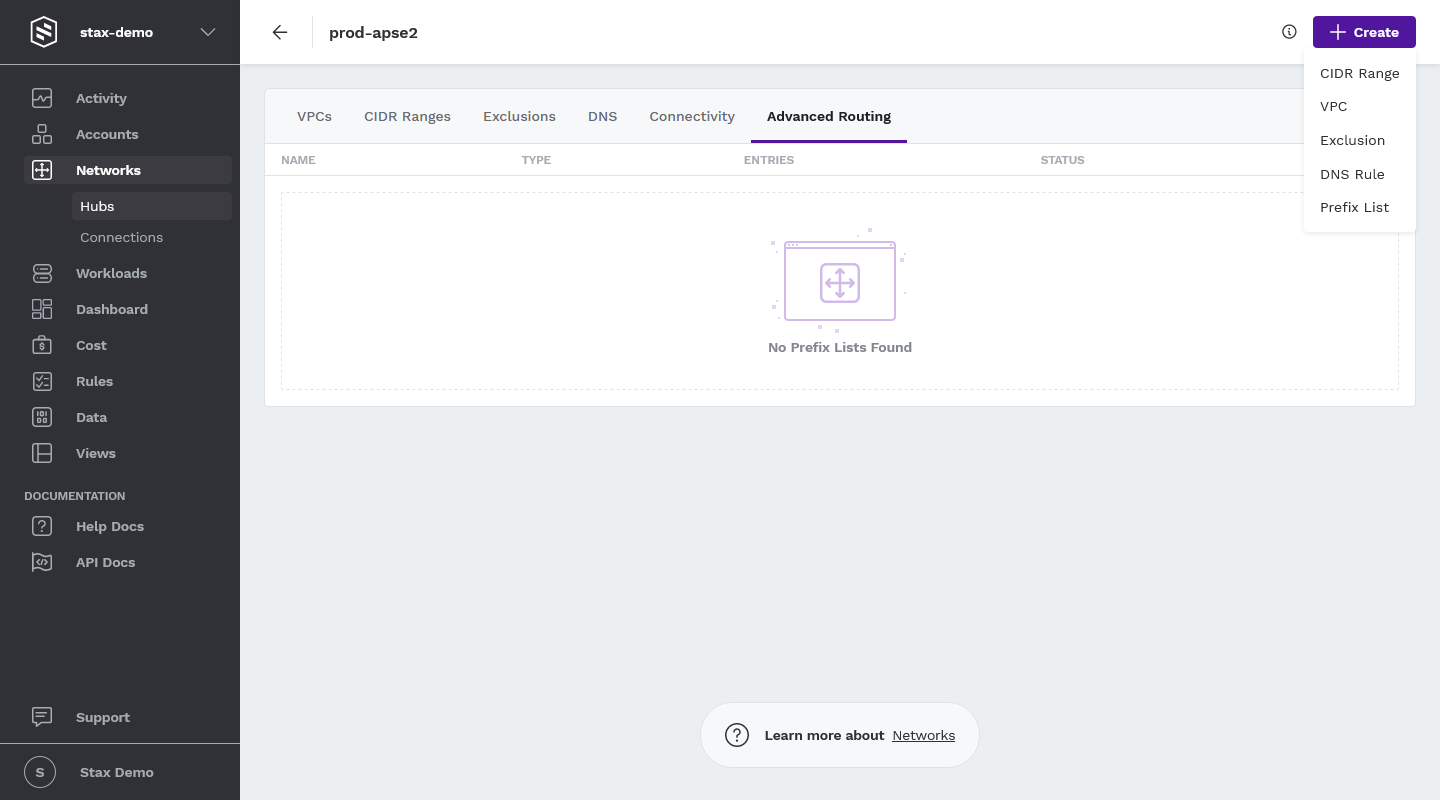
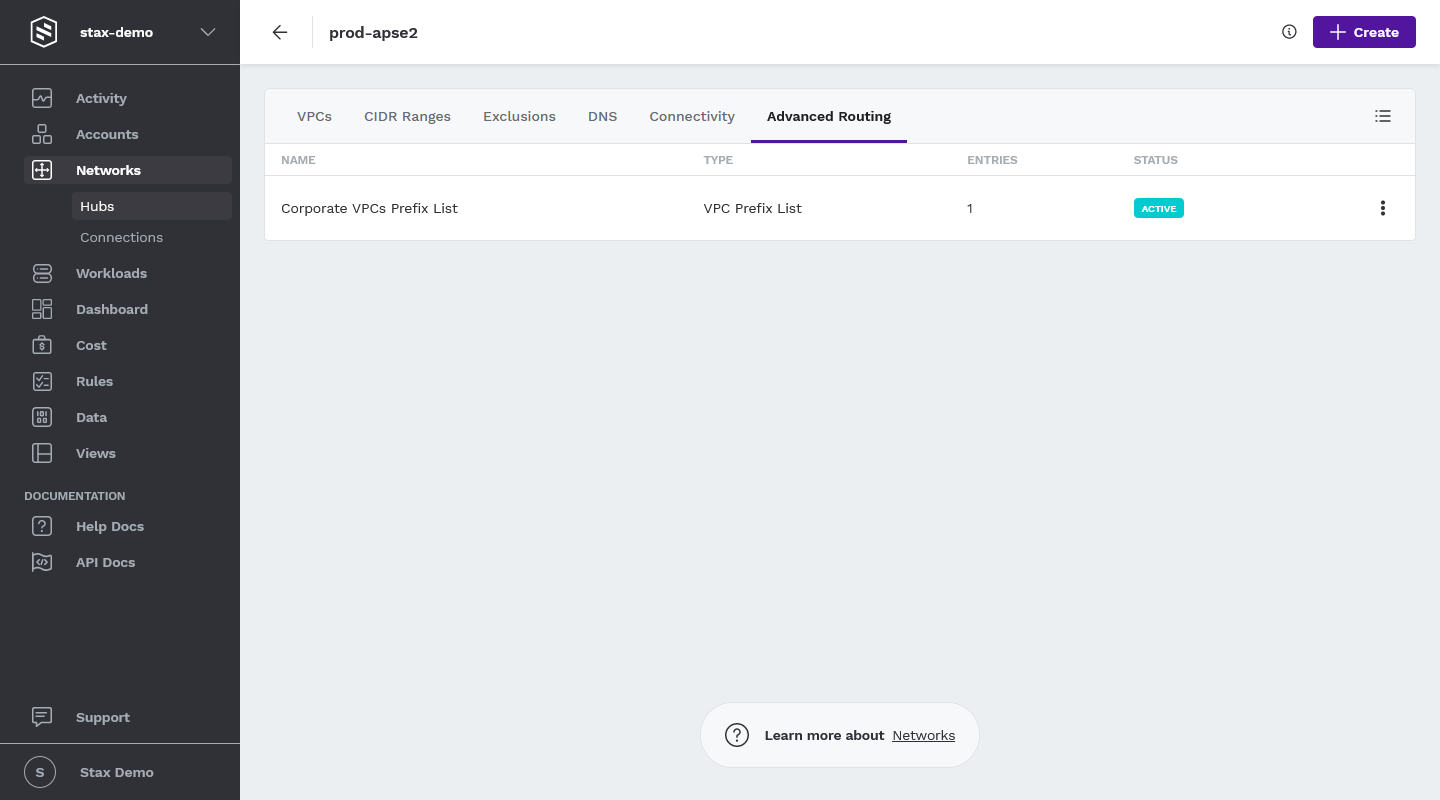
Create a Prefix List
Each Networking Hub and VPC can have as many prefix lists as required.
-
Log in to the Stax Console
-
Select Networks in the left-hand nav
-
On the Networks page, choose your desired Networking Hub
-
Click + Create, then select Prefix List. The Create a Prefix List form will be displayed
-
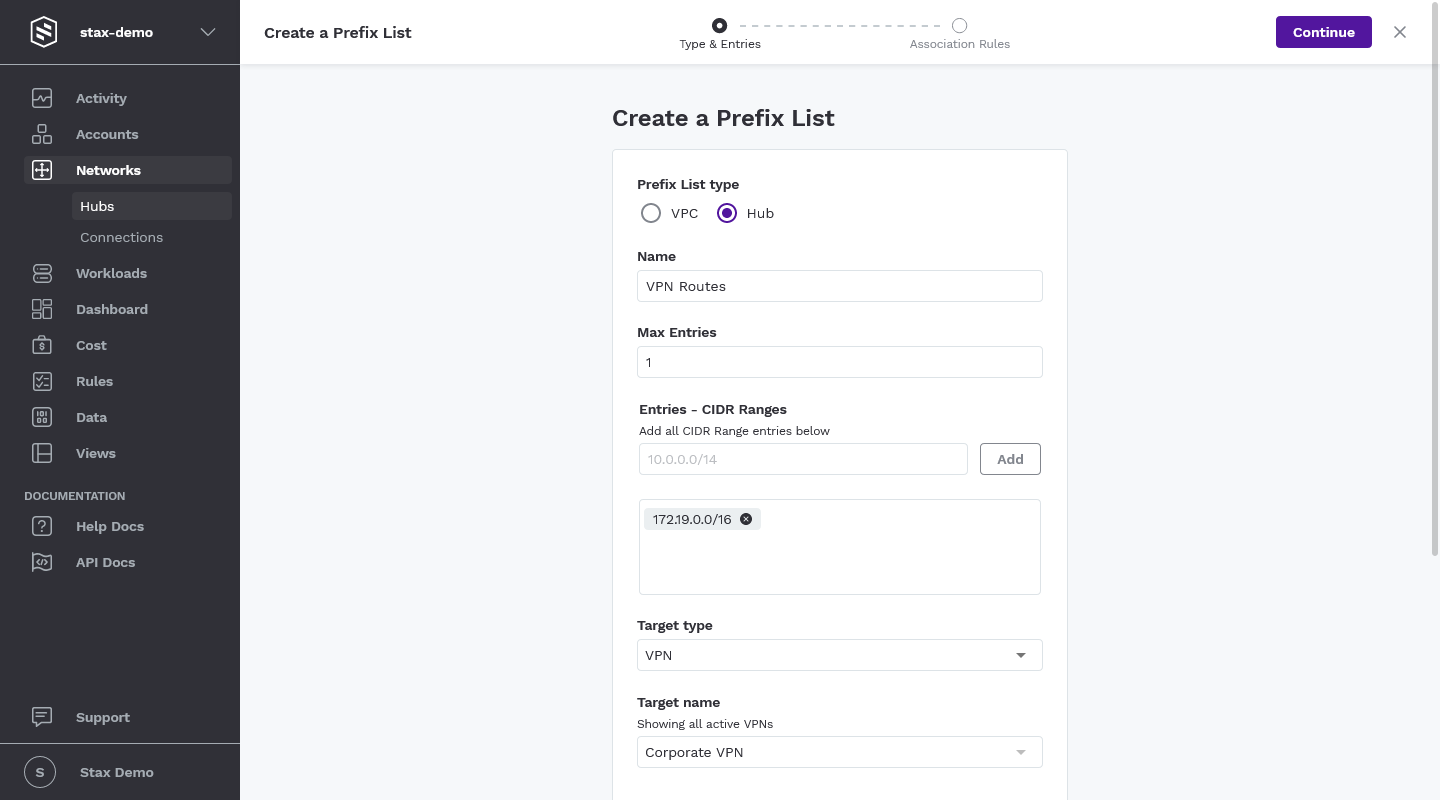
On the Create a Prefix List form, choose the prefix list type, either VPC or Hub
-
Complete the remainder of the fields:
- Name: Enter a name for the prefix list
- Max Entries: When selecting a value for Max Entries, consider how many entries you expect the prefix list to require, as it will consume this number of entries in attached route tables
- Entries - CIDR Ranges: Enter each of the CIDR blocks that you wish to contain in this prefix list. The number of CIDR ranges entered must be fewer than or equal to the number specified in Max Entries
-
If creating a Hub prefix list:
- Target type: Select the destination for routed traffic. Choose from a specific VPC, Direct Connect Gateway, VPN Connection, or a black hole
- Target name: Choose the appropriate targets from the list
-
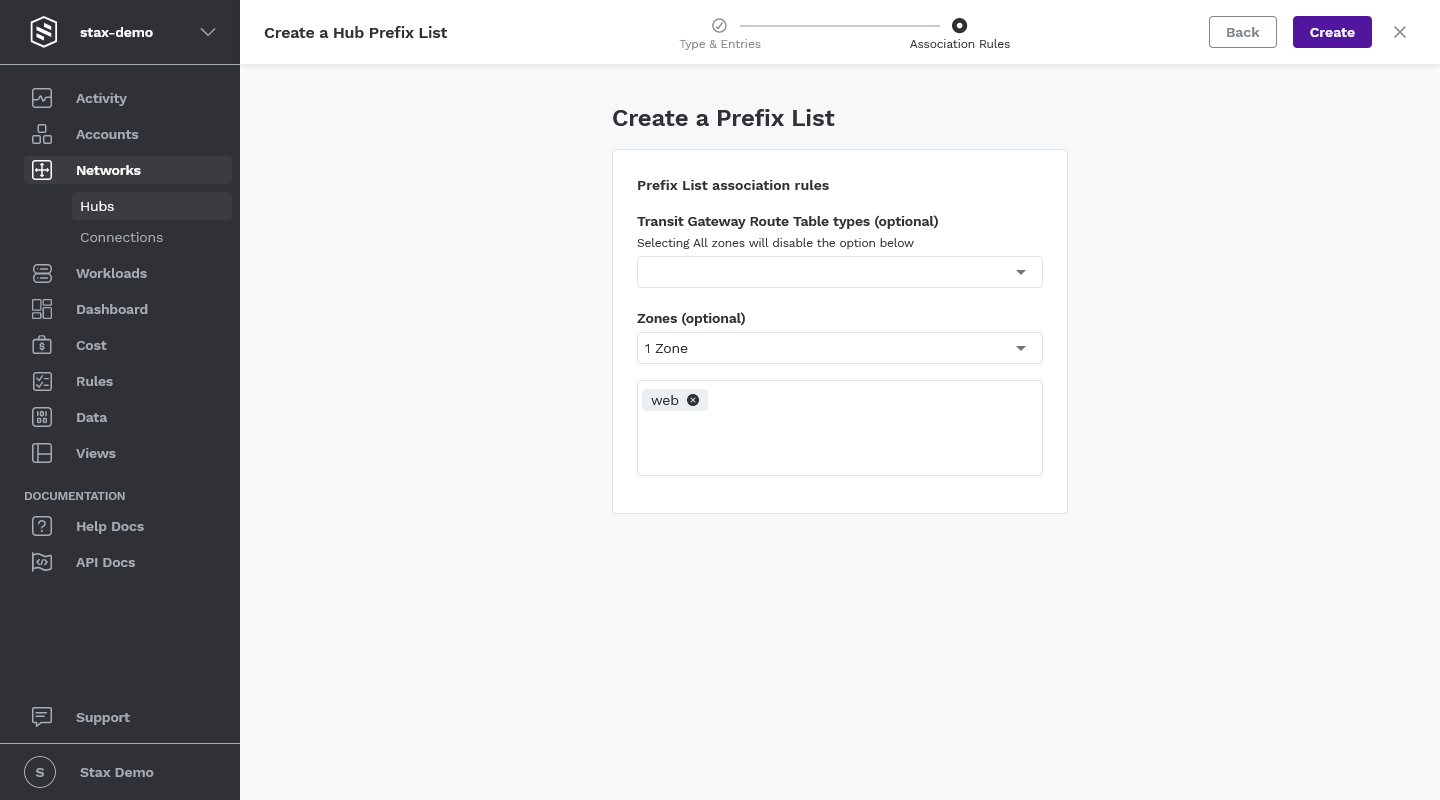
Click Continue to set the association rules
-
If you are creating a Hub prefix list, you must choose route table types, flat VPC zones, or a combination as appropriate.
-
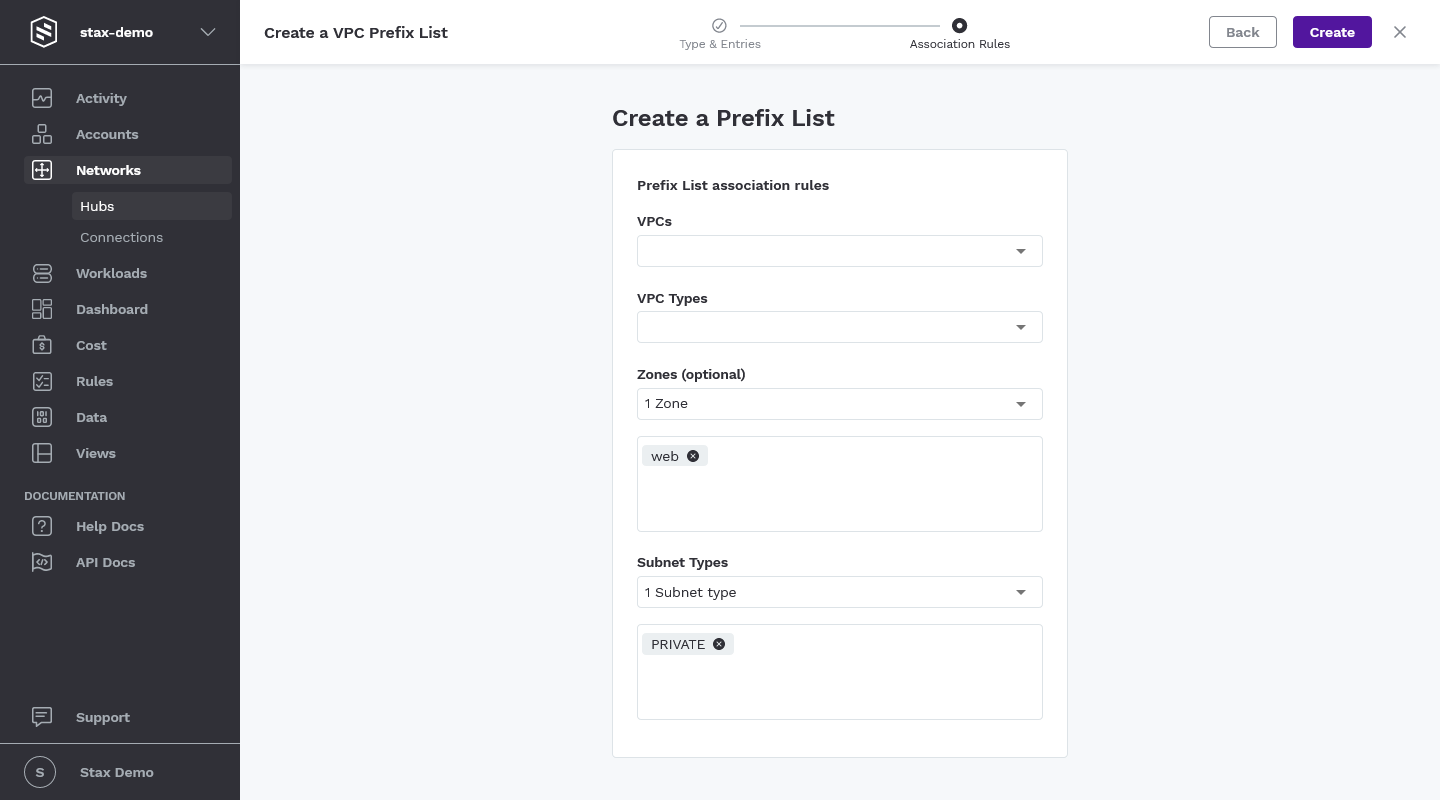
If you are creating a VPC prefix list, target the VPCs by selecting either specific VPCs, VPC types, or Flat VPC zones. Choose the subnet types that the prefix list should be associated to
-
-
Click Create to create the prefix list
The prefix list will be displayed on the Advanced Routing page once initialization has completed.
Edit a Prefix List
You may rename your prefix list, as well as modifying max entries and the routing entries themselves. In the case of a Hub prefix list, you can also modify the target type and target name.
-
Log in to the Stax Console
-
Select Networks in the left-hand nav
-
On the Networks page, choose your desired Networking Hub
-
Select the Advanced Routing tab
-
Click the vertical ellipsis (⋮) to the right of the Prefix List then select Edit from the list
-
In the Prefix List details form, modify the settings as appropriate
-
Click Save to save the changes
Your changes may take a few minutes to take effect. The prefix list will show a status of Updating while the update is in progress.
Edit Prefix List Associations
Use this method to change the association rules for a prefix list.
-
Log in to the Stax Console
-
Select Networks in the left-hand nav
-
On the Networks page, choose your desired Networking Hub
-
Select the Advanced Routing tab
-
Click the vertical ellipsis (⋮) to the right of the prefix list then select Edit Association Rules from the list
-
In the Prefix List details form, provide the following information:
- In the case of a Hub prefix list, you can change the Transit Gateway route table types and/or Flat VPC zones that the Prefix List should associate with
- In the case of a VPC prefix list, you can change the VPCs, VPC types, zones, and subnet types for association with
-
Click Save to save the changes
Your changes may take a few minutes to take effect. The prefix list will show a status of Updating while the update is in progress.
Delete a Prefix List
-
Log in to the Stax Console
-
Select Networks in the left-hand nav
-
On the Networks page, choose your desired Networking Hub
-
Select the Advanced Routing tab
-
Click the vertical ellipsis (⋮) to the right of the Prefix List then select Delete from the list
-
Select the Yes, delete button to confirm the deletion of the Prefix List
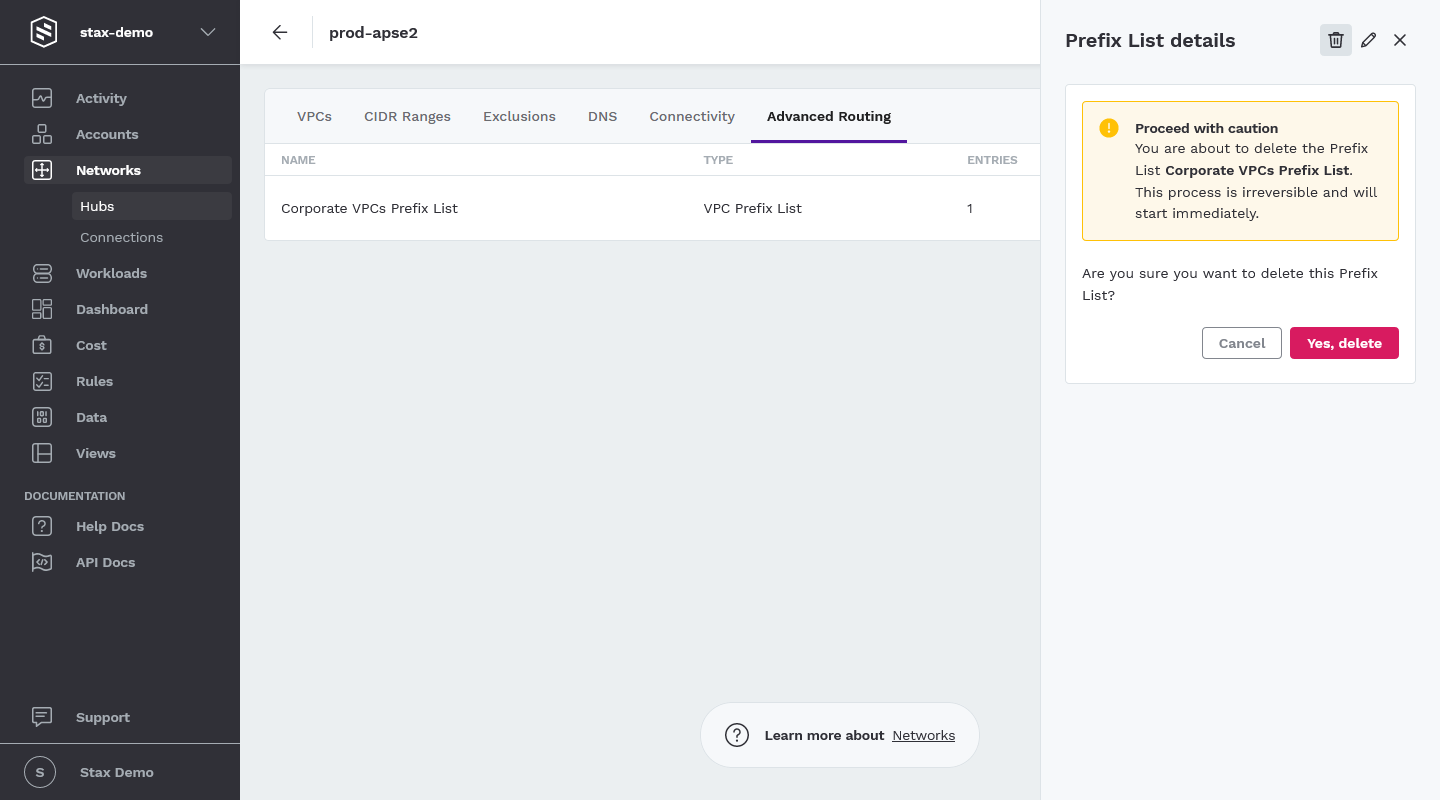
Your changes may take a few minutes to take effect. The prefix list will show a status of Deleting while the update is in progress.