Manage Direct Connect
Networks is an opt-in feature. To enable this feature for your Stax tenancy, please raise a support case.
In order to create Direct Connect resources, you should have already provisioned a Direct Connect connection to an AWS account.
Before You Begin
- Estimated time to complete: 15 minutes
- Ensure you are a member of the Admin role in your Stax tenancy
- You must already have created a Networking Hub. If not, you'll need to create one first
Create a Direct Connect Gateway
Stax supports both hosted and dedicated Direct Connect connections as well as Transit and Private Virtual Interfaces.
-
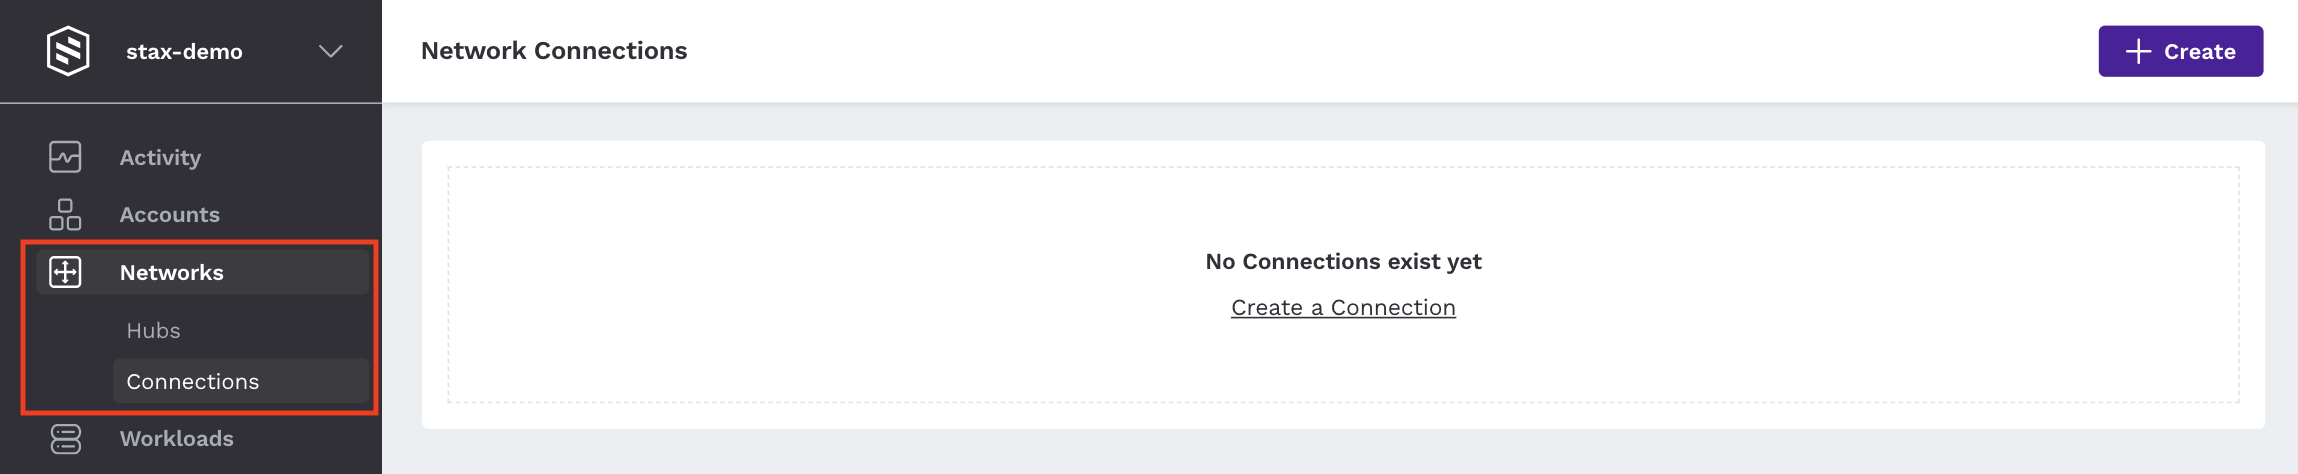
Log in to the Stax Console
-
Select Networks in the left-hand nav
-
Select Connections in the sub-menu, beneath Hubs
-
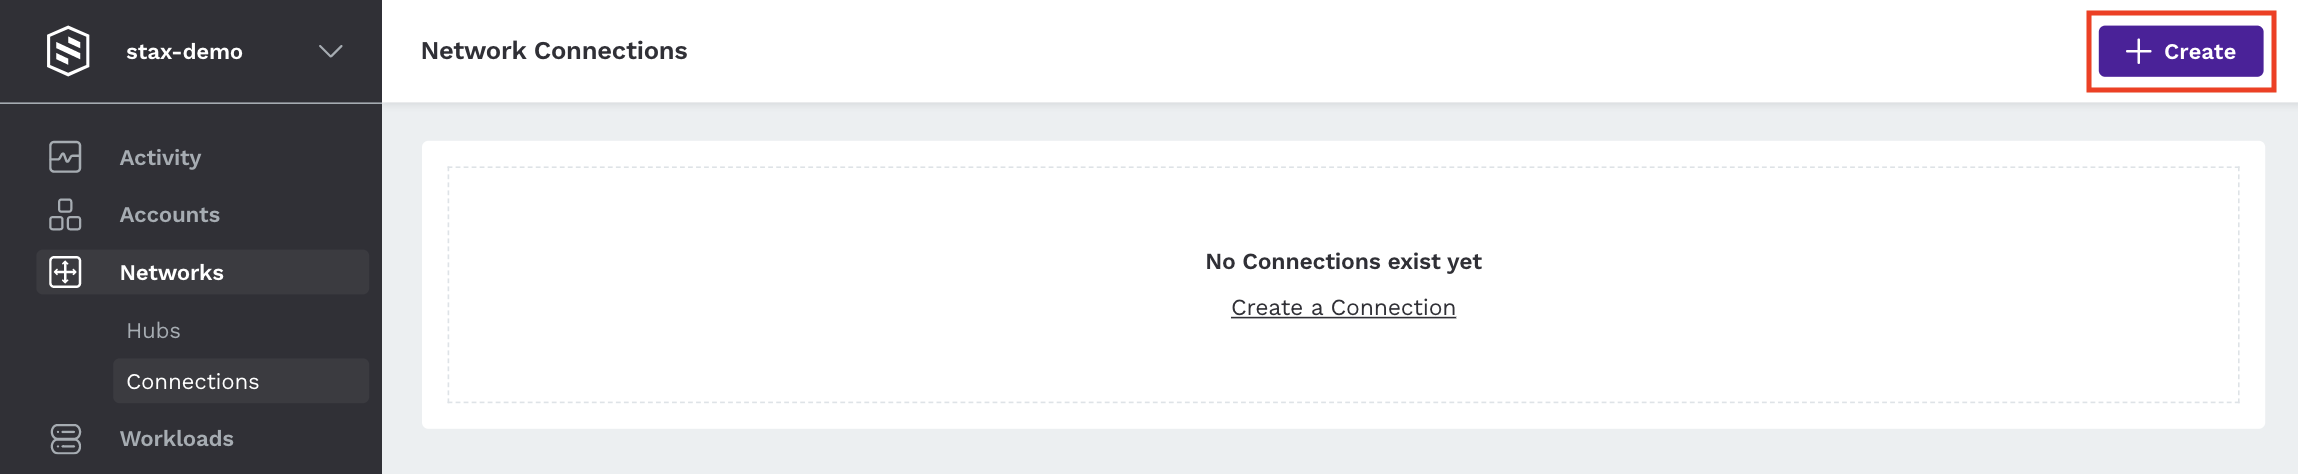
On the Connections page, click + Create
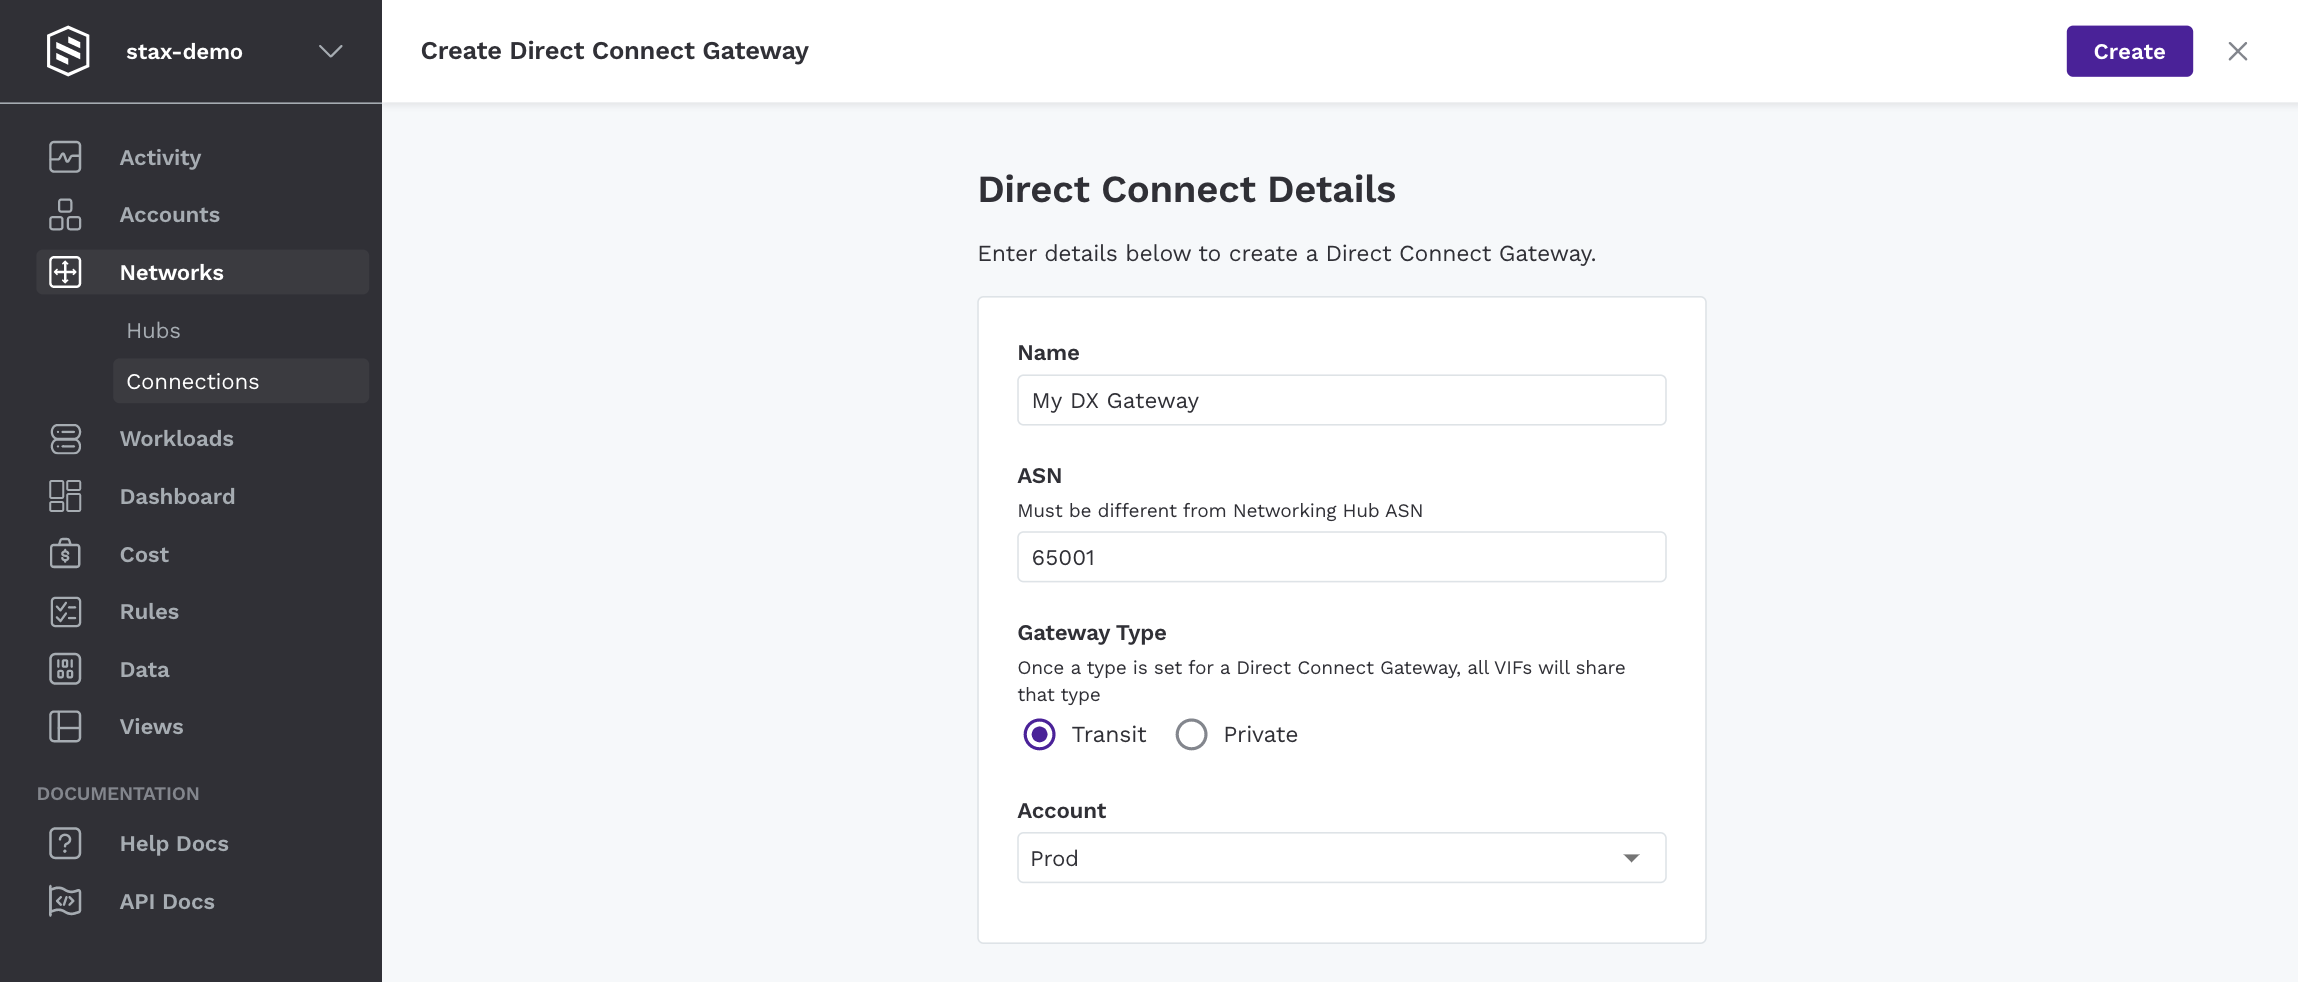
- In the Direct Connect details form, provide the following information:
-
Name: Enter a name for your Direct Connect Gateway
-
ASN: Input an ASN between 64512-65534 or 4200000000-4294967294. This ASN must differ from your Networking Hub's ASN
-
Gateway Type: Choose either a Transit or Private Gateway type. Your selection will determine the type of VIFs created for your Direct Connect connection
-
Account: Select the Account from the drop-down list that contains your Direct Connect connection
-
- In the Direct Connect details form, provide the following information:
-
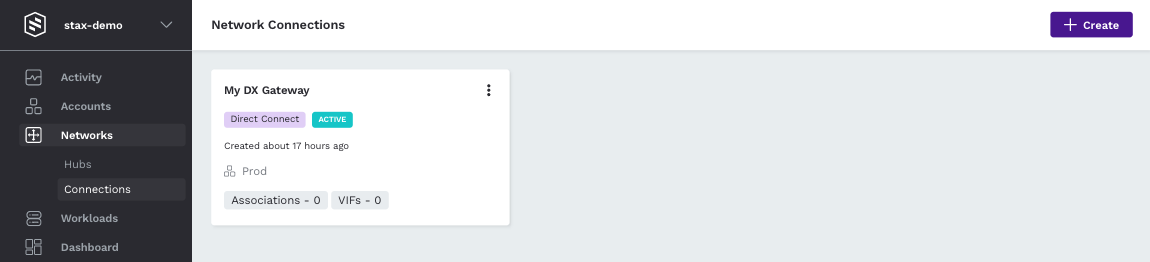
Click Create to create the Direct Connect Gateway. Once your Direct Connect Gateway has completed initialization, it will be displayed on the Connections page
Edit a Direct Connect Gateway
Direct Connect Gateways cannot be edited after creation. If you need to make a change to the configuration of your Gateway, it must be deleted and then recreated.
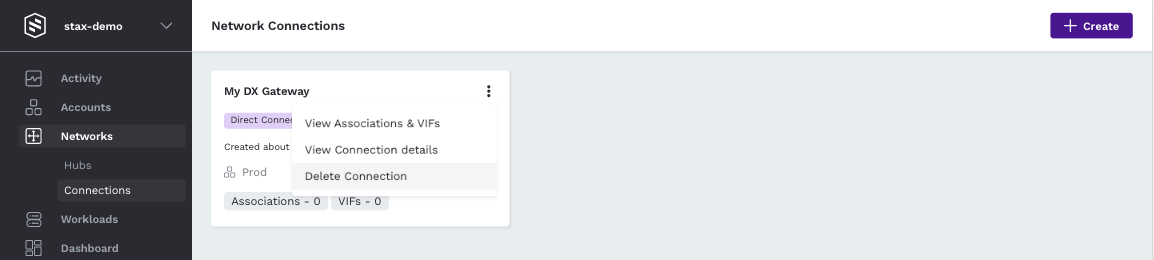
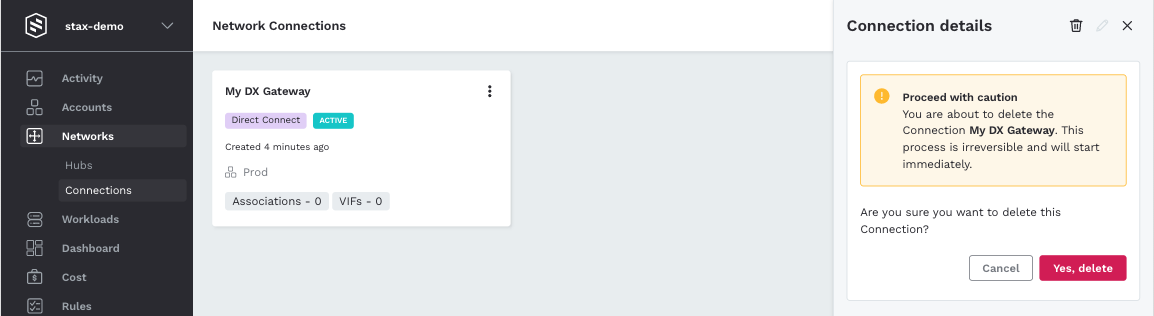
Delete a Direct Connect Gateway
To delete a Direct Connect Gateway, any associations and virtual interfaces must first be removed.
From the Connections main page:
-
Click the vertical ellipsis (⋮) to the right of the Direct Connect Gateway, then select Delete Connection from the list
-
Select the Yes, delete button to confirm the Direct Connect Gateway's deletion
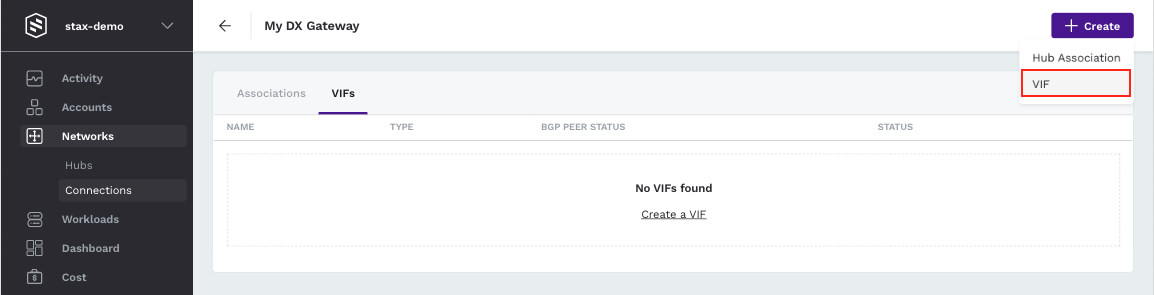
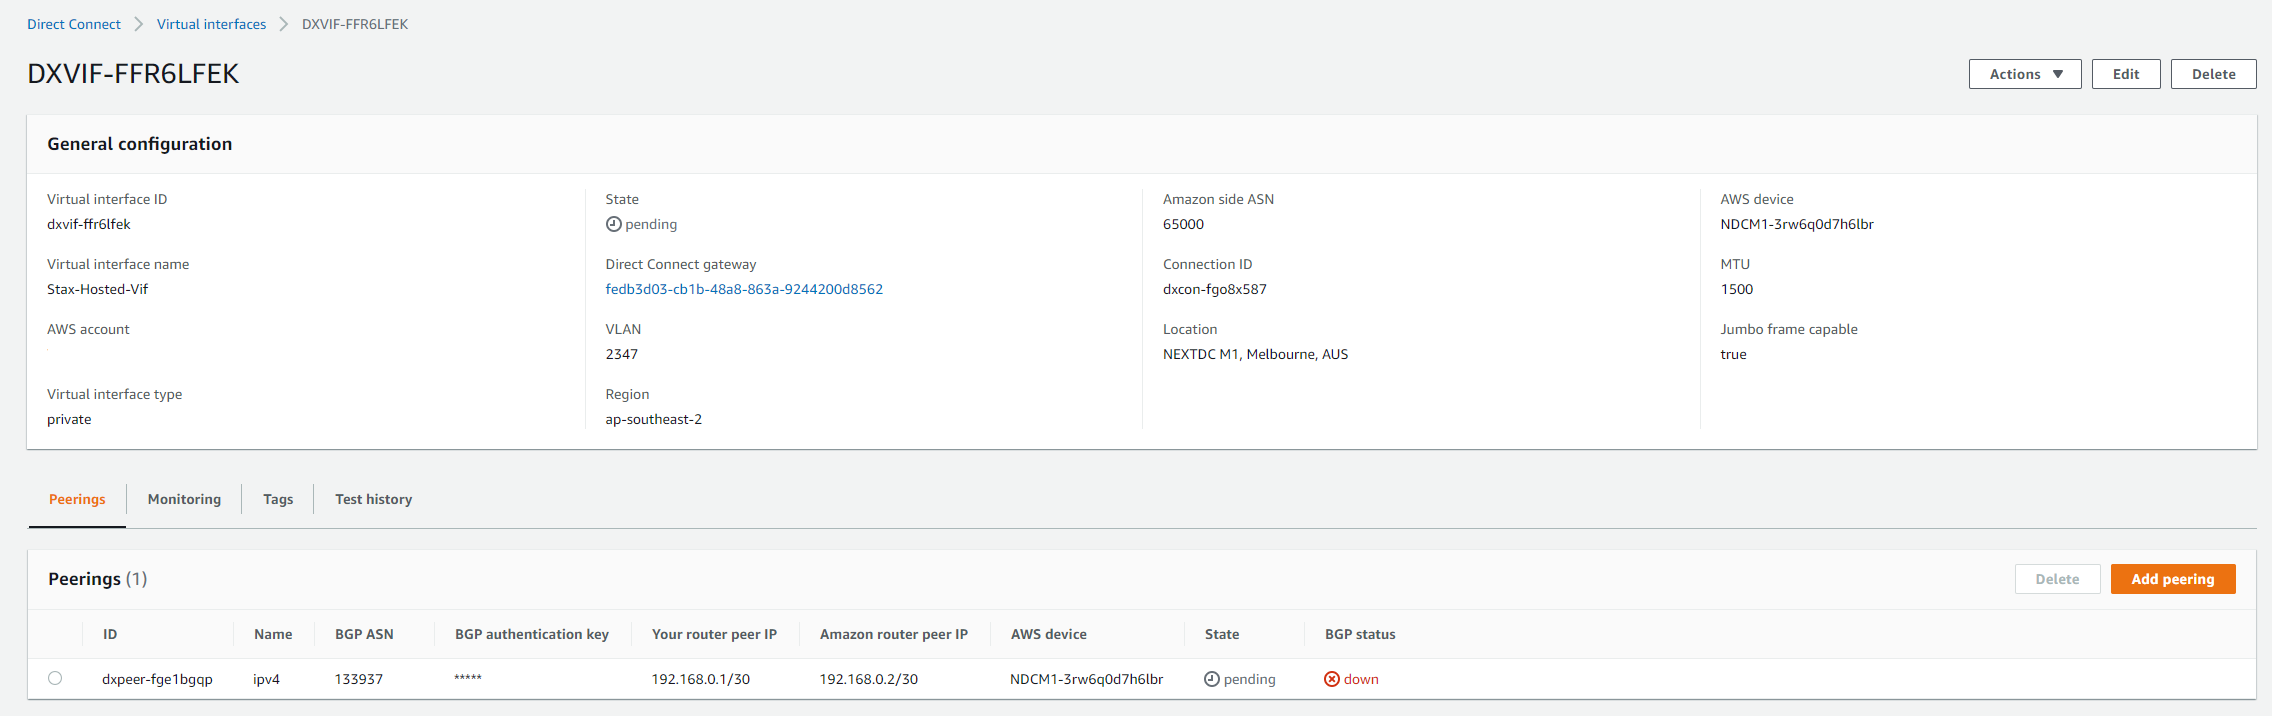
Create a Direct Connect Virtual Interface
You can create a Direct Connect Virtual Interface within an existing Direct Connect Gateway to enable Direct Connect connectivity. This process could take up to 60 minutes to complete.
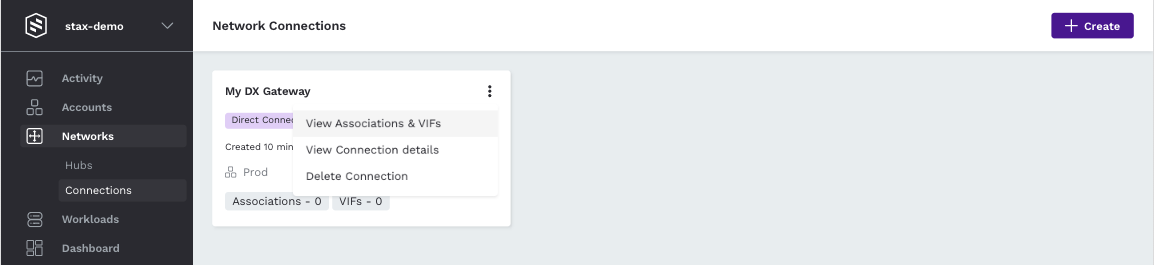
From the Connections main page:
-
Click the vertical ellipsis (⋮) to the right of the Direct Connect Gateway, then select Associations & VIFs from the list
-
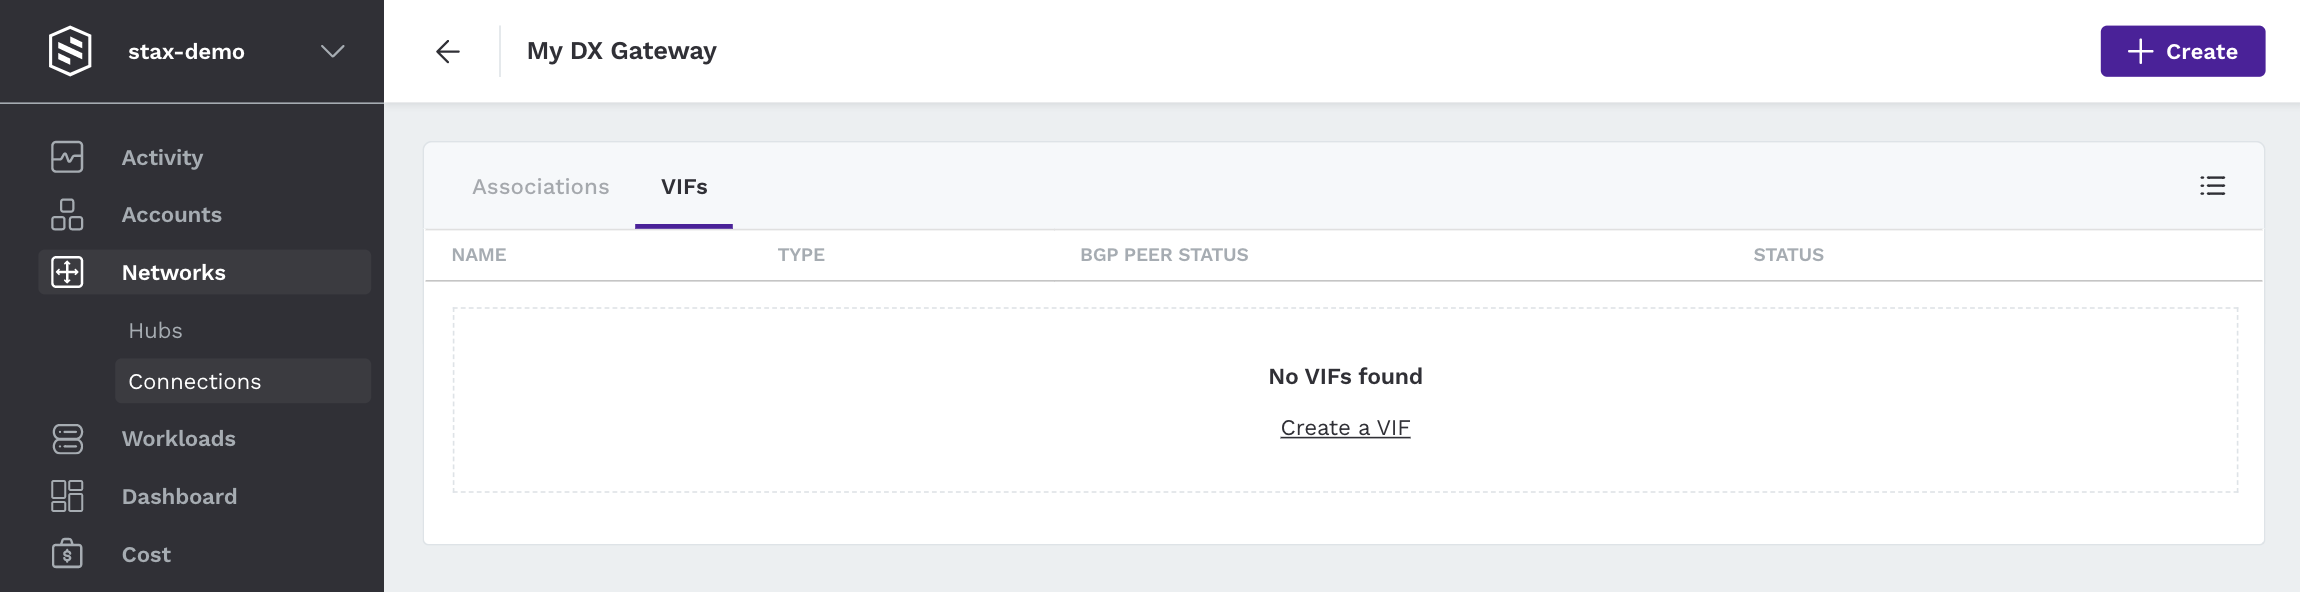
Select the VIFs tab
-
Click + Create, then select VIF
-
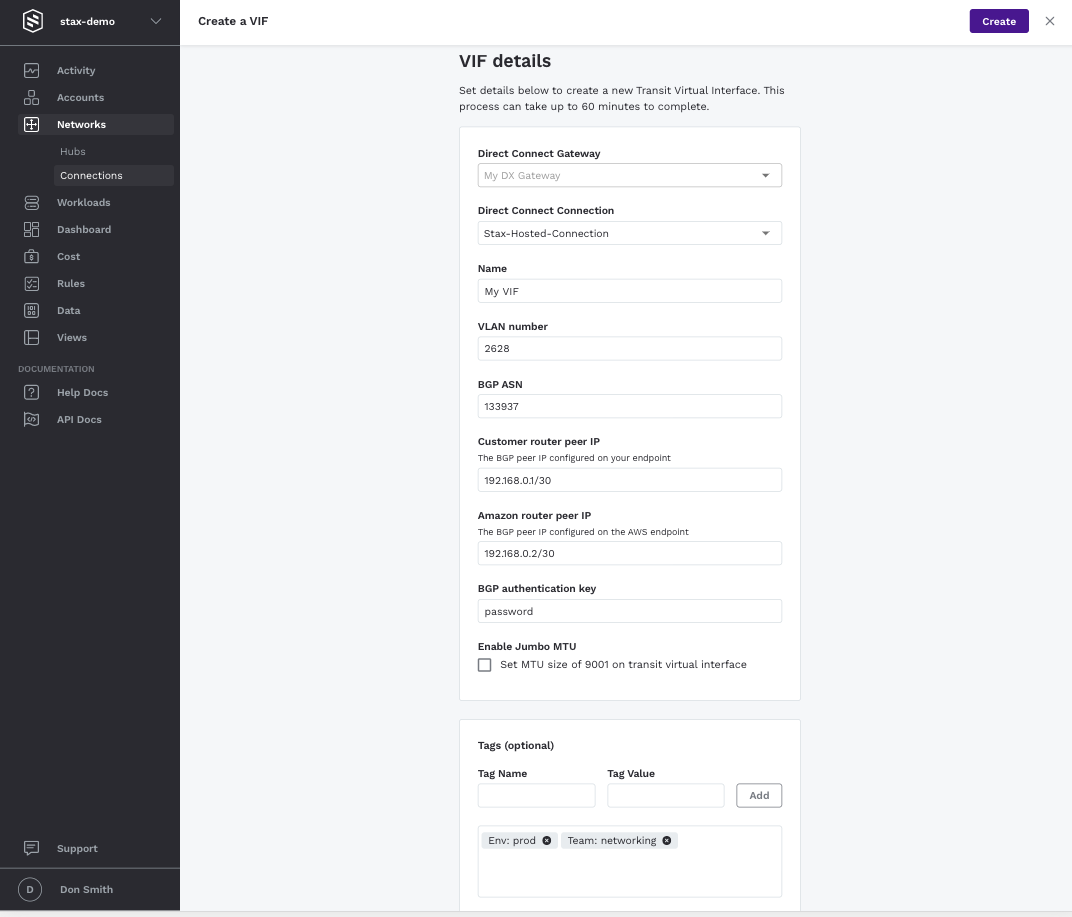
In the VIF details form, provide the following information:
-
Direct Connect Connection: Select from the available connections
-
Name: Enter a name for your VIF
-
VLAN number: If using a hosted Direct Connect Connection accept the default VLAN, for a dedicated Direct Connect Connection enter a value between 1-4094 that matches your network setup
-
BGP ASN: Enter a BGP ASN between 1-2147483647. This should be set to the ASN of your on-premises Networking Router
-
Customer router peer IP: Enter the BGP peer IP configured on your endpoint
-
Amazon router peer IP: Enter the BGP peer IP configured on the AWS endpoint
-
BGP authentication key: Enter your AWS Direct Connect connection's BGP authorization key. This value can be found in the AWS Direct Connect console.
-
Enable Jumbo MTU: Select to set an MTU size of 9001 on your transit virtual interface
-
Tags: Optionally, add tags to your VIF
-
-
Click Create to create the VIF. Once your VIF has been created, you can check the status of the BGP Peer by clicking the Get BGP Peer Status button shown against your VIF
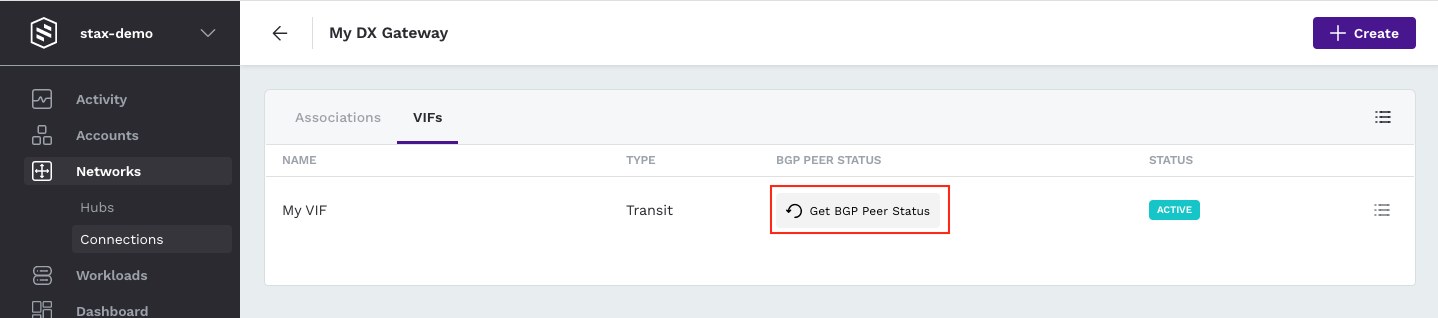
There are three potential states for the BGP Peer Status:
- Pending: BGP Peer status is being retrieved
- Up: BGP Peer is available
- Down: BGP Peer is unavailable
Edit a Direct Connect Virtual Interface
From the Connections main page:
-
Click the vertical ellipsis (⋮) to the right of the Direct Connect Gateway, then select Associations & VIFs from the list
-
Select the VIFs tab
-
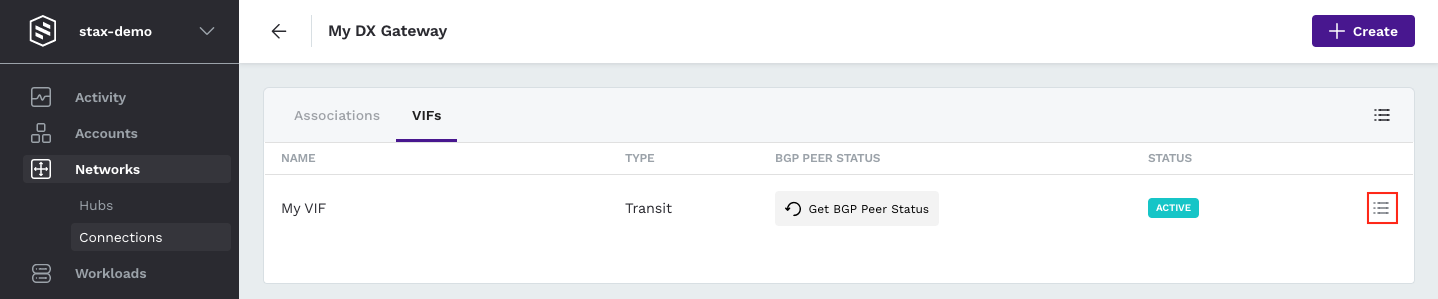
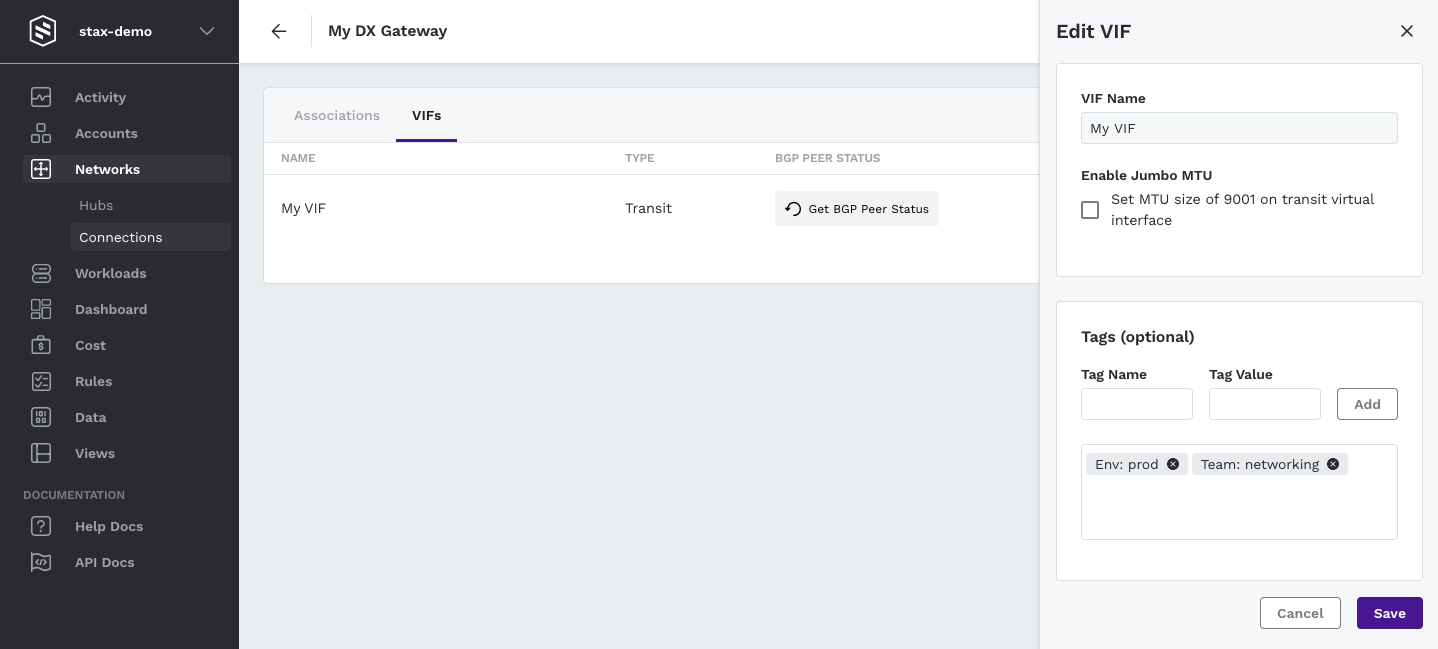
To edit the details of a specific VIF, select the drawer icon located to the right of the VIF's name
-
Select the edit icon
-
Make the required changes to the VIF's Jumbo MTU setting and/or tags, then click Save
Delete a Direct Connect Virtual Interface
From the Connections main page:
-
Click the vertical ellipsis (⋮) to the right of the Direct Connect Gateway, then select Associations & VIFs from the list
-
Select the VIFs tab
-
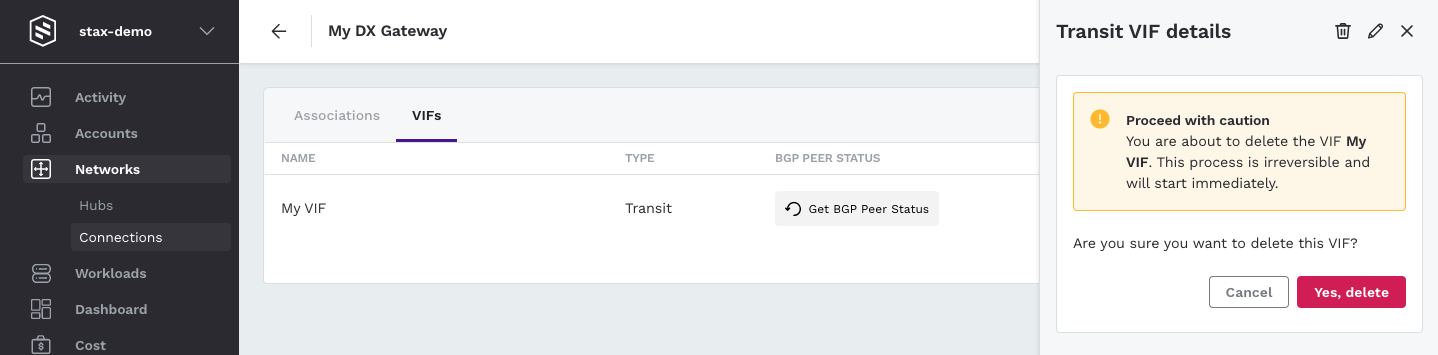
To delete a specific VIF, select the drawer icon located to the right of the VIF's name
-
Select the delete icon
-
Select the Yes, delete button to confirm the deletion of the VIF
Attach a Hosted Virtual Interface to a Direct Connect Gateway
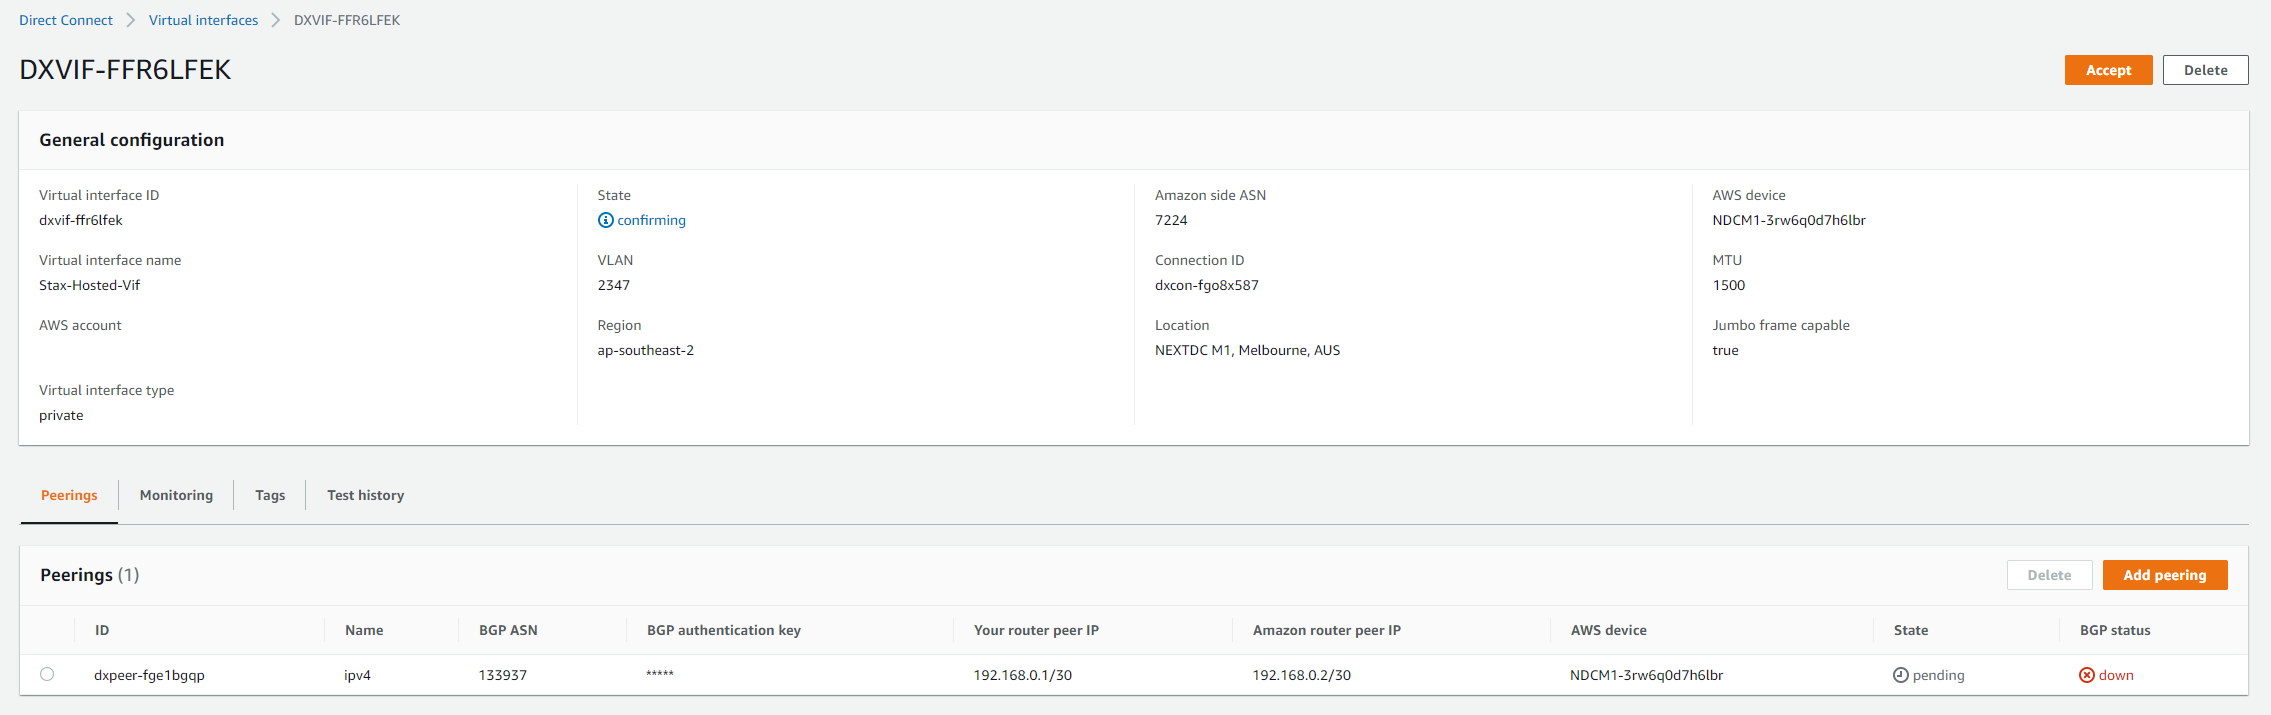
If you are using a Hosted Direct Connect VIF from a Direct Connect partner, you will need to accept the Hosted VIF within your AWS account and then associate it to your Stax Direct Connect Gateway.
-
Create your Direct Connect Gateway within Stax, ensuring that you create it within the AWS account that contains your Hosted Direct Connect VIF
-
Sign in to the AWS Account that contains your Hosted Direct Connect VIF
-
Navigate to the Direct Connect, Virtual interfaces section within the AWS console
-
Select the Hosted VIF to view its details. It should be in a status of confirming

-
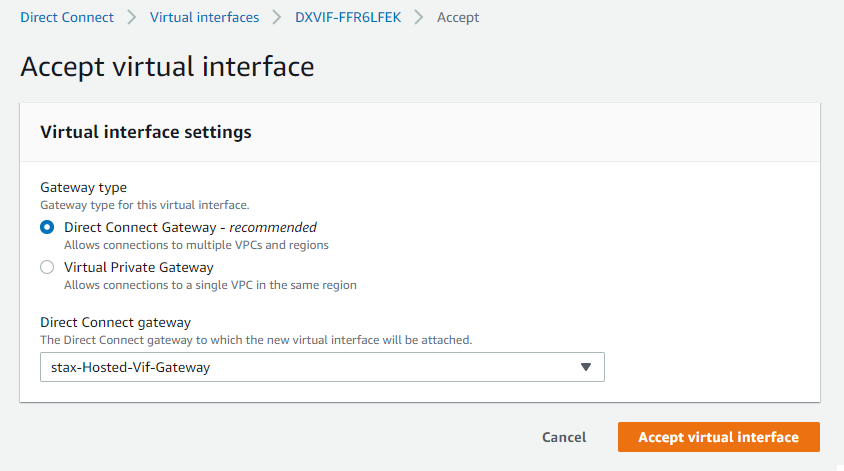
Click the Accept button in the top right of the Direct Connect VIF details page
-
Select the Stax Direct Connect Gateway created in Step 1 as the Direct Connect Gateway to target and then Accept virtual interfaces
-
Wait for the BGP Status of the Peering to transition from down to up, this will take up to 5 minutes
Associate a Direct Connect Gateway to a Networking Hub
Transit Direct Connect Gateways can be associated with a Networking Hub. This process can take up to 40 minutes to initialize.
From the Connections main page:
-
Choose your Transit Direct Connect Gateway and click the vertical ellipsis (⋮) to the right of the Direct Connect Gateway, then select Associations & VIFs from the list
-
Select the Associations tab
-
Click + Create, then select Hub Association
-
Select a Hub from the dropdown
-
Select from the Hub's available CIDR Range/s or enter additional CIDR Ranges
-
Click Create to create the Association
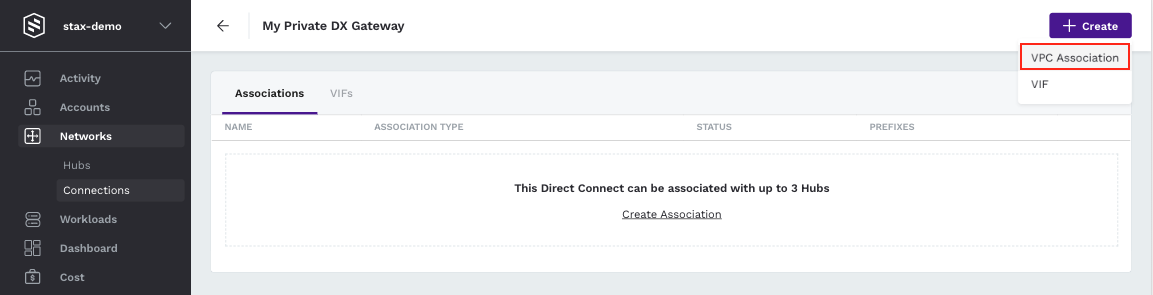
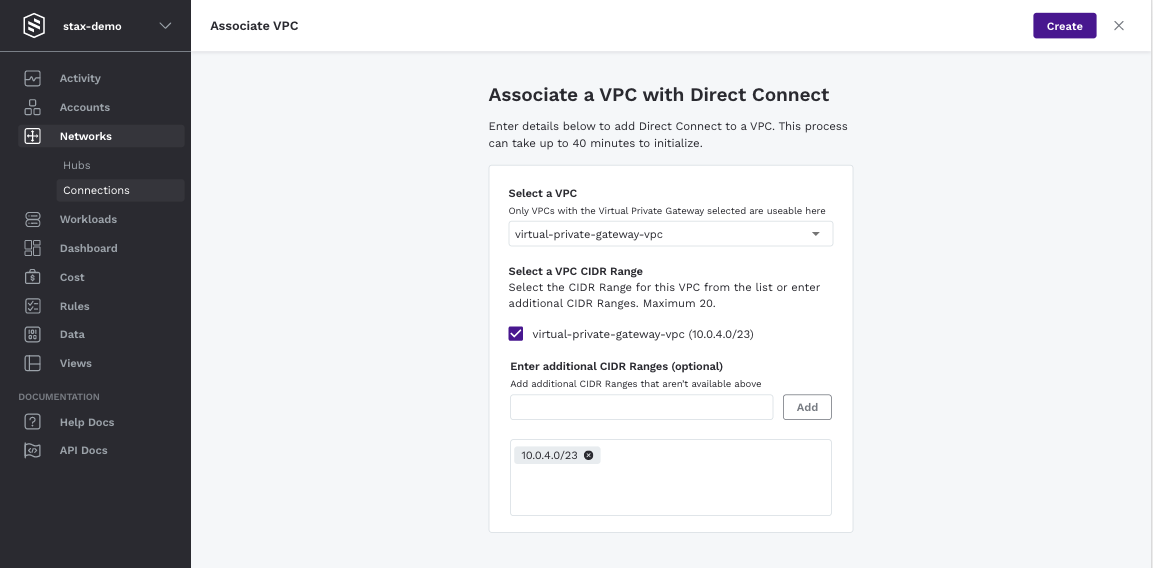
Associate a Direct Connect Gateway to a VPC
Private Direct Connect Gateways can be associated with VPCs that have a Virtual Private Gateway. This process can take up to 40 minutes to initialize.
From the Connections main page:
-
Choose your Private Direct Connect Gateway and click the vertical ellipsis (⋮) to the right of the Direct Connect Gateway, then select Associations & VIFs from the list
-
Select the Associations tab
-
Click + Create, then select VPC Association
-
Select a VPC from the dropdown
-
Select the VPC's Virtual Private Gateway CIDR Range and/or add additional CIDR Ranges
-
Click Create to create the Association
Edit a Networking Hub or VPC Association
From the Connections main page:
-
Click the vertical ellipsis (⋮) to the right of the Direct Connect Gateway, then select Associations & VIFs from the list
-
Select the Associations tab
-
To edit the details of a specific Association, select the drawer icon located to the right of the Association name

-
Select the edit icon
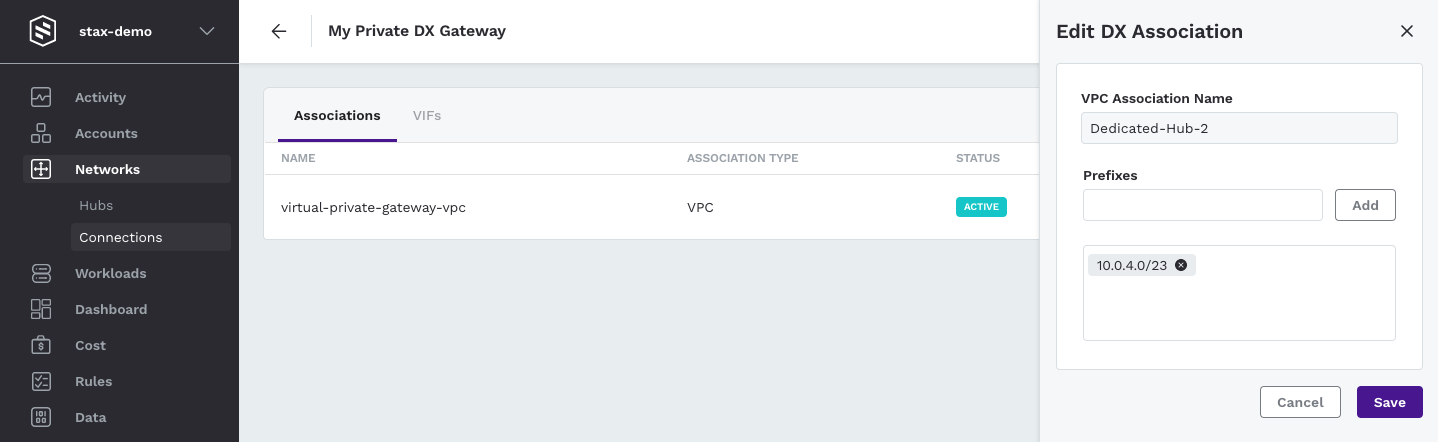
-
Make the required changes to the Association's CIDR Range prefixes, then click Save
Delete a Networking Hub or VPC Association
From the Connections main page:
-
Click the vertical ellipsis (⋮) to the right of the Direct Connect Gateway, then select Associations & VIFs from the list
-
Select the Associations tab
-
To delete a specific Association, select the drawer icon located to the right of the Association name
-
Select the delete icon
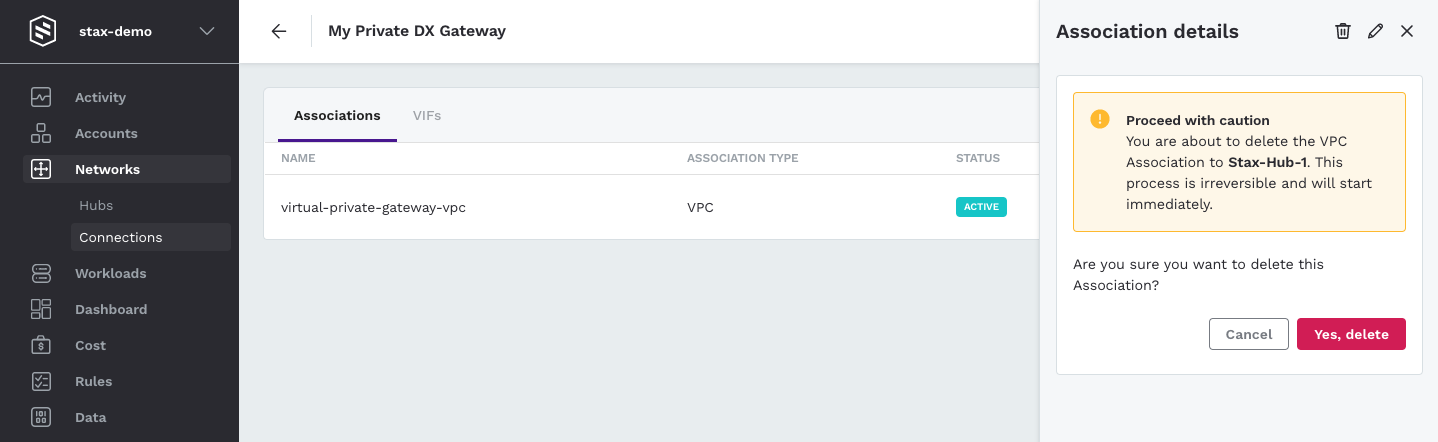
-
Select the Yes, delete button to confirm the deletion of the VIF