Manage DNS Resolvers and Rules
Networks is an opt-in feature. To enable this feature for your Stax tenancy, please raise a support case.
You can create DNS Resolvers and DNS Rules to enhance the DNS resolution capabilities of your Stax Networking Hub. You can create one DNS Resolver per Networking Hub, but many DNS Rules to customize how DNS resolution works.
In order to use DNS Resolvers, you should already have an AWS Direct Connect or Site-to-Site VPN in place between your Stax Networking Hub and your on-premises infrastructure.
Before You Begin
- Estimated time to complete: 10-20 minutes
- Ensure you are a member of the Admin role in your Stax tenancy
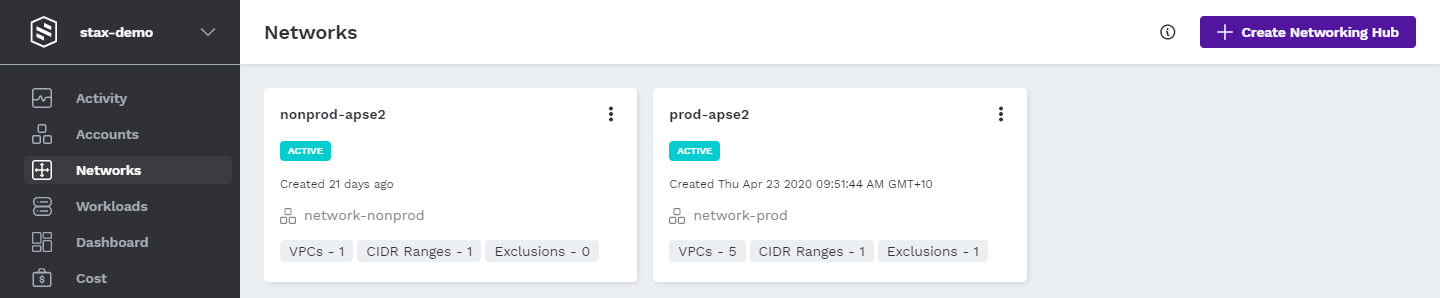
- You must already have crated a Networking Hub. If not, you'll need to create one first
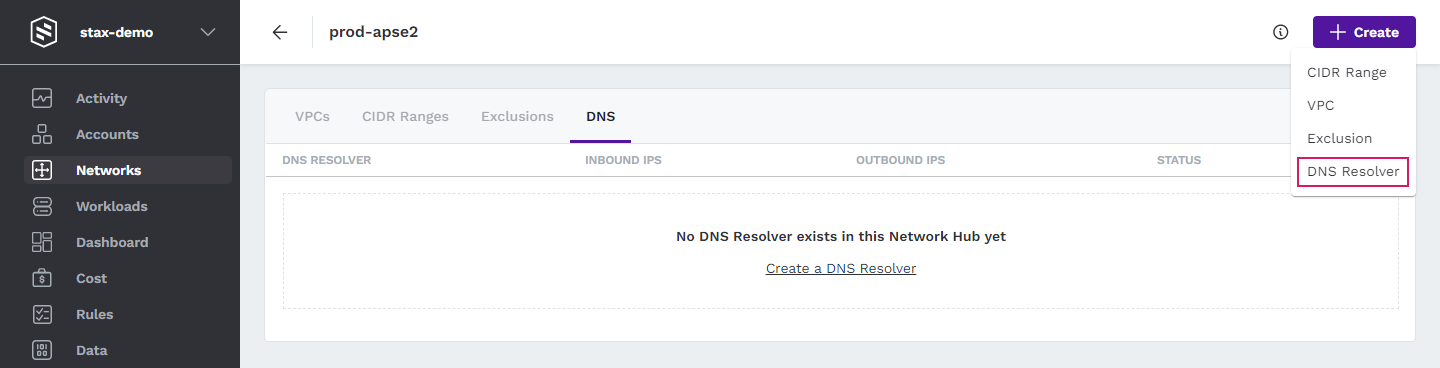
Create a DNS Resolver
You can create one DNS Resolver per Networking Hub.
-
Log in to the Stax Console
-
Select Networks in the left-hand nav

-
On the Networks page, choose your desired Networking Hub
-
Click + Create, then select DNS Resolver
-
Enter a name for your DNS Resolver, then choose from either 2 or 3 IP addresses to associate with your inbound/outbound resolvers. Optionally, enter any tags required for your resolver

-
Click Create to create the resolver
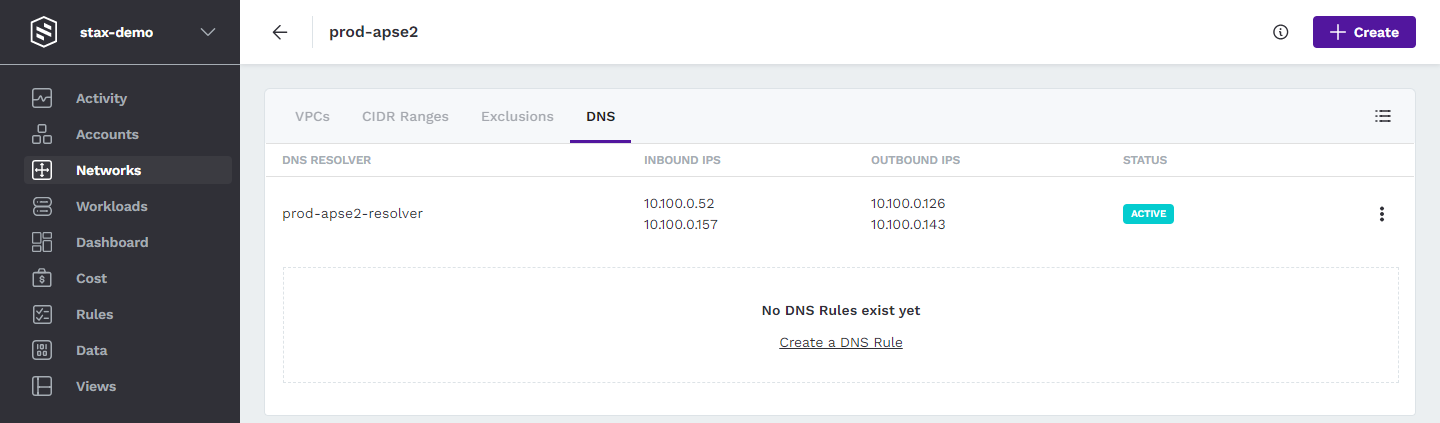
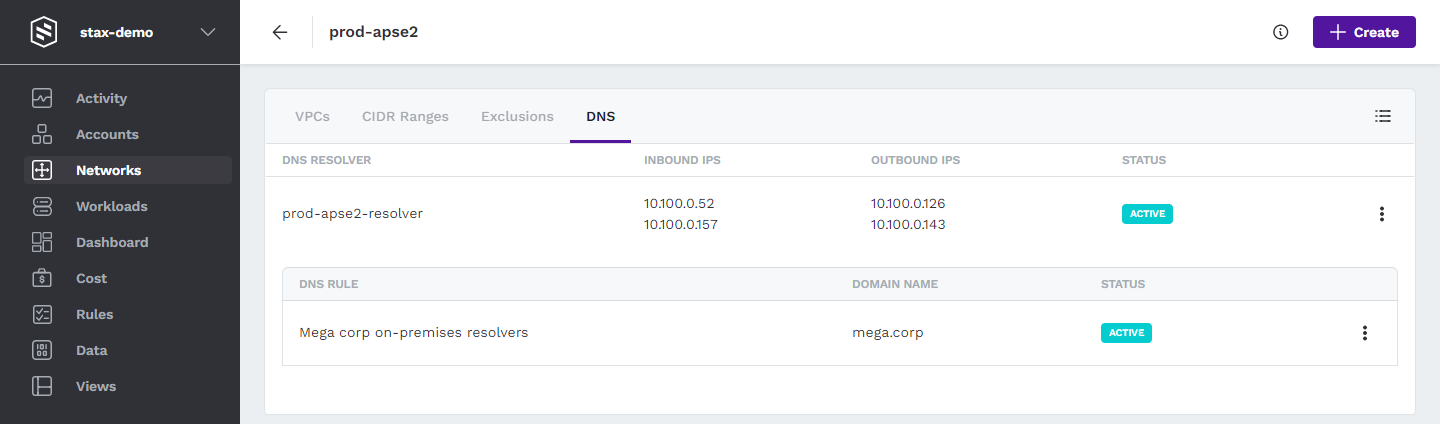
Once your DNS Resolver has completed deployment, it will be displayed on the DNS tab of your Networking Hub.
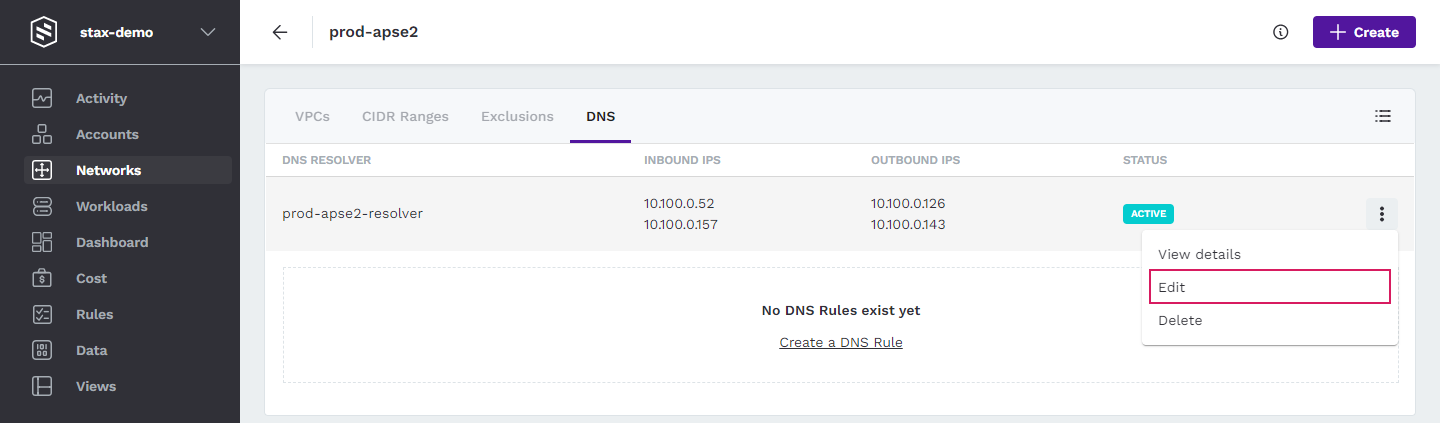
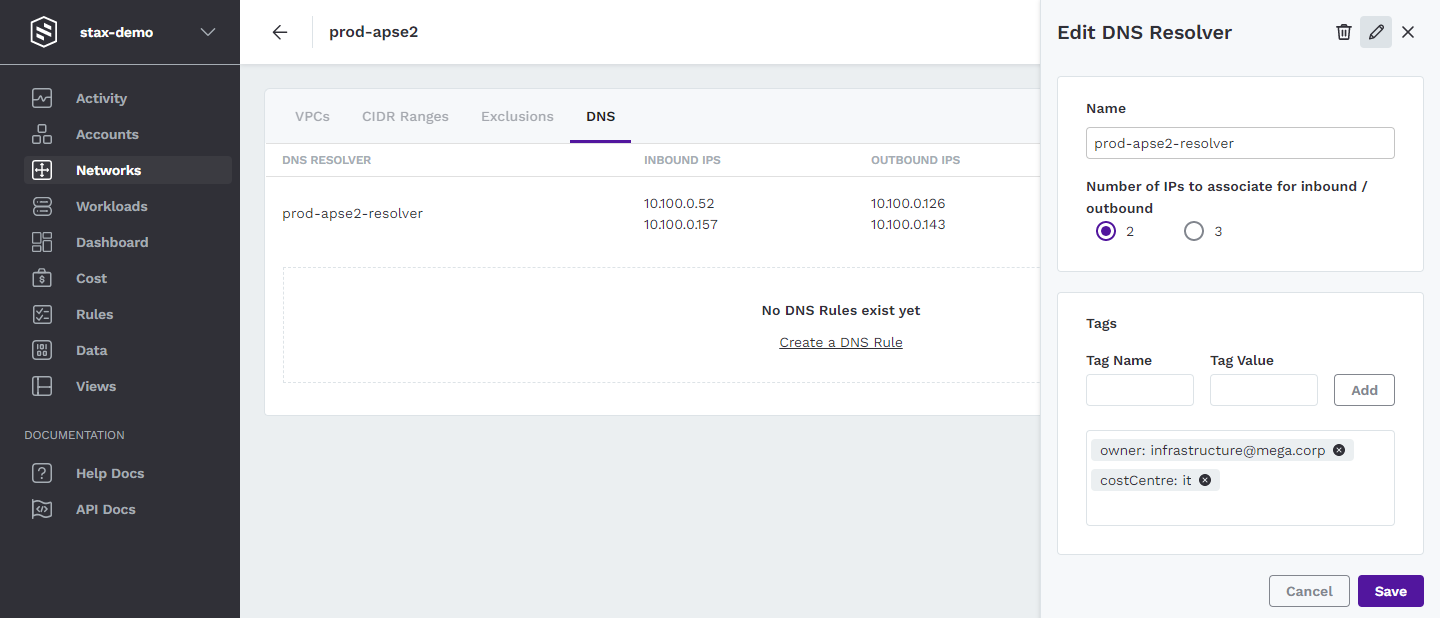
Edit a DNS Resolver
You can rename your DNS Resolver and add or remove interfaces to/from it after it's been created.
-
Log in to the Stax Console
-
Select Networks in the left-hand nav
-
On the Networks page, choose your desired Networking Hub
-
Select the DNS tab
-
Click the vertical ellipsis (⋮) to the right of the DNS Resolver then select Edit from the list
-
Edit the Name, number of associated IP addresses, and tags as required
-
Click Save to save the changes
Your changes may take a few minutes to take effect.
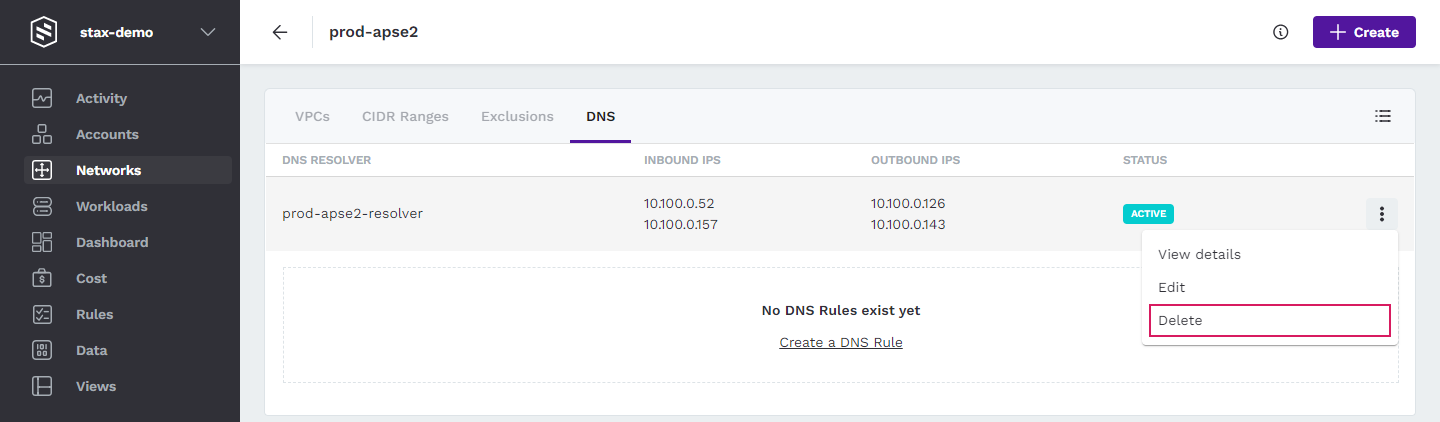
Delete a DNS Resolver
Under certain circumstances, you may need to delete a Networking Hub's DNS Resolver. Before you begin, you must have deleted all DNS Rules within the Resolver to be deleted.
-
Log in to the Stax Console
-
Select Networks in the left-hand nav
-
On the Networks page, choose your desired Networking Hub
-
Select the DNS tab
-
Click the vertical ellipsis (⋮) to the right of the DNS Resolver then select Delete from the list
-
Select the Yes, delete button to confirm the resolver's deletion
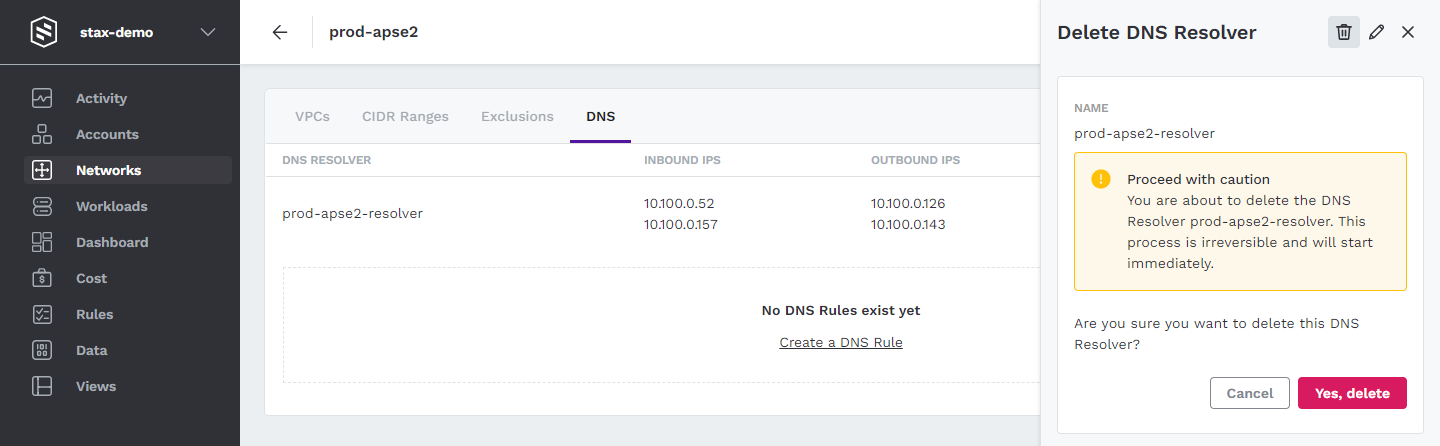
The deletion of the DNS Resolver may take a few minutes to complete.
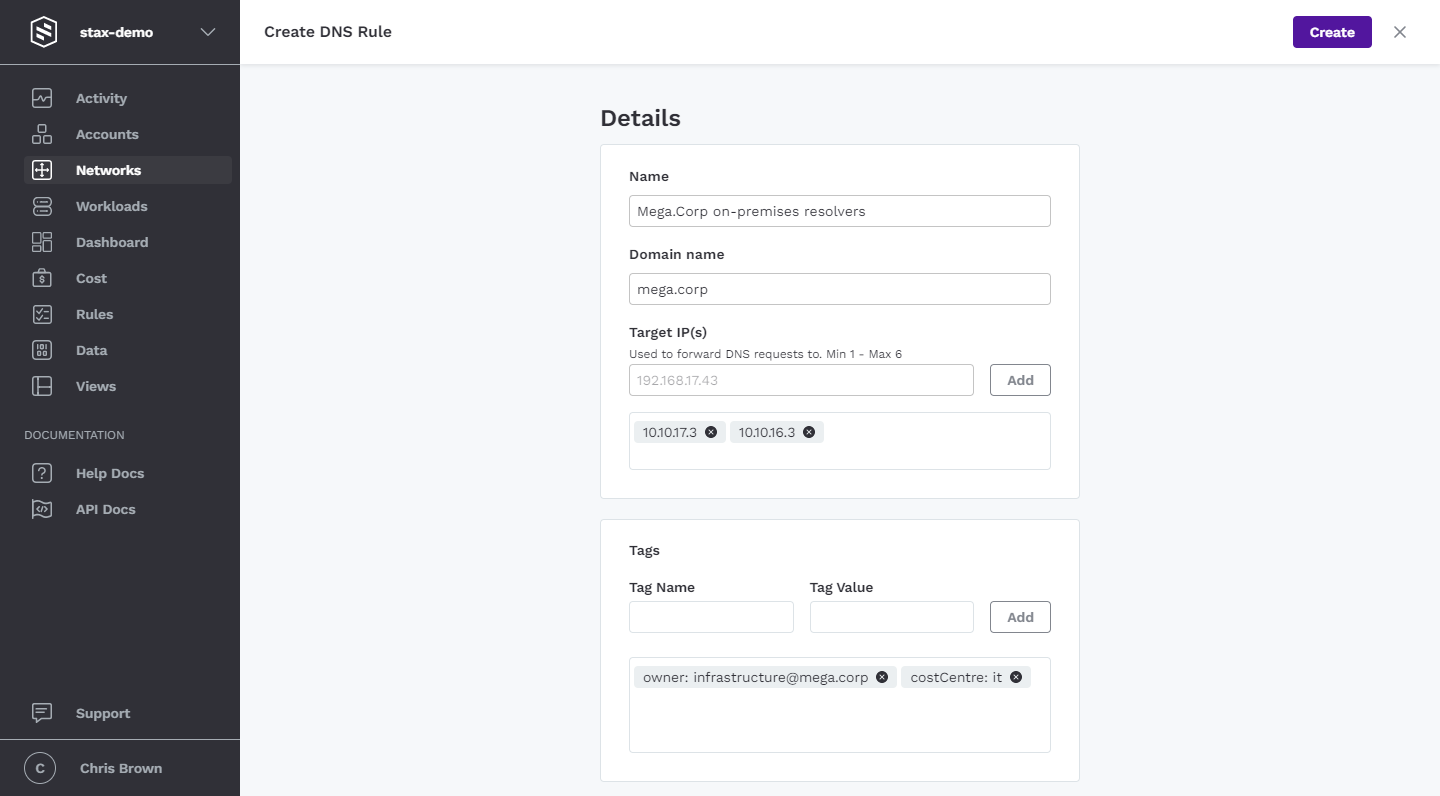
Create a DNS Rule
You can create DNS Rules within an existing DNS Resolver to forward queries from AWS to your on-premises DNS servers.
-
Log in to the Stax Console
-
Select Networks in the left-hand nav
-
On the Networks page, choose your desired Networking Hub
-
Select the DNS tab
-
Click + Create, then select DNS Rule

-
Enter a name for your DNS Rule, a domain name to forward requests for, and the IP address(es) of your on-premises DNS server(s). Optionally, enter any tags required for your rule
-
Click Create to create the Rule
Once your DNS Rule has completed deployment, it will be displayed on the DNS tab of your Networking Hub.
Edit a DNS Rule
You can rename your DNS Rule and change the target IP address(es) after it's been created.
-
Log in to the Stax Console
-
Select Networks in the left-hand nav
-
On the Networks page, choose your desired Networking Hub
-
Select the DNS tab
-
Click the vertical ellipsis (⋮) to the right of the DNS Rule you wish to edit then select Edit from the list
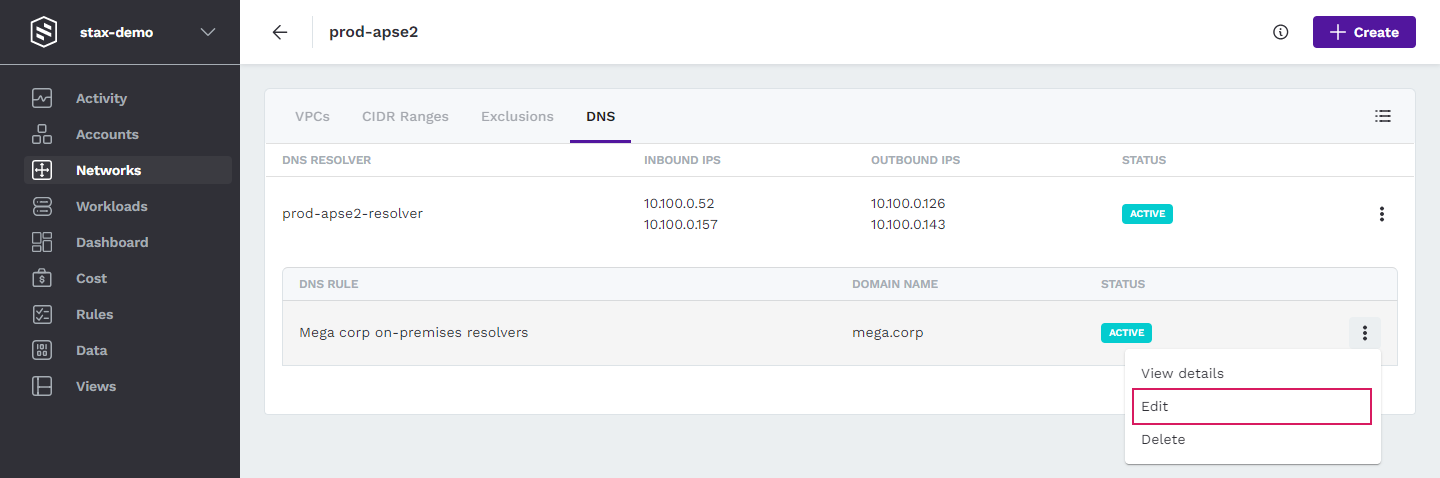
-
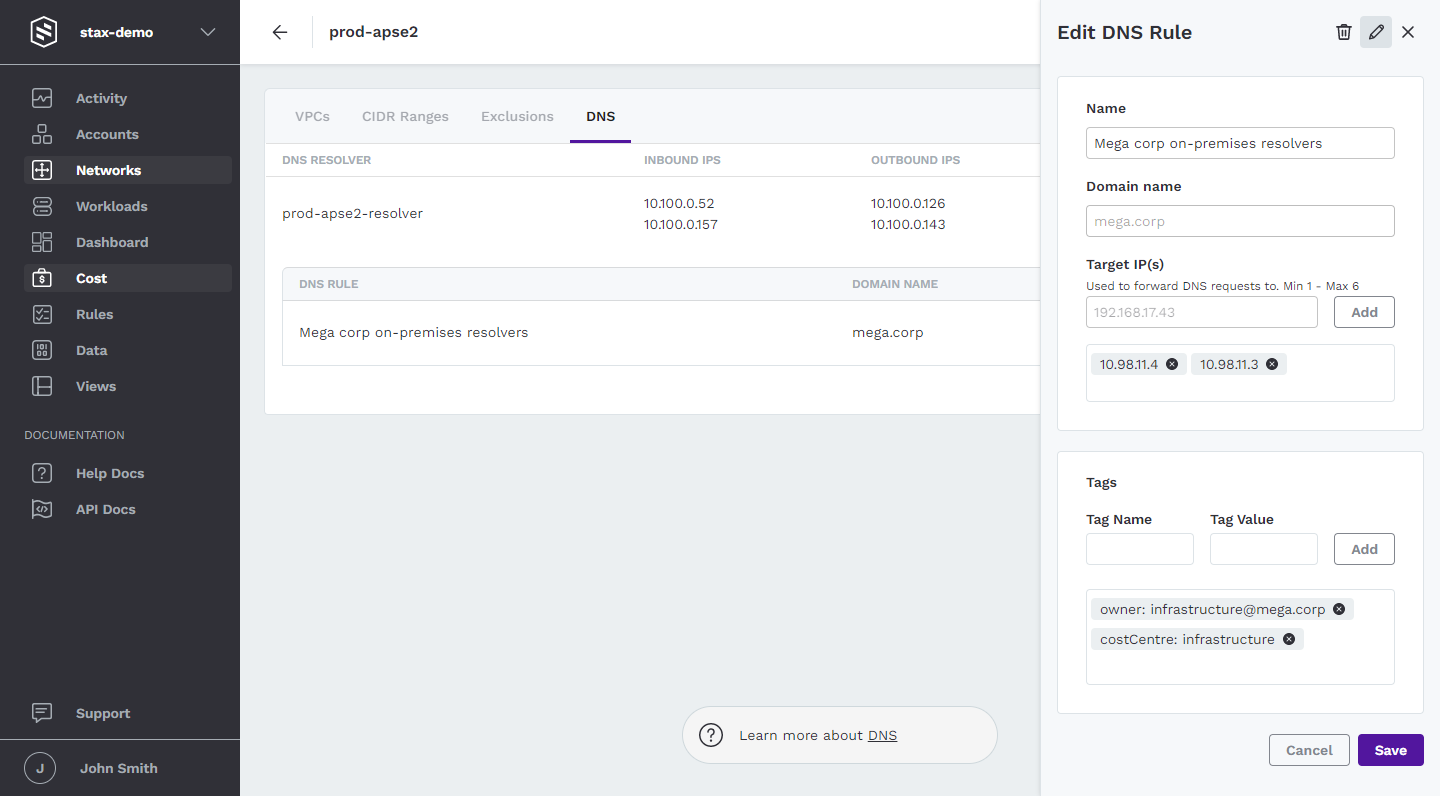
Edit the Name, target IP address(es), and tags as required
-
Click Save to save the changes
Your changes may take a few minutes to take effect.
Delete a DNS Rule
You can delete a DNS Rule to stop the DNS Forwarder from forwarding requests to your on-premises DNS server(s) for a particular domain.
-
Log in to the Stax Console
-
Select Networks in the left-hand nav
-
On the Networks page, choose your desired Networking Hub
-
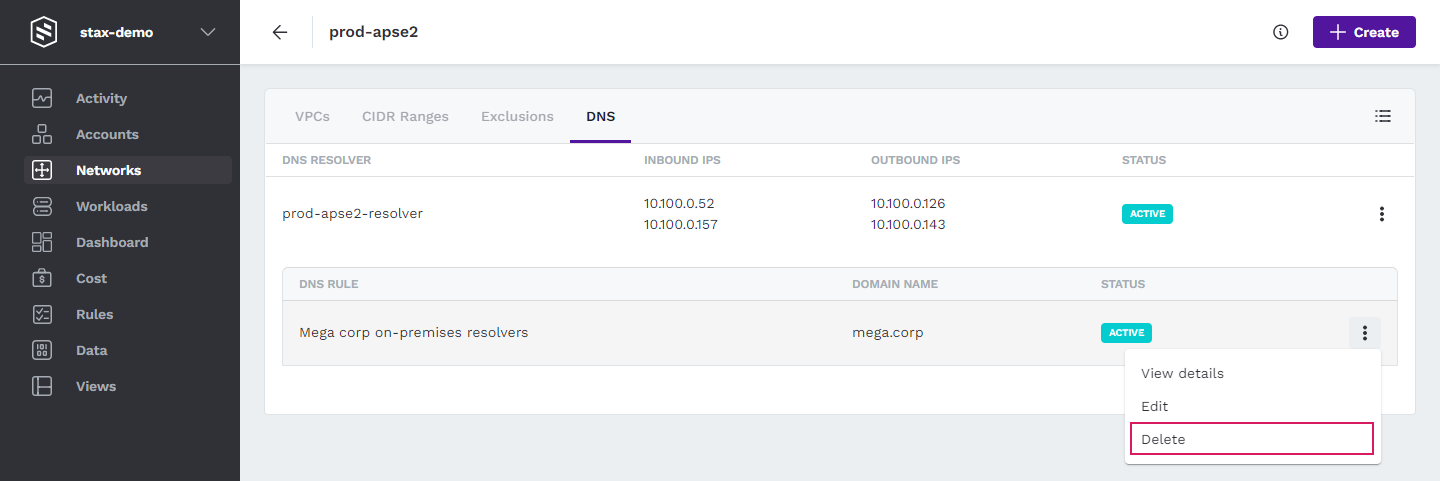
Select the DNS tab 5. Click the vertical ellipsis (⋮) to the right of the DNS Rule you wish to delete then select Delete from the list
-
Select the Yes, delete button to confirm the rule's deletion
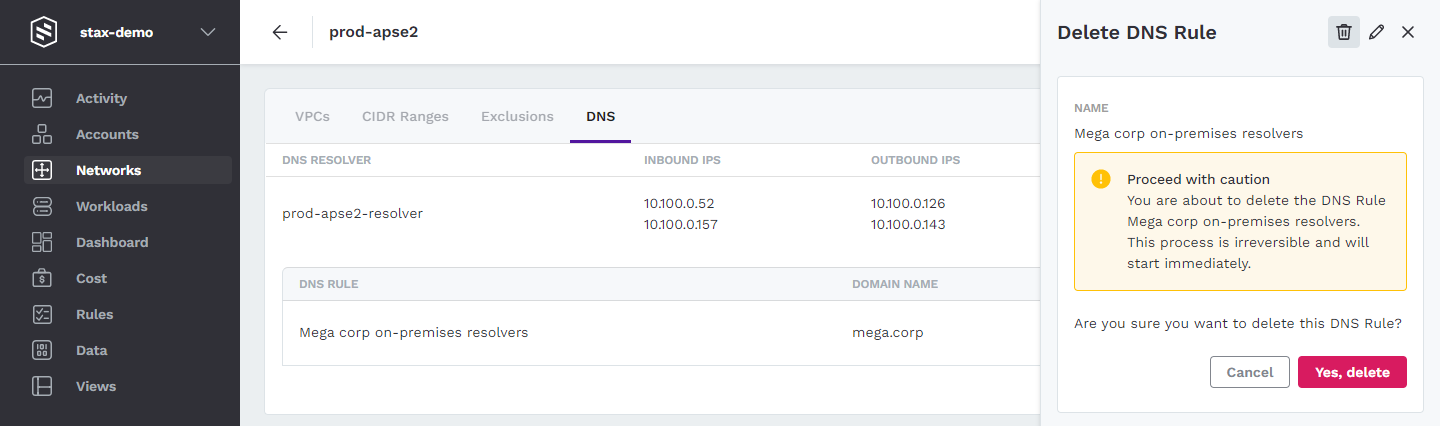
The deletion of the DNS Rule may take a few minutes to complete.